
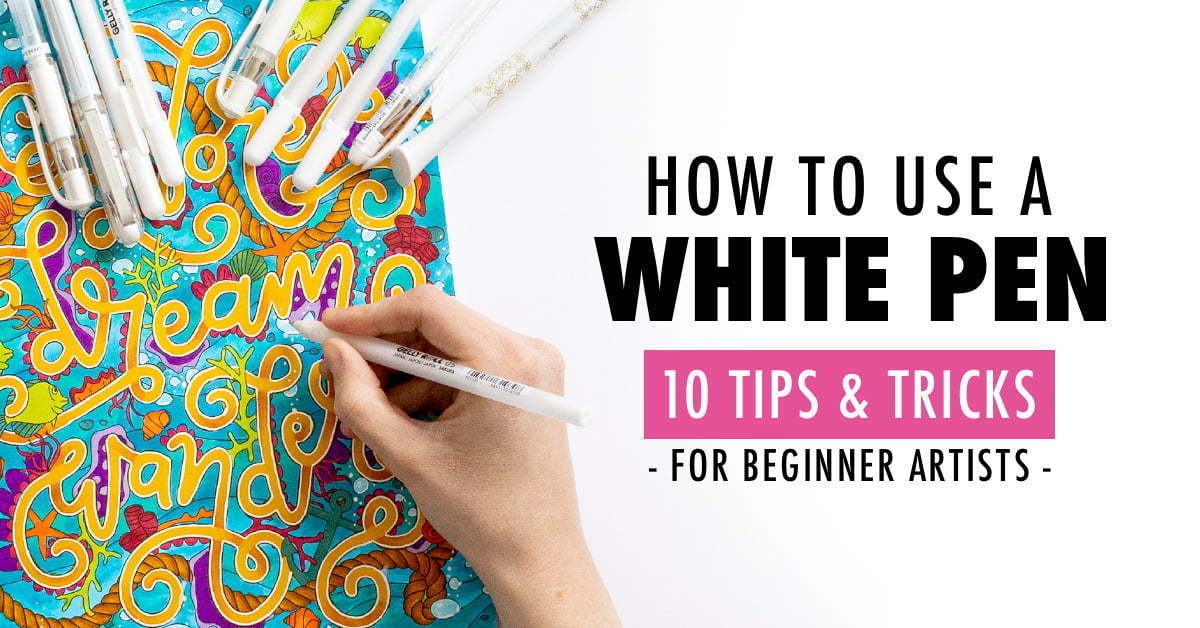
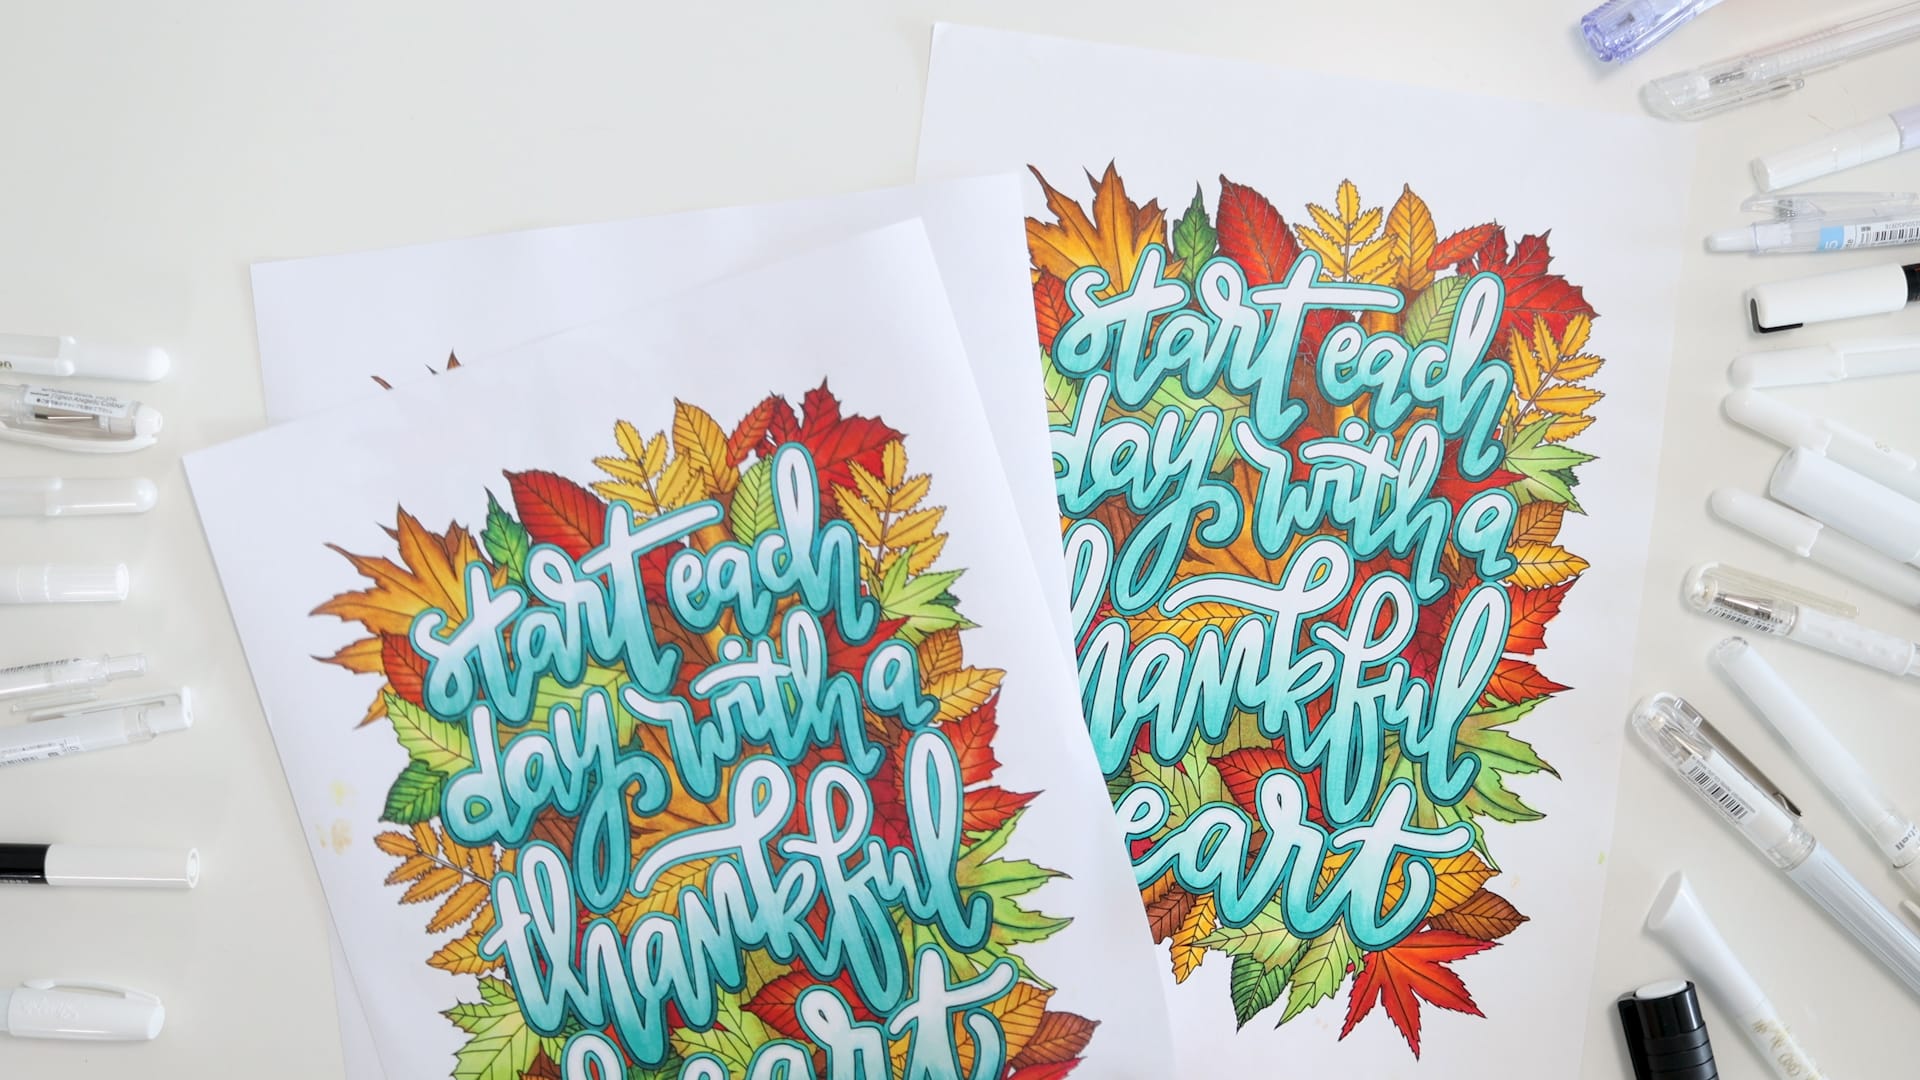
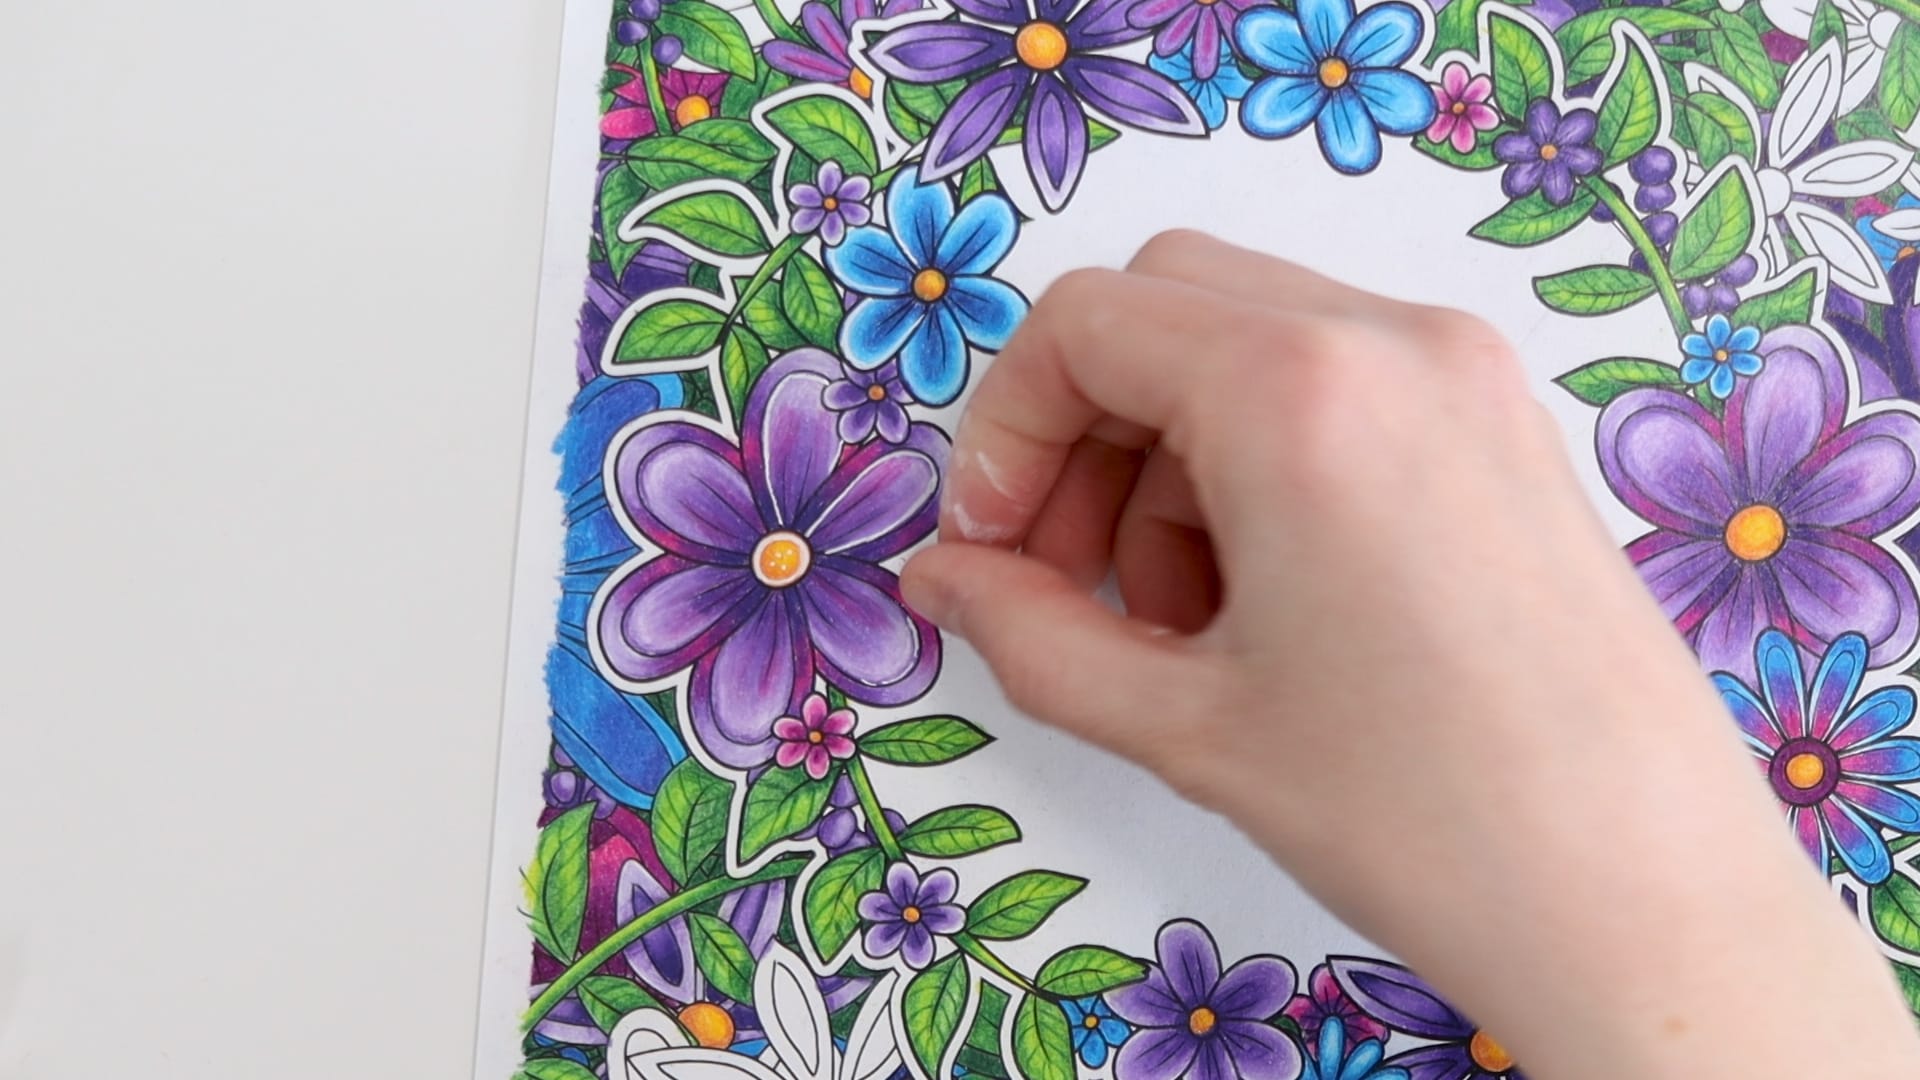
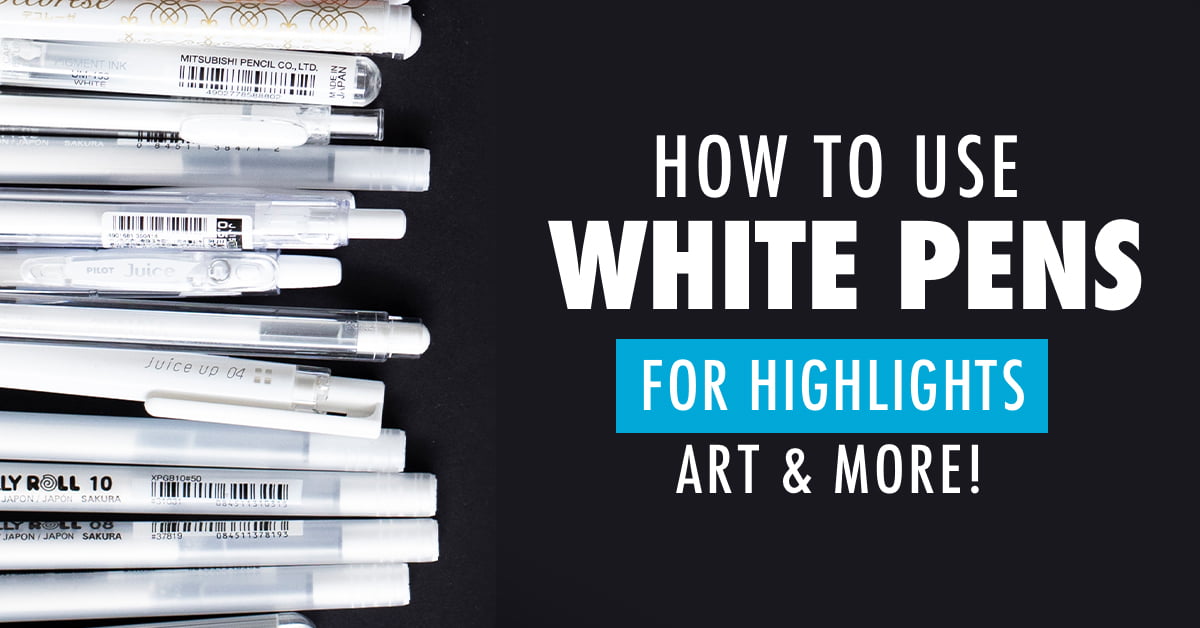
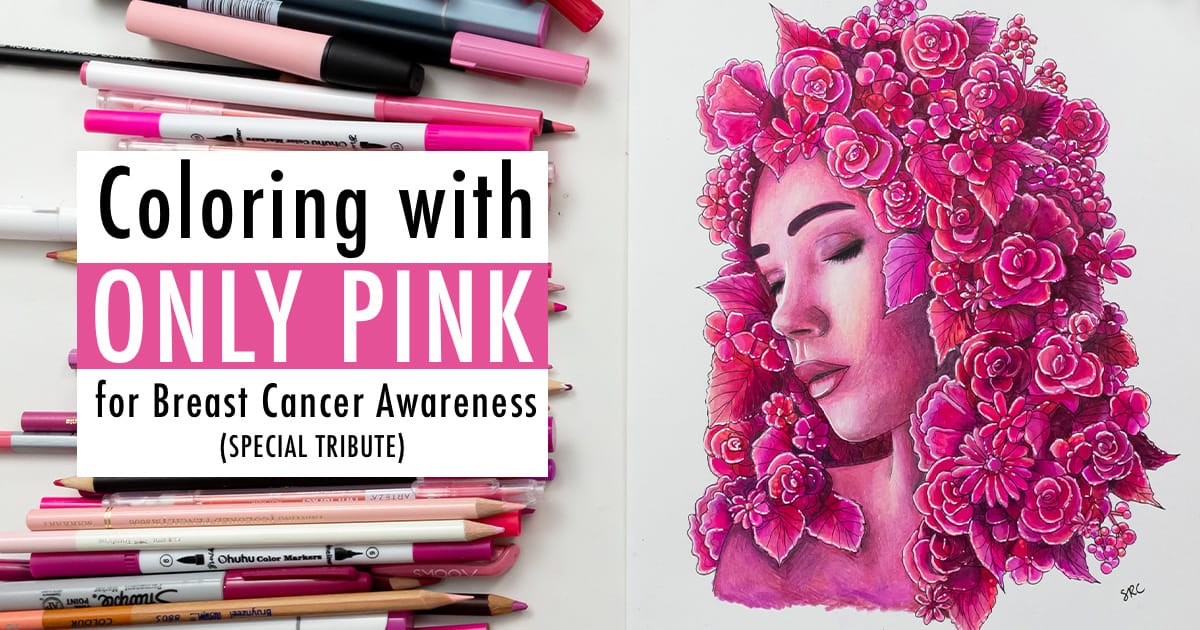
There are many little tricks we can steal from professional artists to take a coloring page from ‘meh’ to ‘amazing!’ – One of my favorite tricks is to use a white gel pen to add highlights and accents to different areas, creating more depth and interesting features in a coloring page.
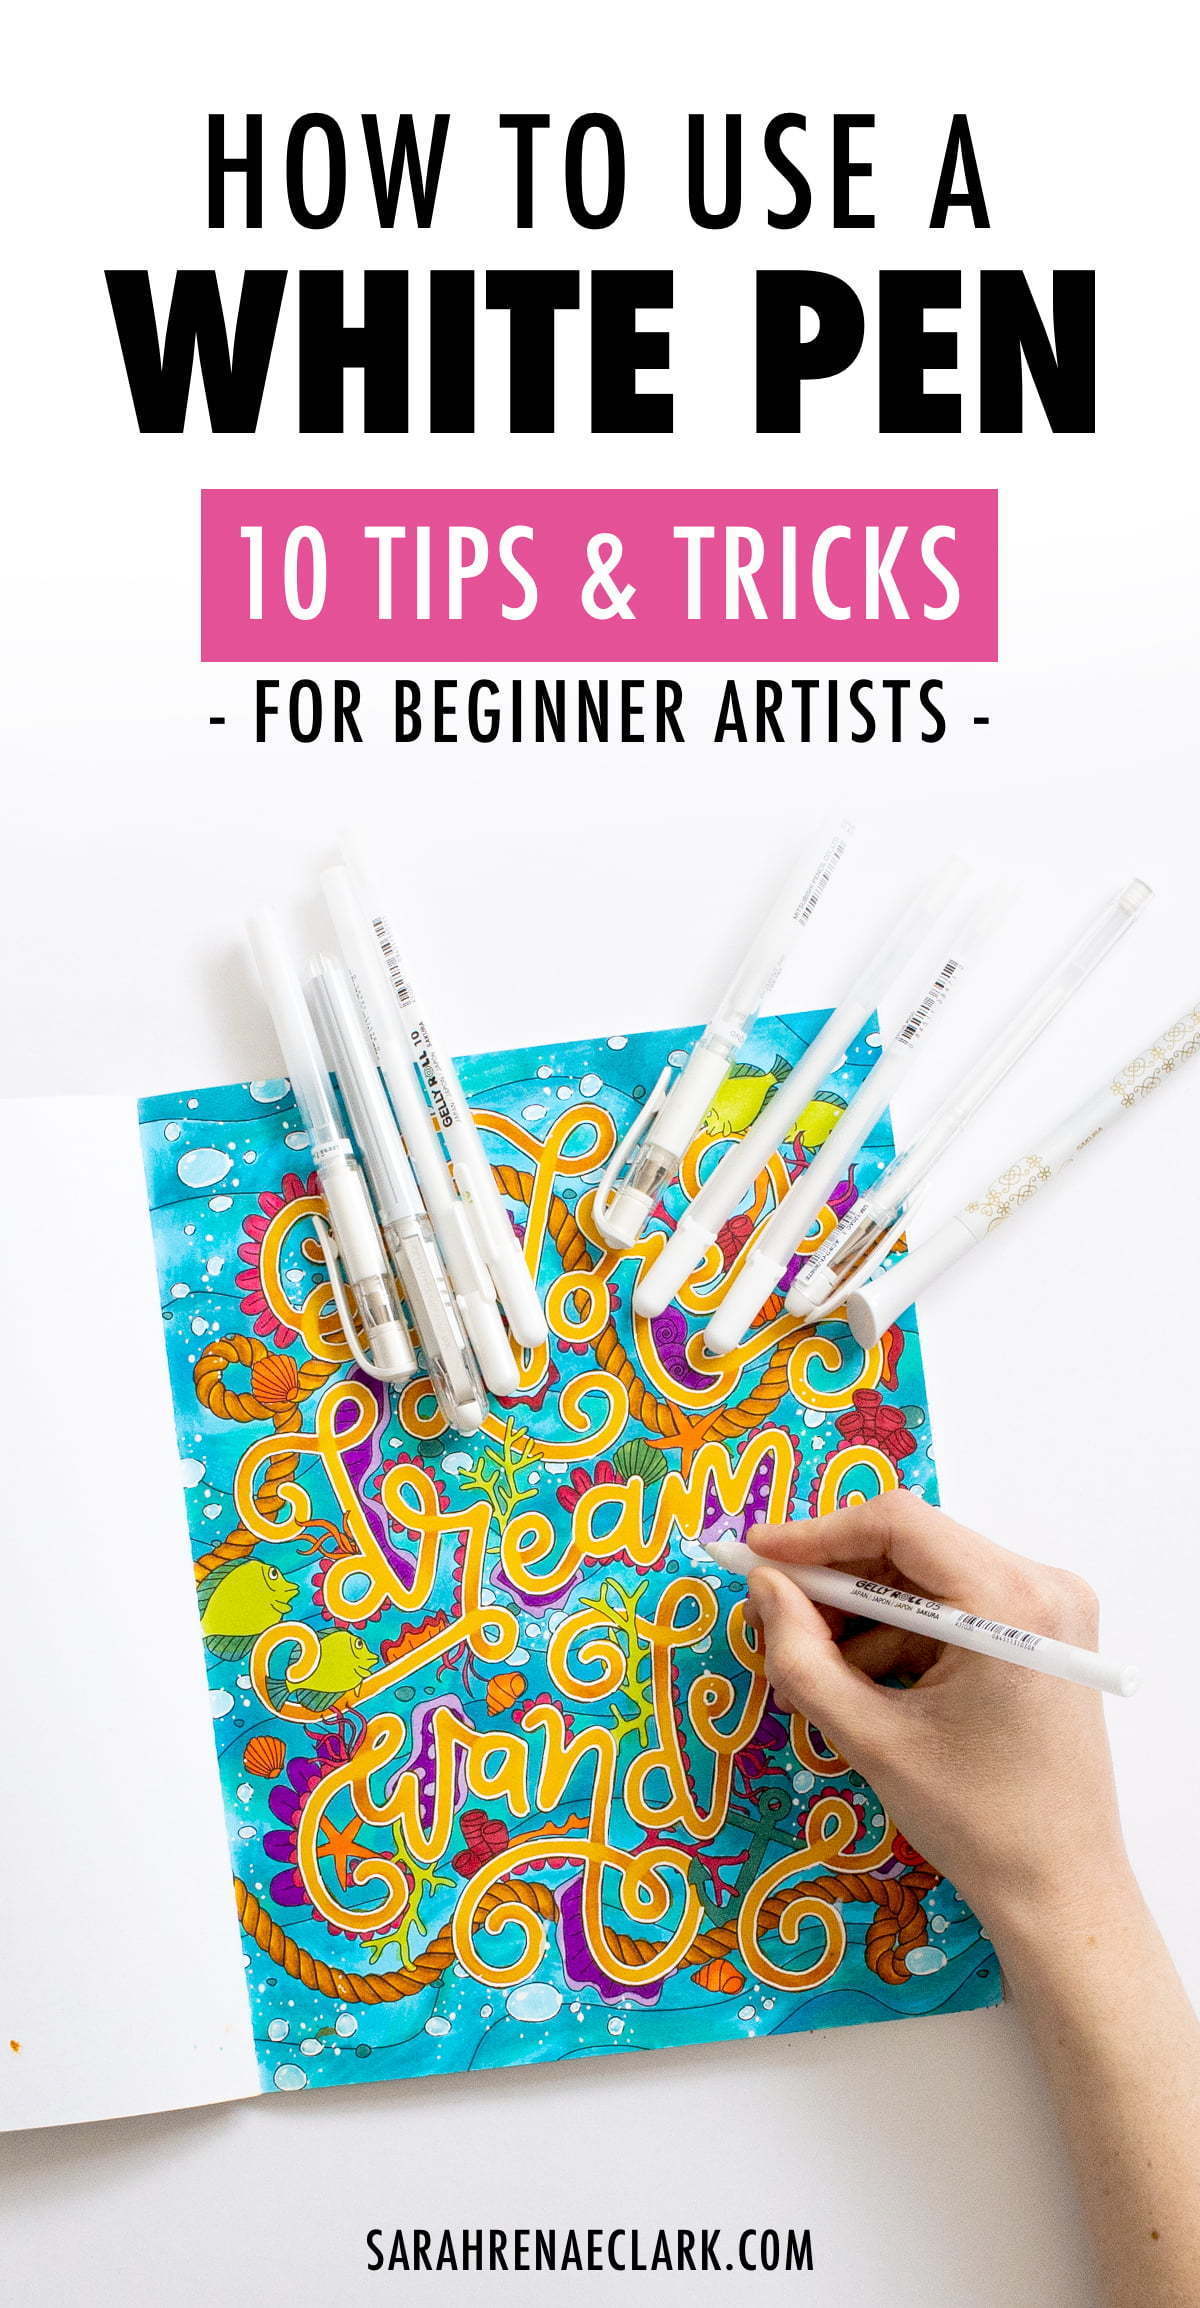
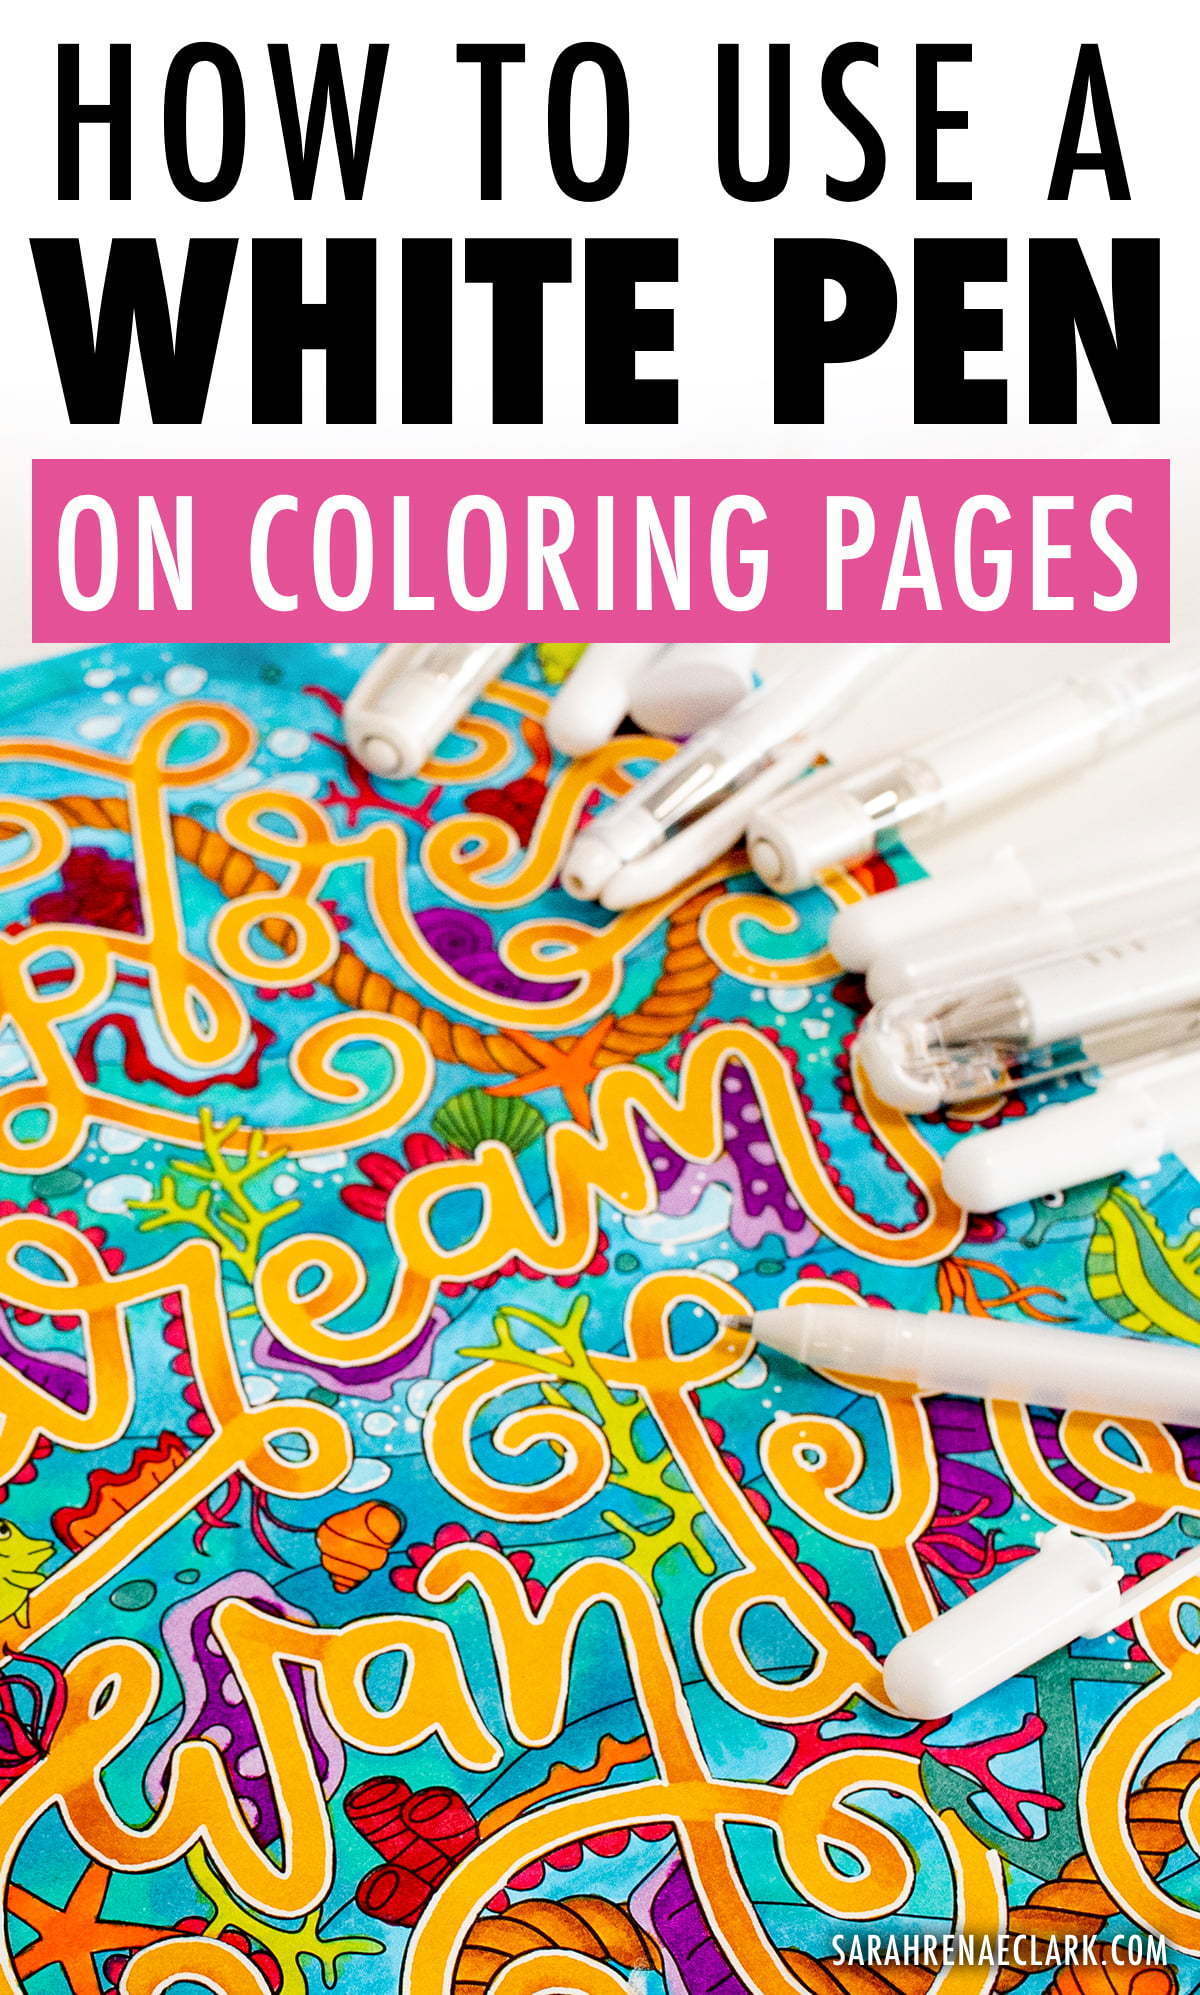
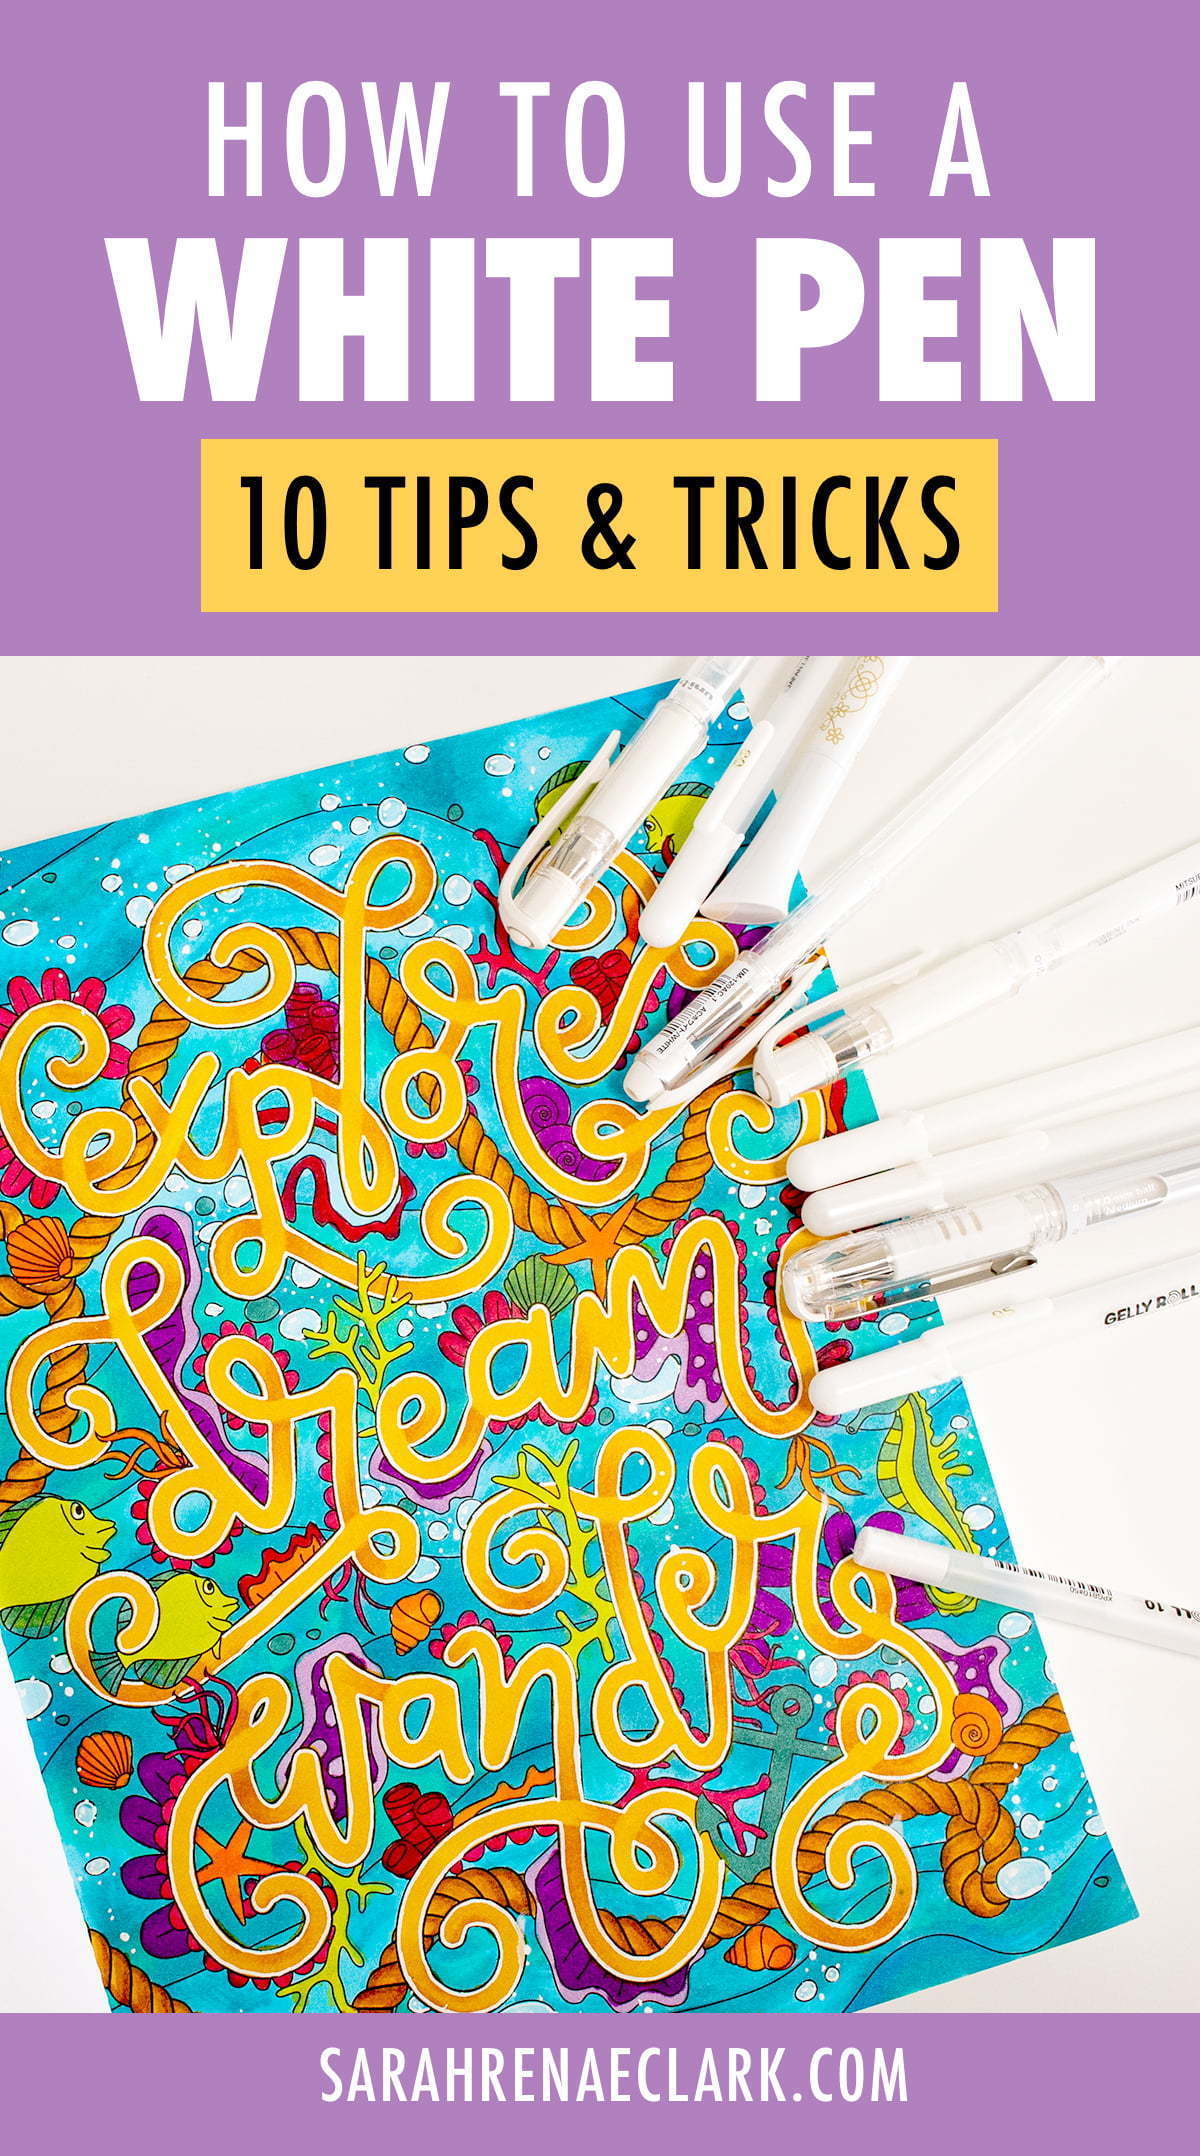
Here’s an example of a recent page from my Coloring Bundle, where I used a white gel pen to outline the lettering, but also to add highlights to the bubbles in the background and other small details, creating a more interesting underwater effect.

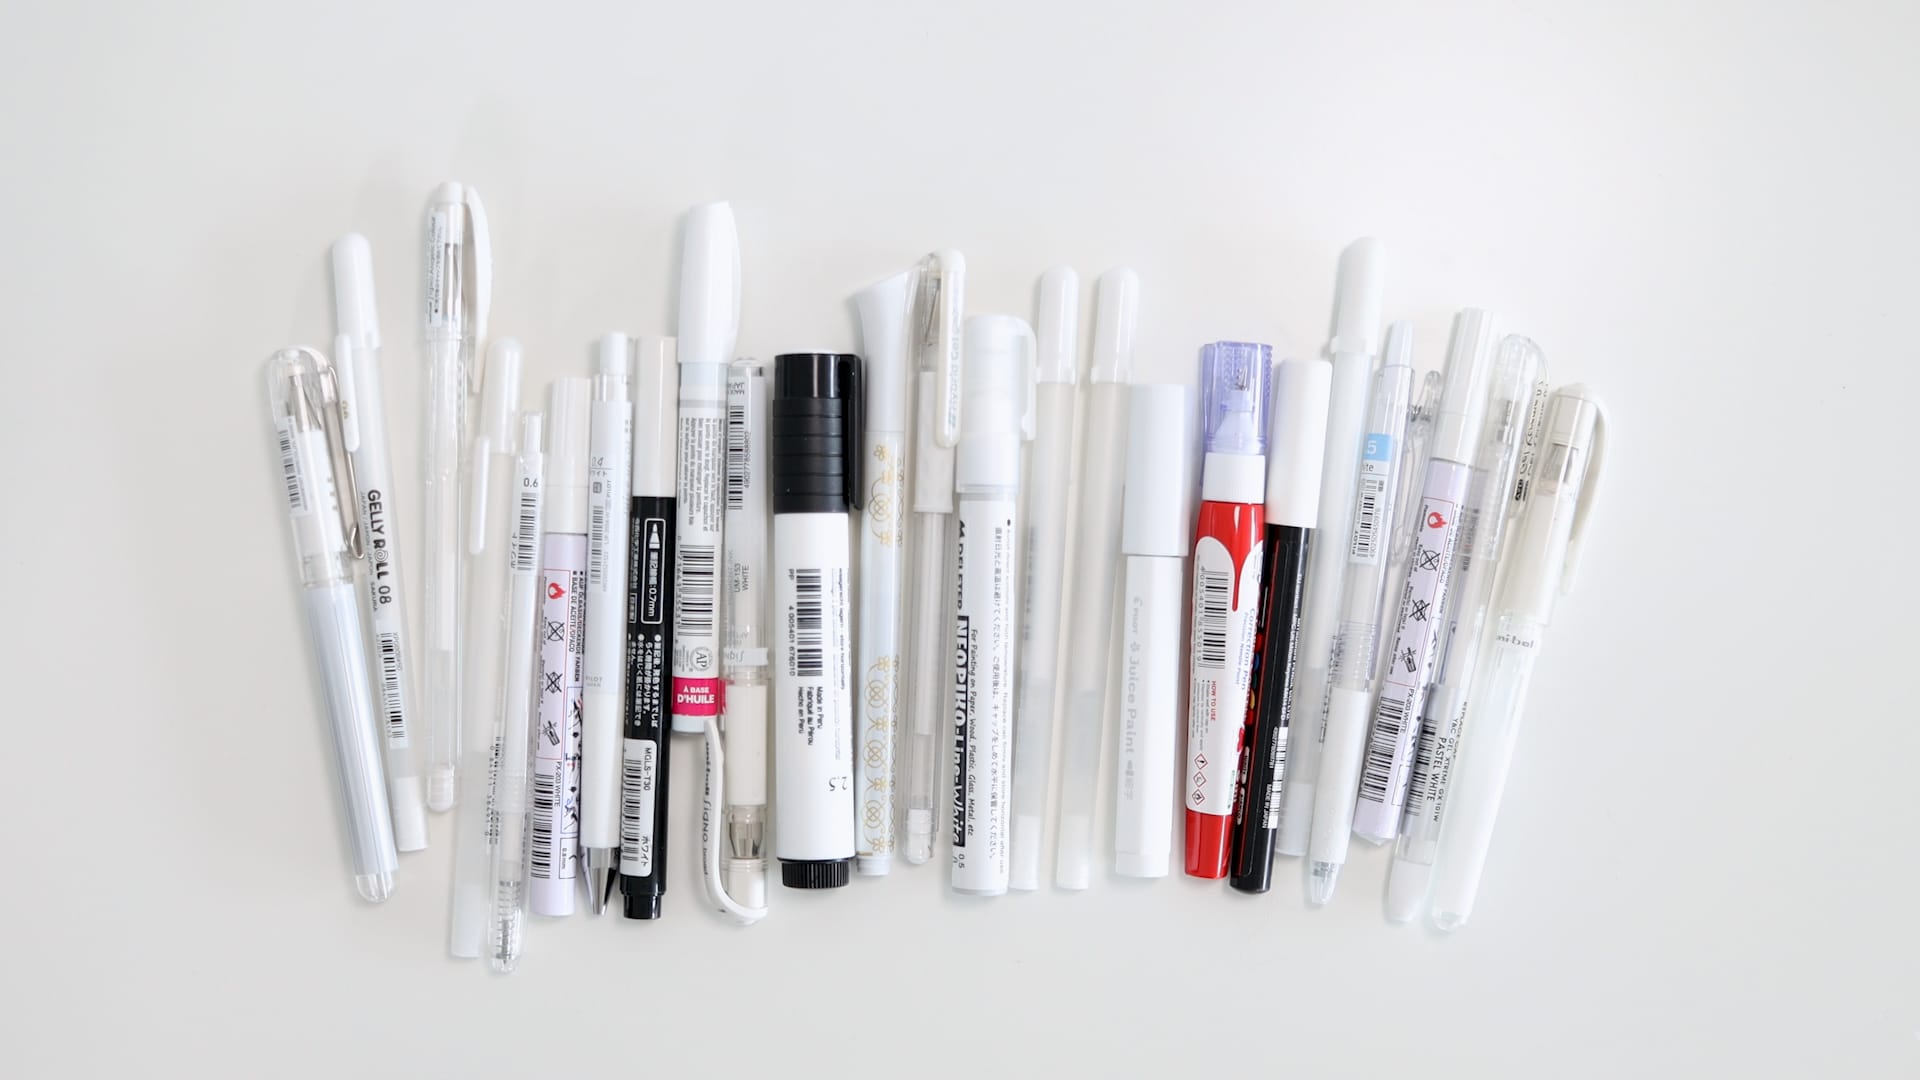
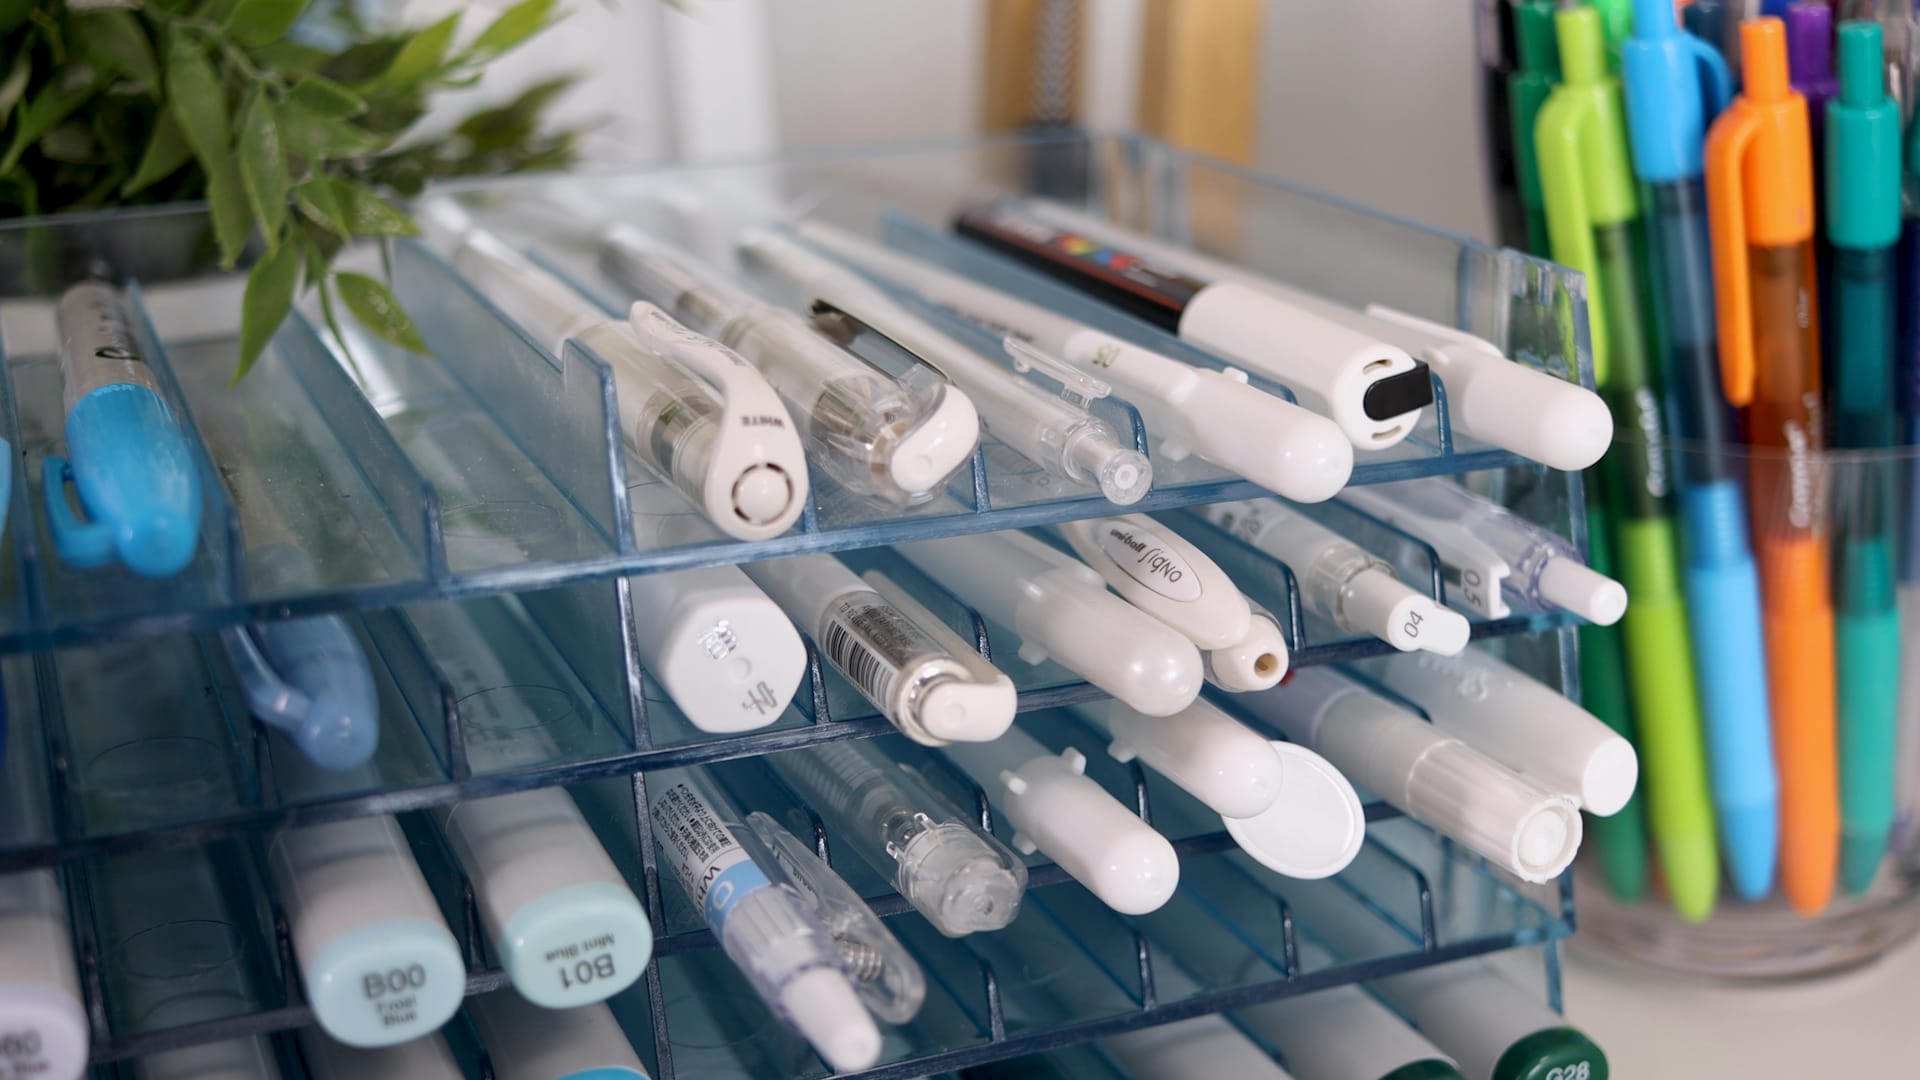
In my last post, I compared all the white pens I could find to work out which ones were the best to use on coloring pages, on paper, on washi tape and a few other mediums as well.
Today, I’m going to show you my top 10 tips for getting the most out of your white pens, and how to clean them if they end up getting clogged up.
If you’d like to watch the video version of this blog post, I have posted it below. Please remember to like this video and subscribe to my YouTube channel so you don’t miss out on any future videos.
Note: This post contains Amazon affiliate links and I may earn a commission if you click them and make a purchase (at no cost to you).
What are white pens used for?
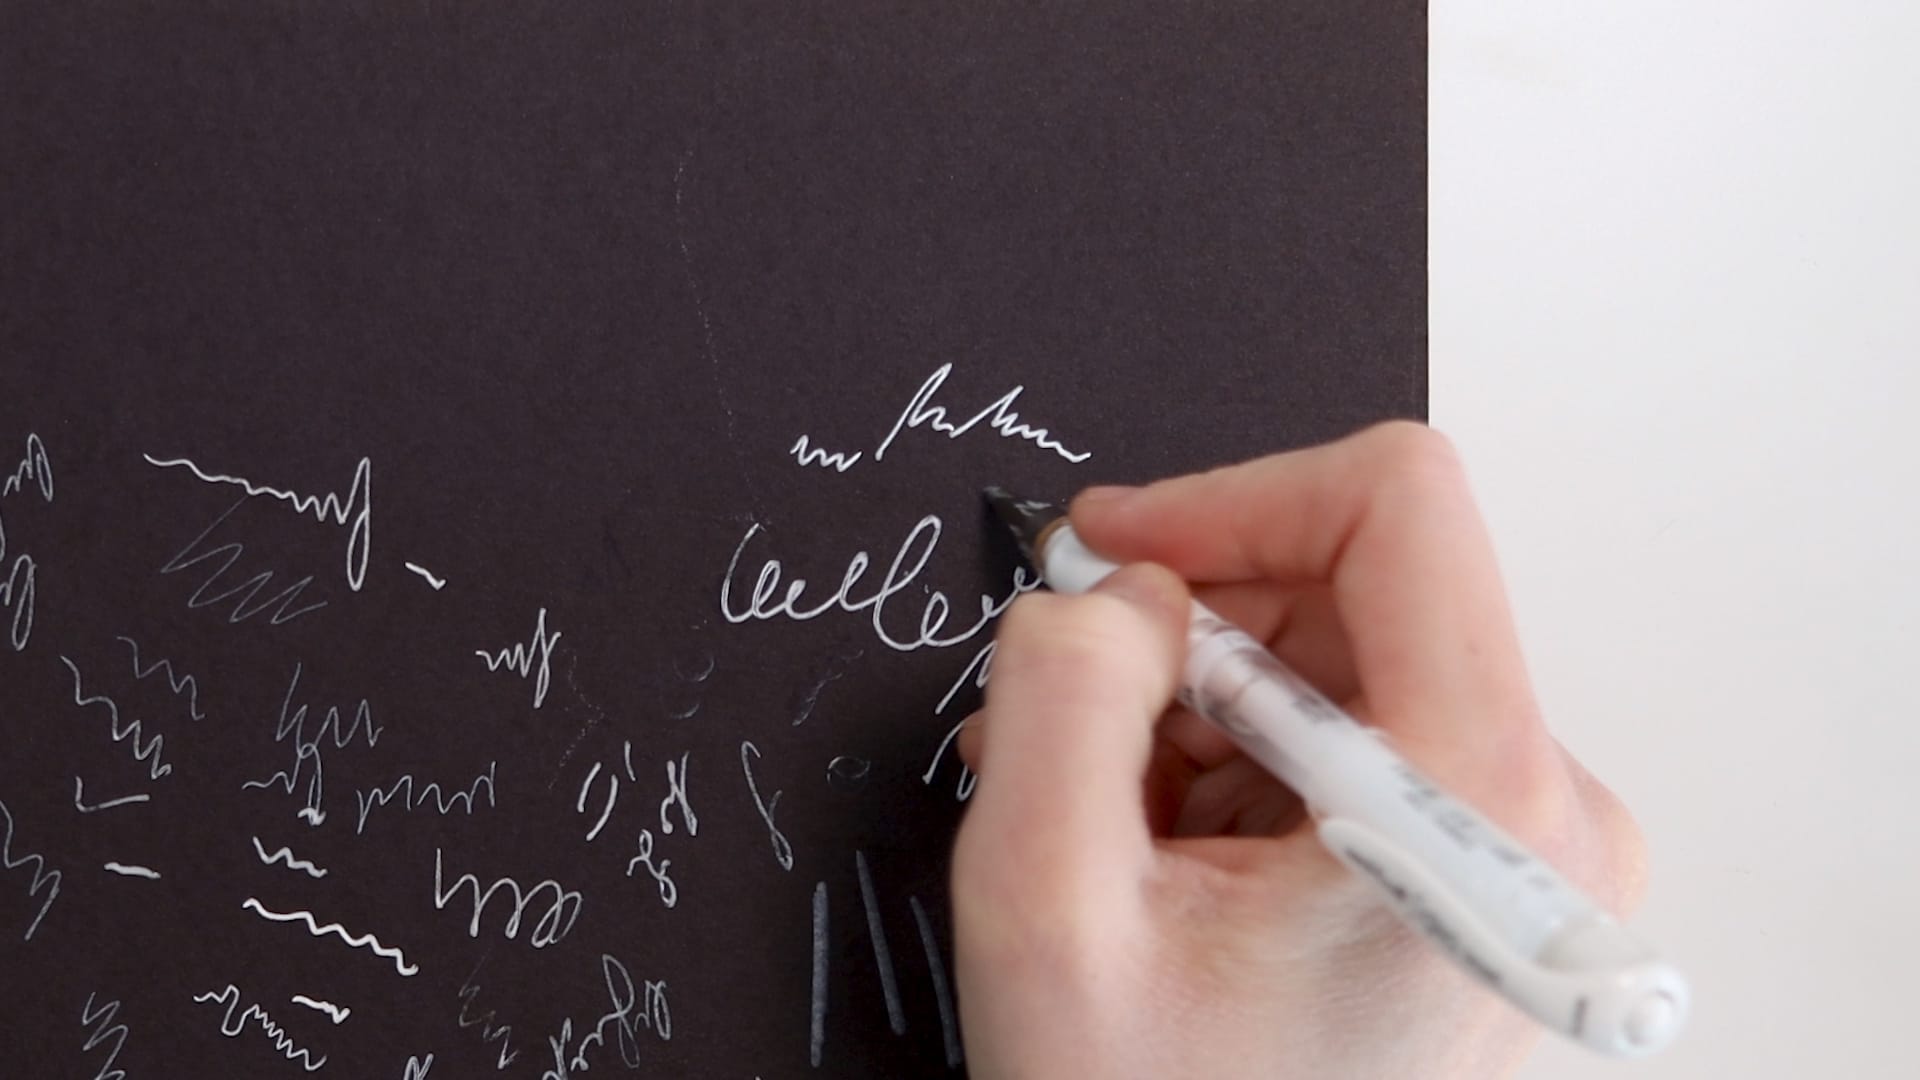
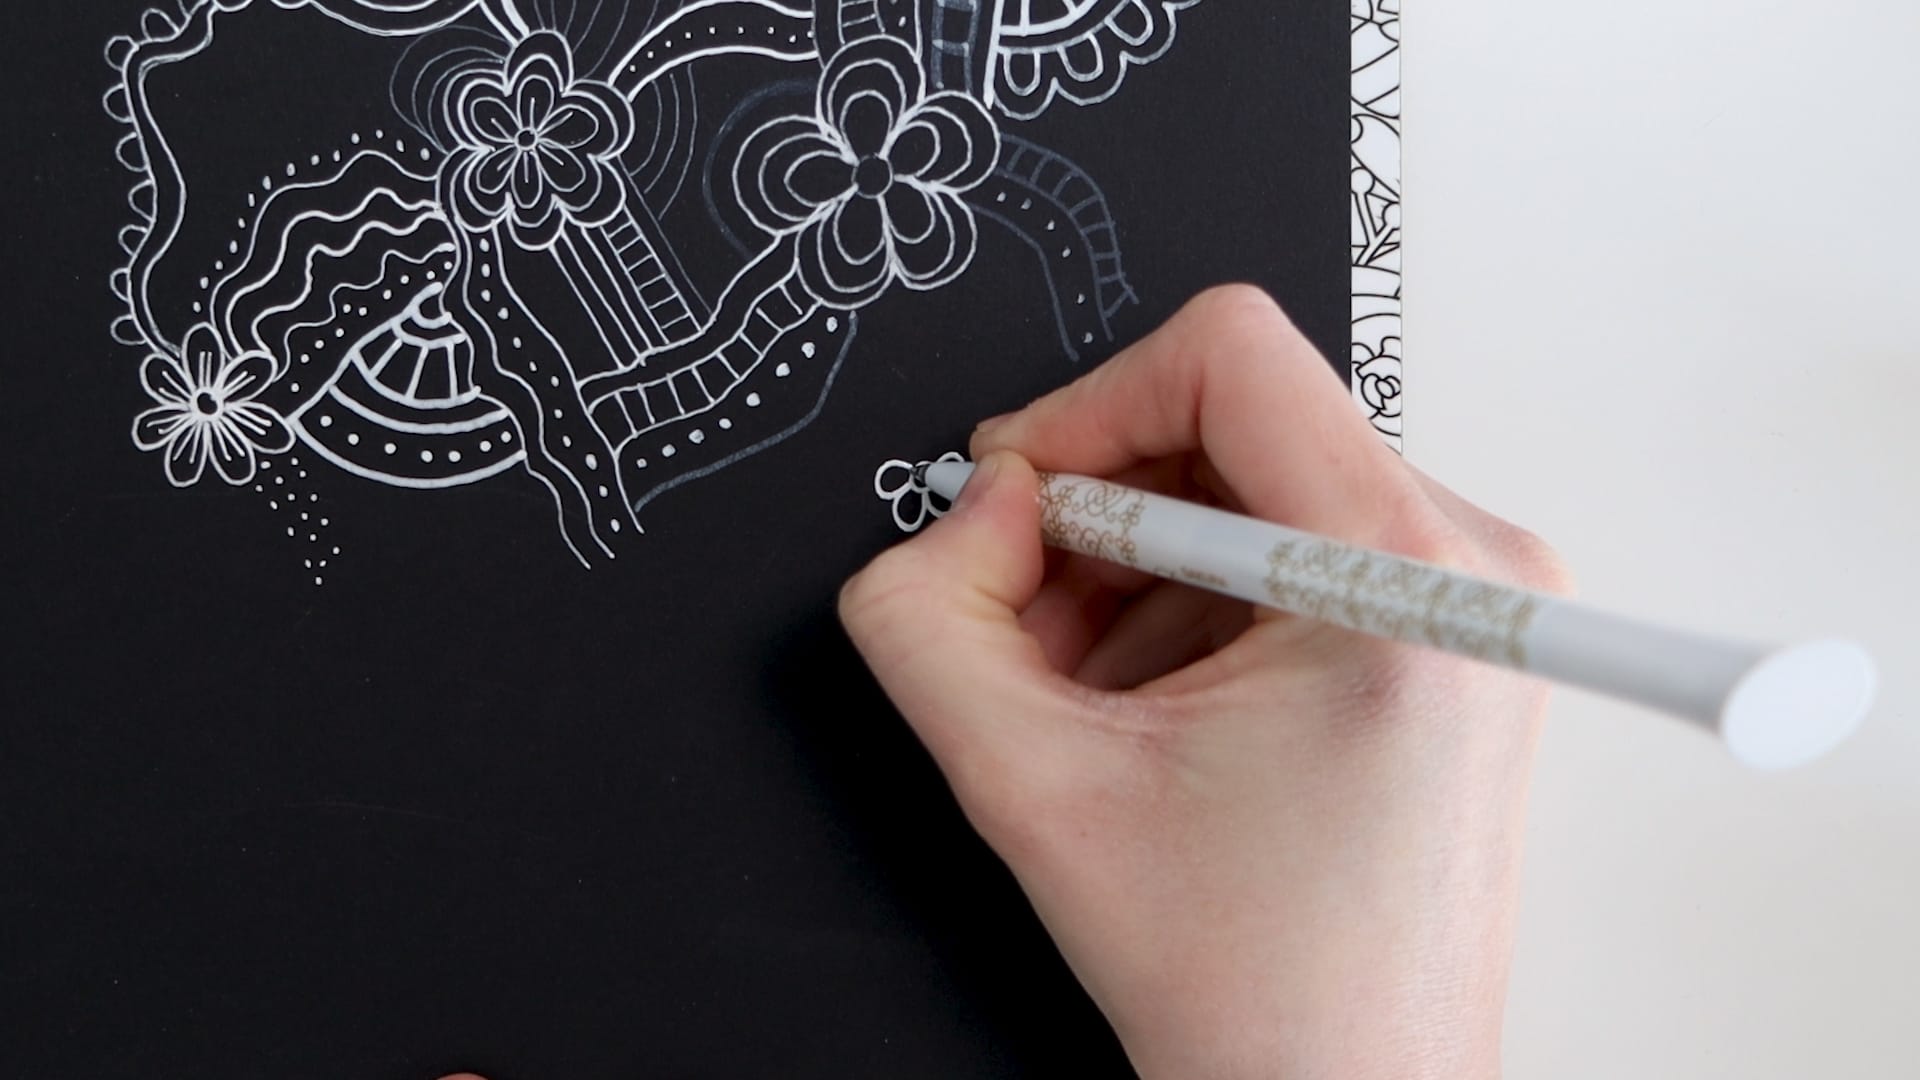
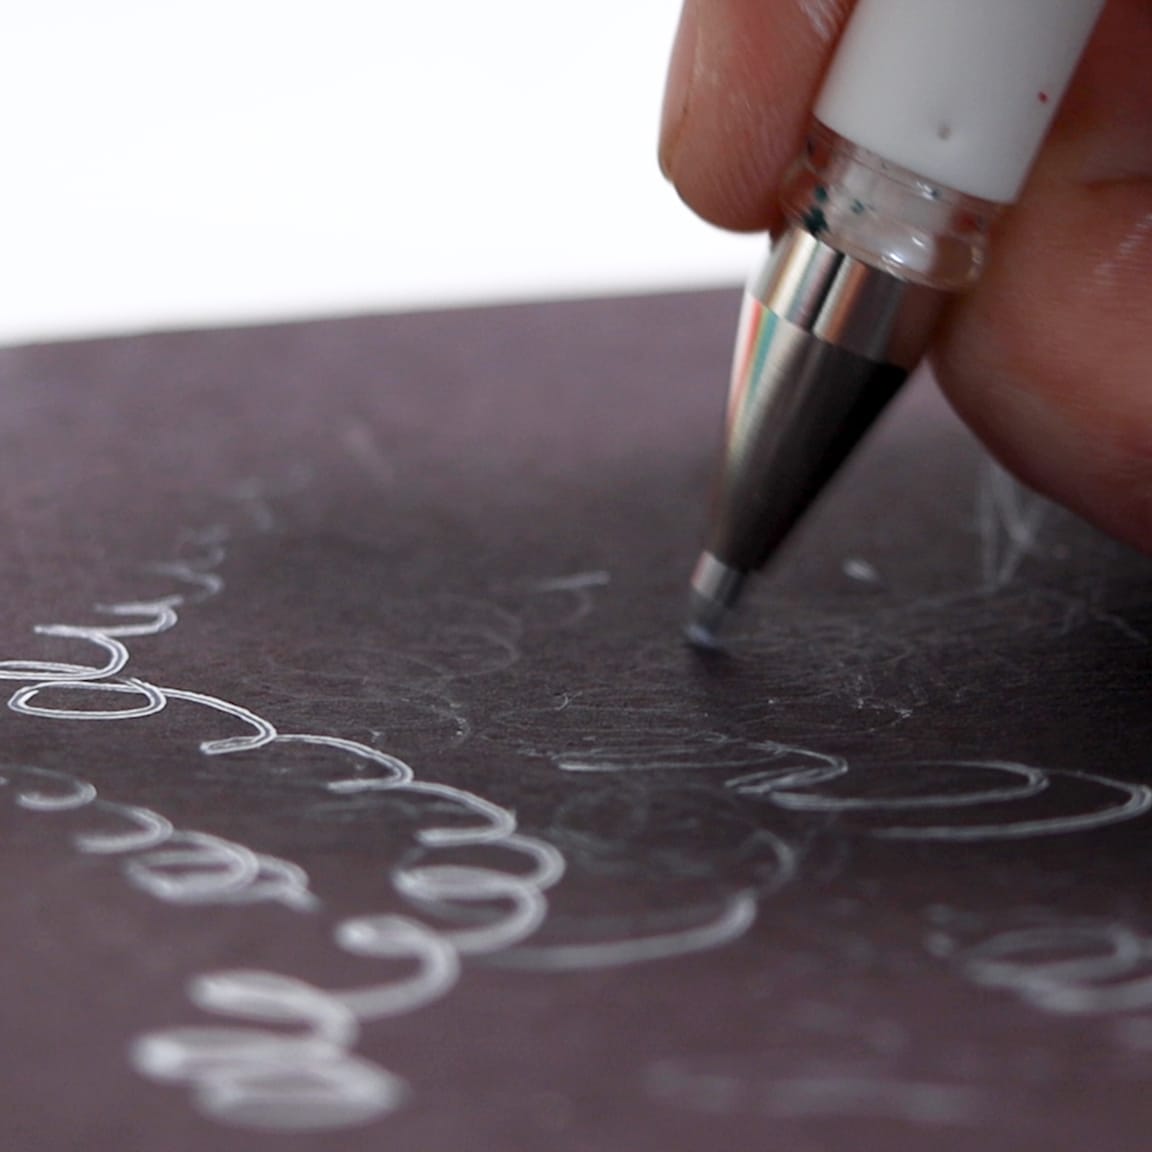
White pens are incredibly useful, especially for adding accents and to highlight parts of your coloring pages (here’s one I did previously). But did you know you can also cover up mistakes you’ve made on a white page, for example, when you color outside of the lines? You can also use white pens to create amazing lettering or to draw on dark surfaces (such as black paper).
If you’d learn more about which white pens are the best for you, please check out my other blog post here.

White Pens: My Top Tips!
Check out my video below to hear my top 10 tips for using white pens
Tip 1: Choose the right pen
My first tip is to choose the right pen.
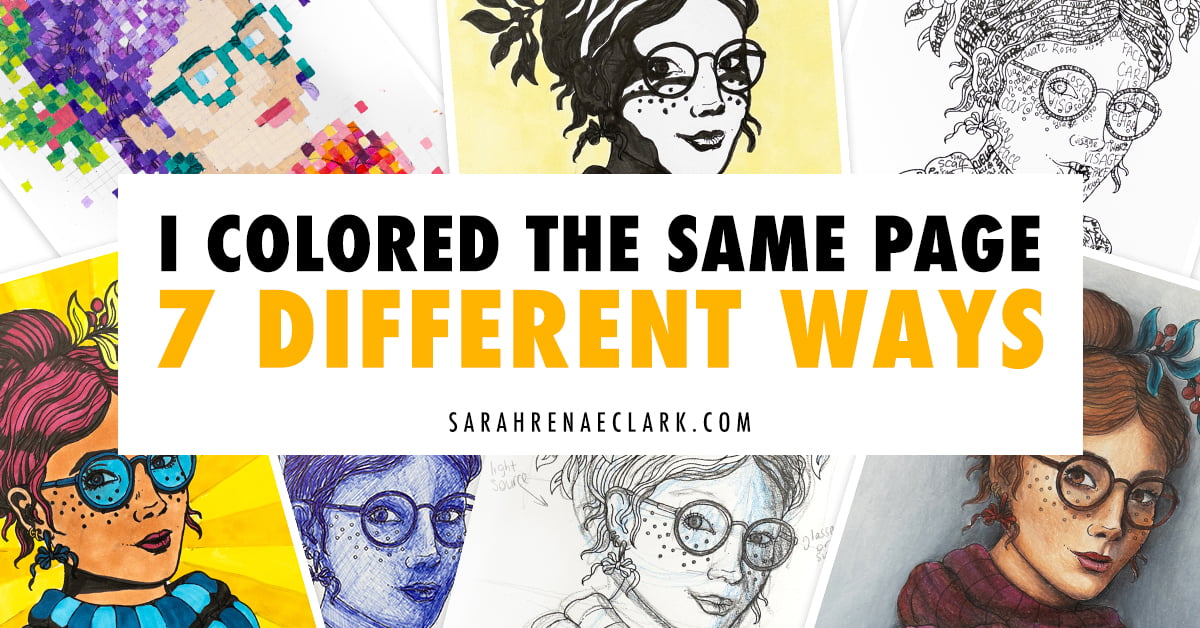
In my previous post, I tested all of the white pens that I had, and I compared how they all went on colored pencils, markers (Copic, Sharpie and TomBow markers), gel pens and washi tape. I discovered that some of the pens that worked fantastic on the markers but worked terribly on the colored pencils.
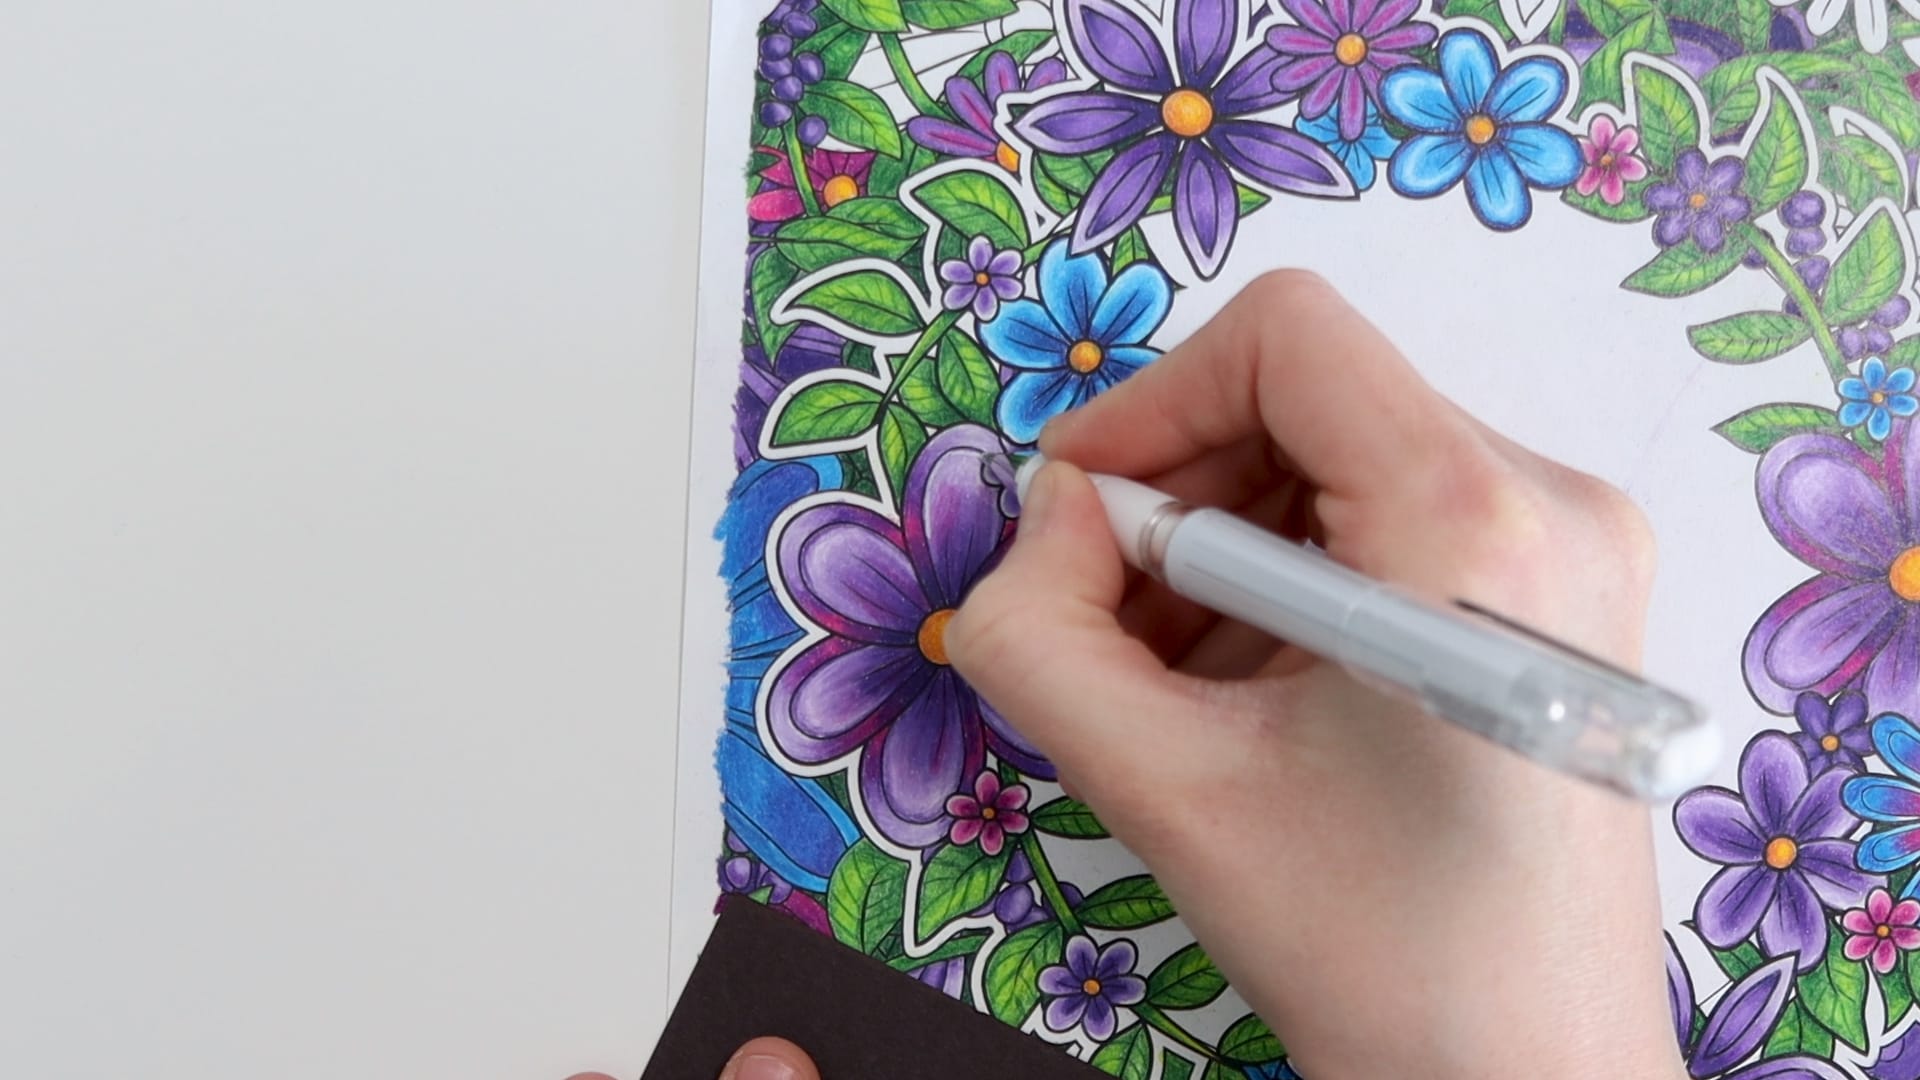
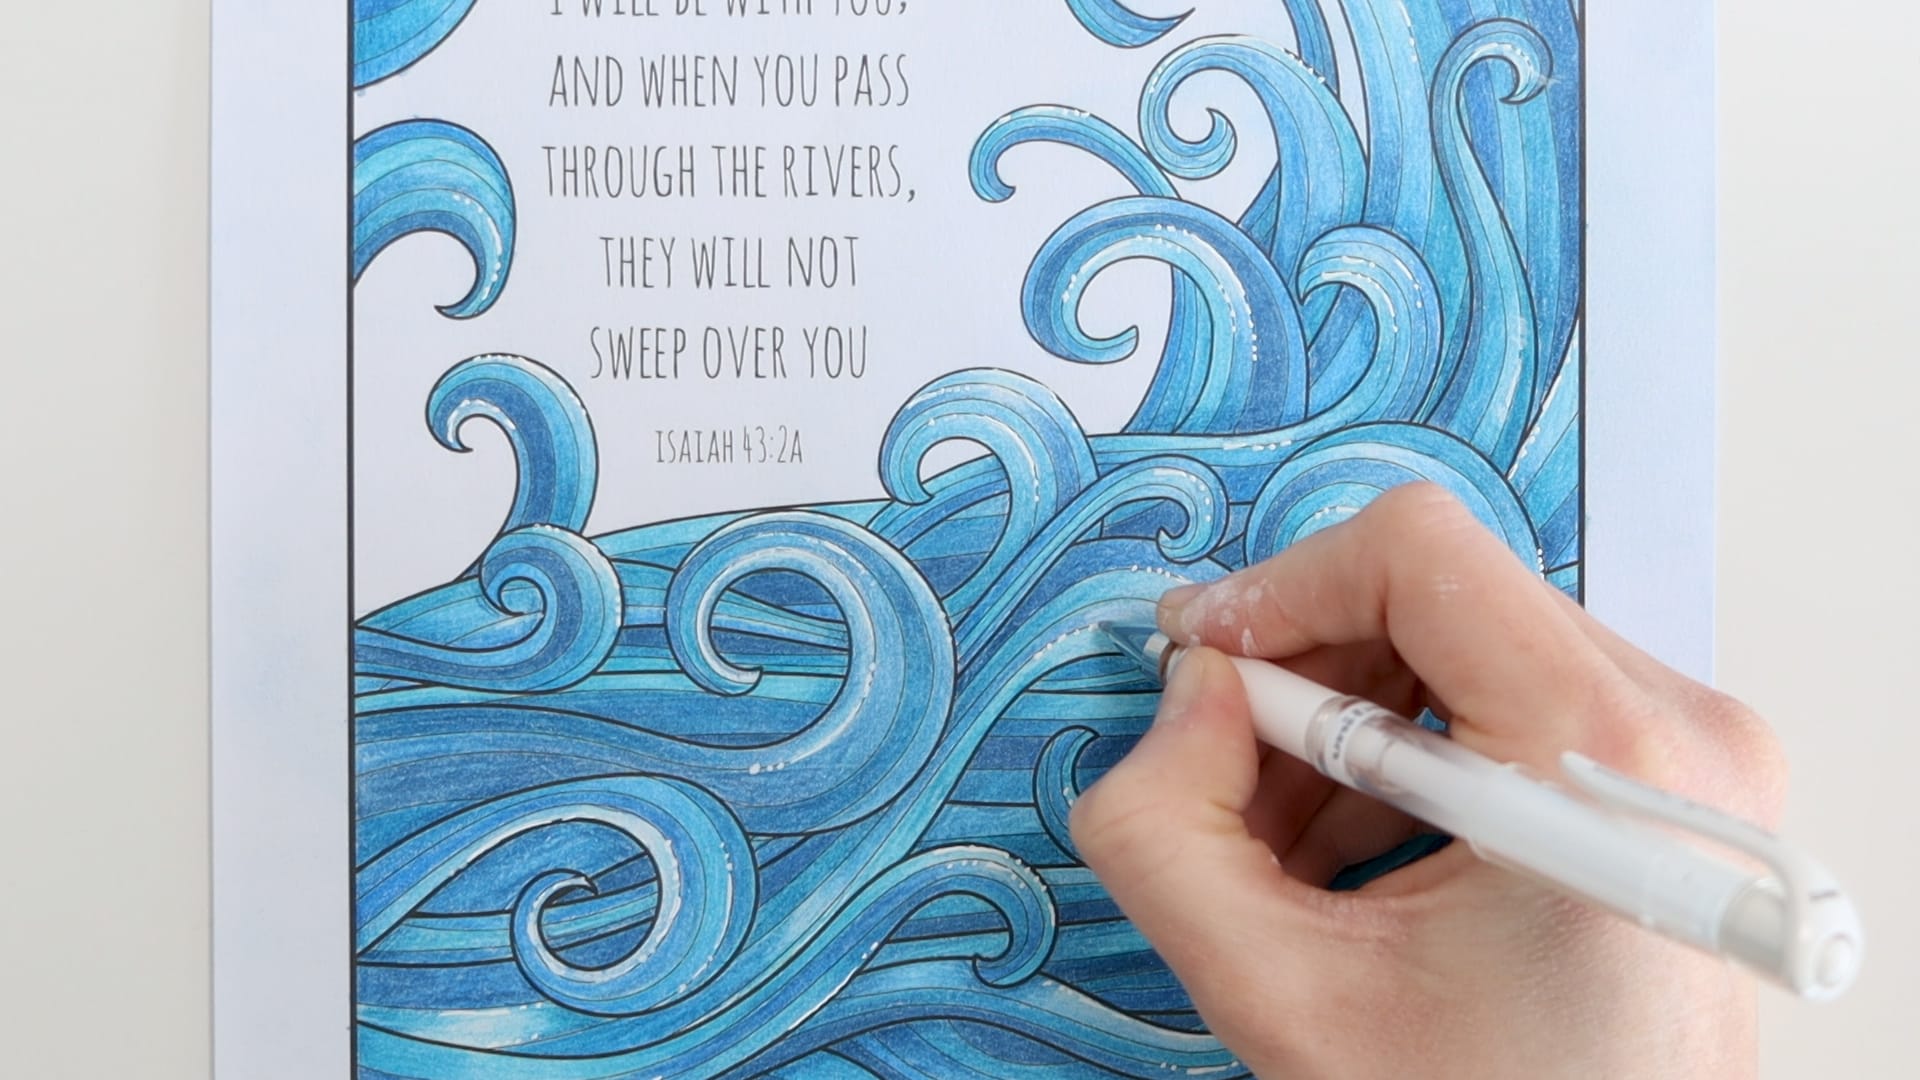
In the “Explore Dream Wander” ocean image above, I used a Sakura Gelly Roll in 2 different sizes for my highlights – in my tests, the Gelly Roll pens worked great on alcohol markers (I used Ohuhu markers for the above image) but they didn’t perform well AT ALL on pencils. So while they were great for this picture, I would choose another pen if I were drawing over colored pencils.
Out of the pens I tested in my last video, these were my favorites:
- The Pentel Hybrid Gel DX
- My Sakura Decorese
- The Uni-ball Singo (in the video, I actually reviewed one that was about four years old and I’ve since bought another one and it definitely one of the best).
My favorite paint marker was the Deleter Neopiko Line White.
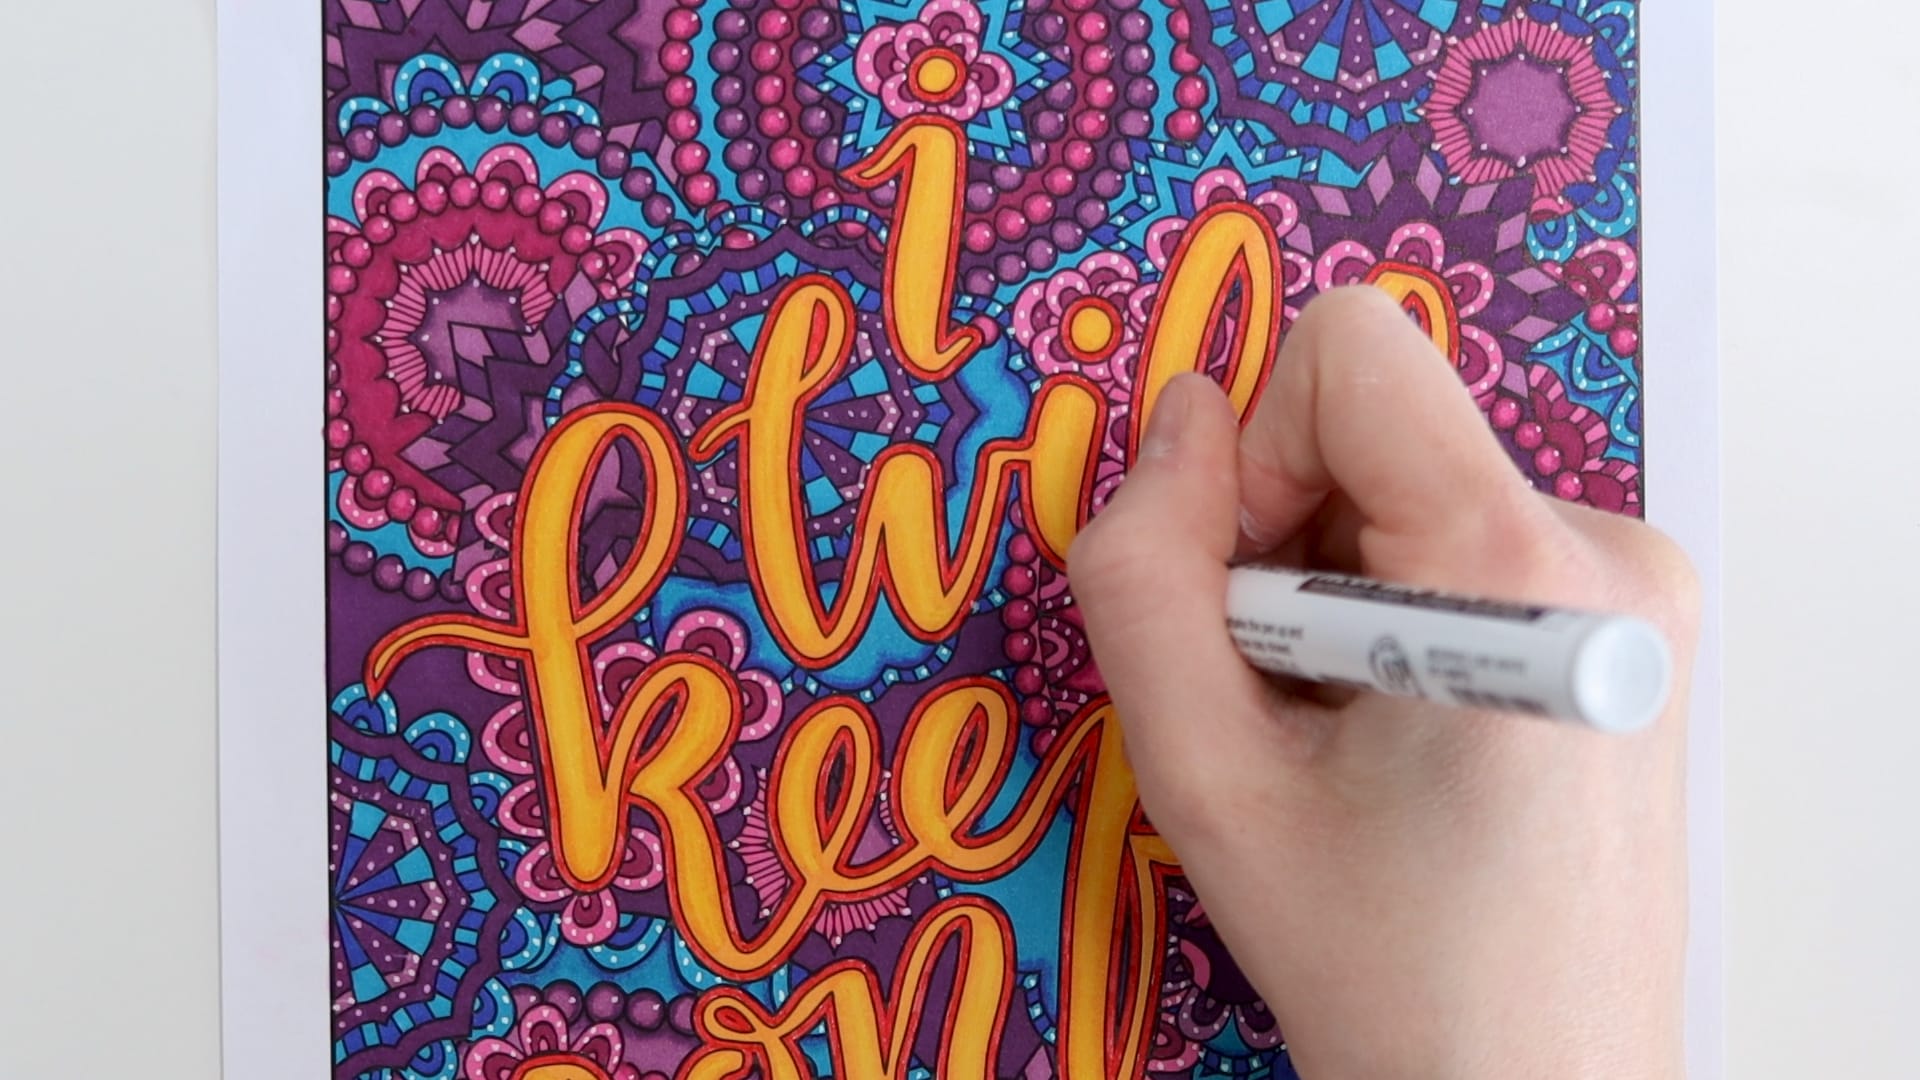
In this post I’m going to mostly be talking about tips to do with what Gel pens, however a lot of those tips also apply to the white paint markers, they are fantastic for doing highlights.
You also want to decide what size marker you want because some of these have a very thin line and some have a very thick line. In my ocean image, I used 2 different sizes of the Gelly Roll gel pen because I wanted more control over the detail in my bubbles, but I wanted a bold line on the lettering. So, you might actually like to have a few in your range for different options.
And again, in my last video and blog post, I detailed all these pens so you can actually see which ones are the right size or the project that you’re wanting to do.
Tip 2: Draw on a scrap piece of paper first
Tip 2 is always keep a scrap piece of paper with you and draw on it first.
It helps to get the ball rolling; it makes sure that it runs smoothly, and it gets the ink moving evenly so you don’t end up with any big blobs or missing lines.
It’s just a great idea and I actually like to do this throughout my work as well.
Tip 3: Use light pressure, work in small sections
Tip 3 is use light pressure and work in small sections at a time, if your pen starts skipping or doesn’t work as well, go back to your scrap paper or rub it on your hand and have another go.
As long as you keep doing little sections at a time, you should be able to keep a smooth flow, even if you’re working on something difficult like colored pencils.
Tip 4: Take your time, don’t rush
Tip 4 is go slowly.
It will give you a much thicker, more vibrant line, and really gets a lot more gel on the paper.
As you become more comfortable with your pen, you can start to experiment with your speed. You can start to work a little bit faster and you can actually start to use that speed to create different lines or tapered lines for things like stars.
Tip 5: Give the ink time to dry

Tip 5 is to let your work dry, don’t lean on the areas with your hand, or it will smudge while the white ink is still wet.
That’s the same whether you’re using a gel pen or paint marker.
So, make sure you let it dry completely before you go over it for a second coat or with anything else or even resting your hands on it.
Tip 6: For a brighter white, do a second layer
If you are wanting a brighter white, what for your work to dry and then you can go over it again in a second layer.
Tip 7: Make a copy of your page as a draft
This is something I personally like to do whenever I’m coloring, because sometimes after you’ve put in hours of work on your page, you don’t want to ruin it by adding something new if you’re feeling a bit uncertain.
So I scan it in and I make a copy first – then I can work off my photocopied version, giving me a chance to do a test run before applying the details to the final page.
So you can try different methods, you can try different outlines, you can try doing things with your white pen that maybe you’re not feeling brave enough yet to do on the final page. If you’re really clever, you can even print at half size to save on ink.
Tip 8: Keep it simple
Don’t go overboard! Keep it simple!
Remember, you can always add more, but you can’t take away. So keep it simple, use your white pen in moderation. And again, as I said in tip seven, make a copy if you want to do something extravagant so that you don’t mess up your original piece. Remember, less is more.
Tip 9: Fix mistakes with your original medium
If you do make a mistake, don’t panic. Instead of smudging it everywhere, just wait for it to dry and go back over the top of your white marker with your original medium, whether it’s pens, pencils, or something else. It might take a few layers, but you will be able to cover it up.
Sith some markers you can actually scratch the white ink off after it dries, especially on top of the wax pencils. I was quite surprised at how easily my white pen scratched off of my pencils.
Tip 10: How to store your gel pens
Now for my tenth tip, I want to talk about gel pen storage. I looked everywhere on the Internet for this because I’ve never really been sure.
Do we store gel pens upright?
Do we store them horizontally?
Do we store them with the nib down?
Now, when it comes to gel pens, there are so many opinions.
Some say store them down. Others say don’t store them down, because they will leak and damage the tips.
Some say store them up. Others say don’t store them up, because the ink won’t be ready when you need it.
Some say store them horizontally. Others say that this causes air bubbles to form in the ink…
Others say because they’re pressurized, and it doesn’t matter.
At the end of the day, I could not find a clear answer to this, even after speaking to several manufacturers, so maybe it doesn’t matter as much as what people think it does? If all of these artists use different approaches successfully, maybe they all work just fine. Maybe there is no secret to storing them properly.
Whatever you do, make sure you keep the lids on whenever you’re not using them, because that will help them stay sealed, so the ink doesn’t dry out from being exposed to the air.
Bonus: How to revive your old gel pens
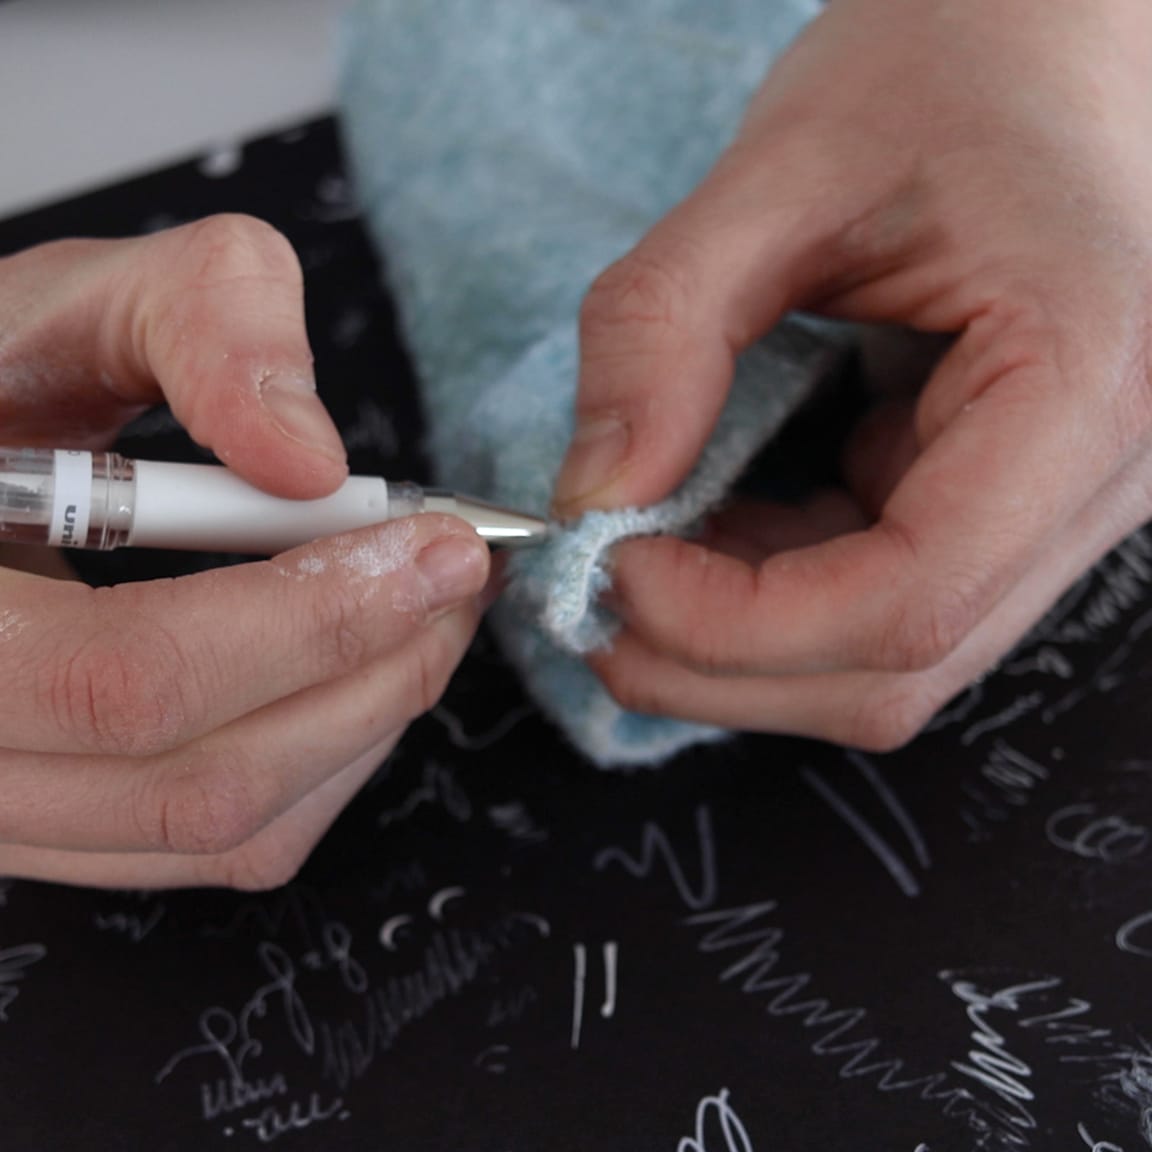
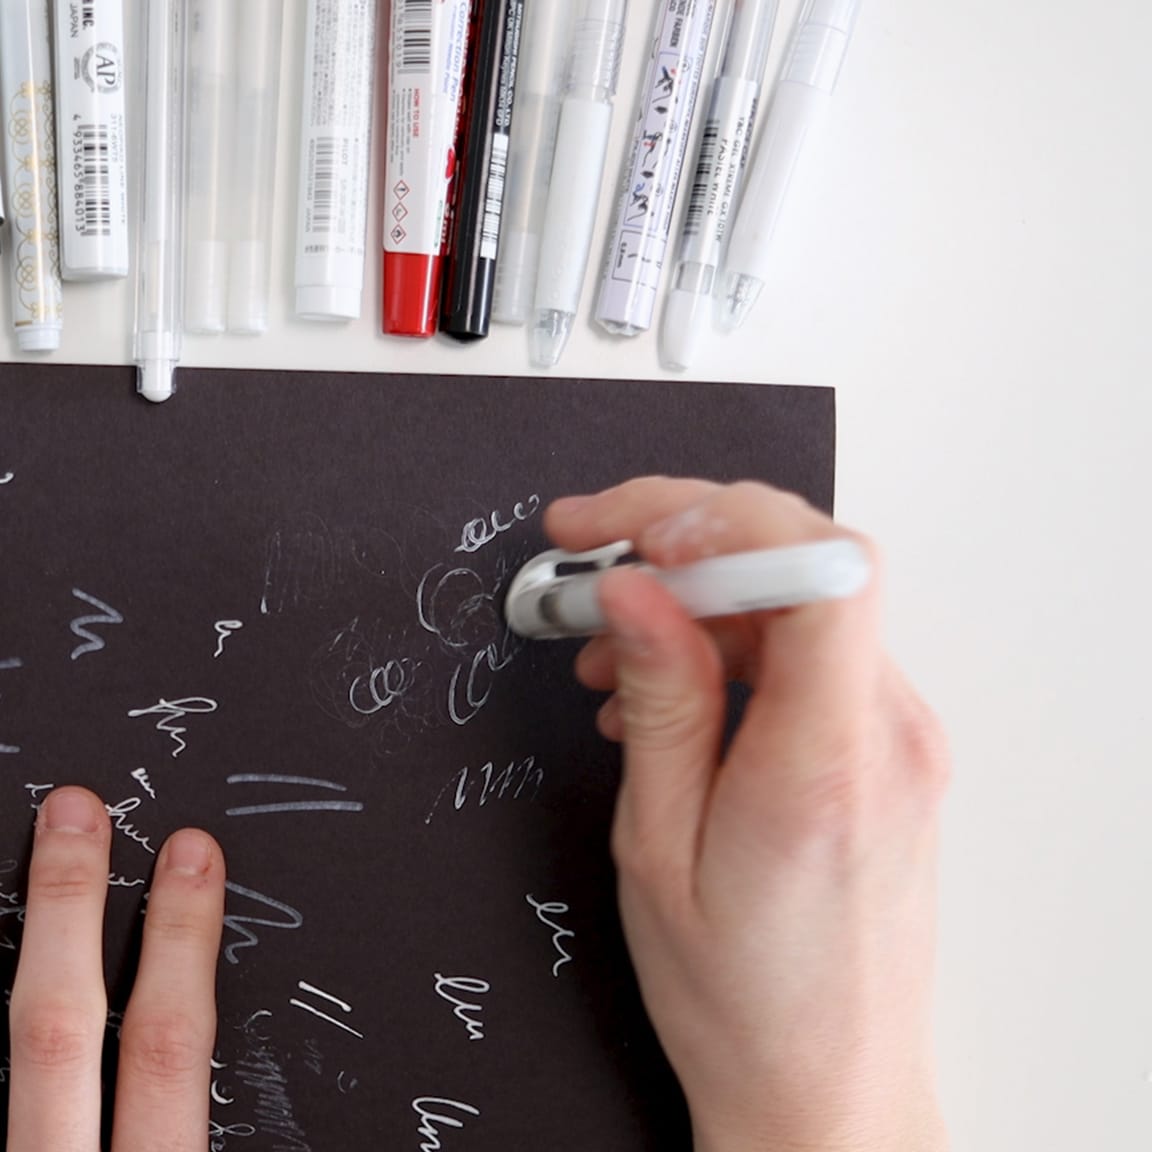
- If your white gel pen does get clogged like my 4-year-old Uni-ball Signo Broad, go back to the scrap paper, keep working away at it. Keeps scribbling until you can get the ball rolling again.
- You can also try cleaning the nib with a cloth to remove any dried ink.
- If that’s not enough and you still can’t get it working, you can give it a slight tap on the paper. Don’t tap it too hard because you will damage the nib, and shaking it might create some air bubbles. Instead, just give it light tap with the lid on, then keep trying to run the pen on the scrap paper.
If those don’t work for you,
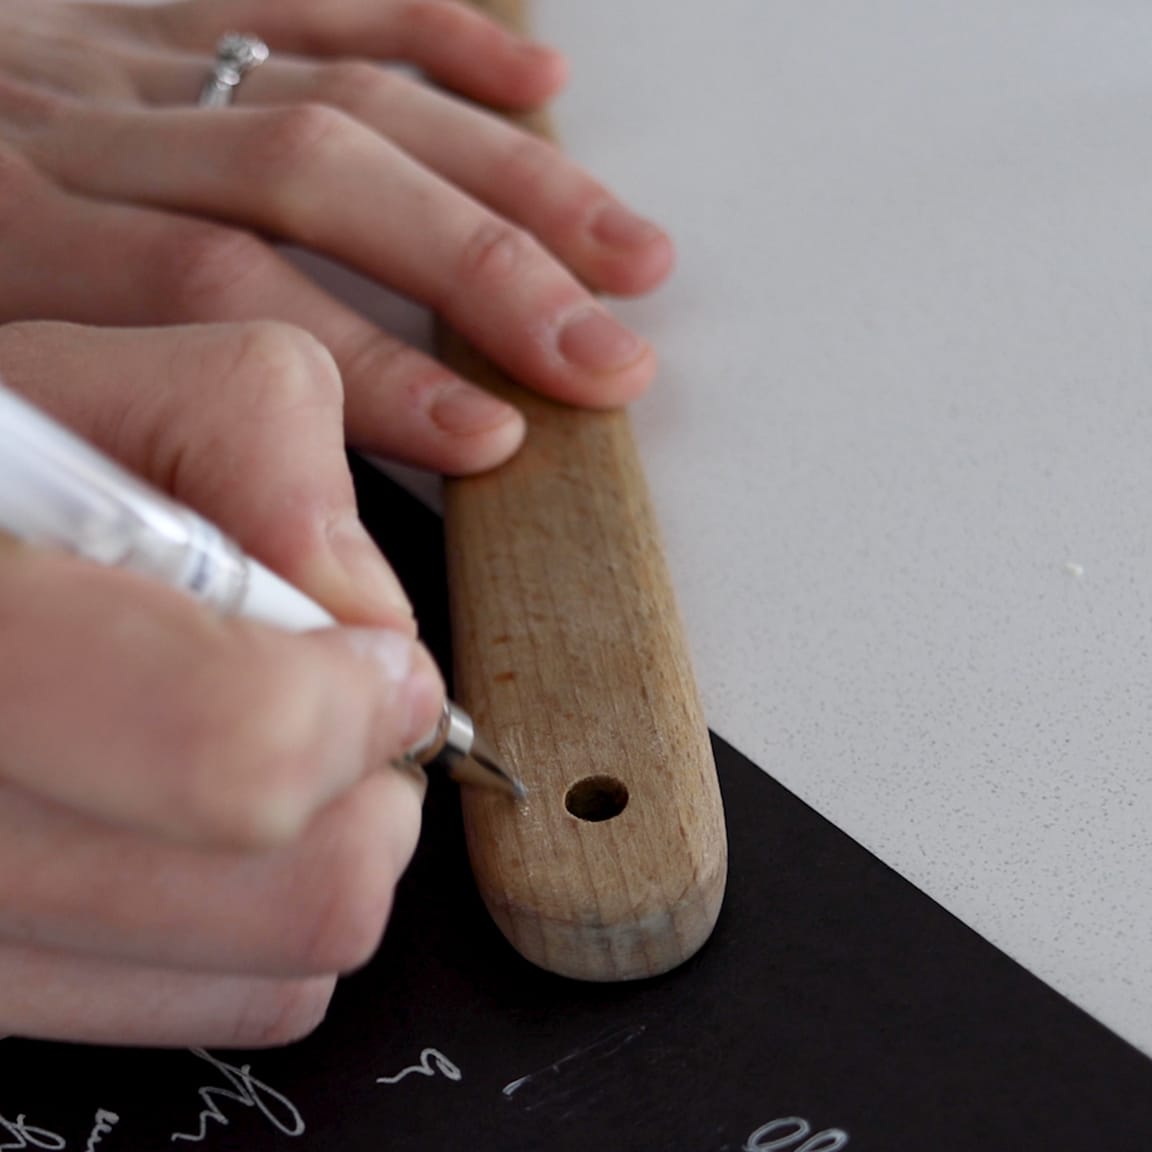
- Draw on your hand or on some wood (I use a wooden spoon). I found the wood worked surprisingly well to get my white Signo gel pen working again.
- Put it in some warm water or under the steam of your kettle (especially if the ink is dry near the tip)
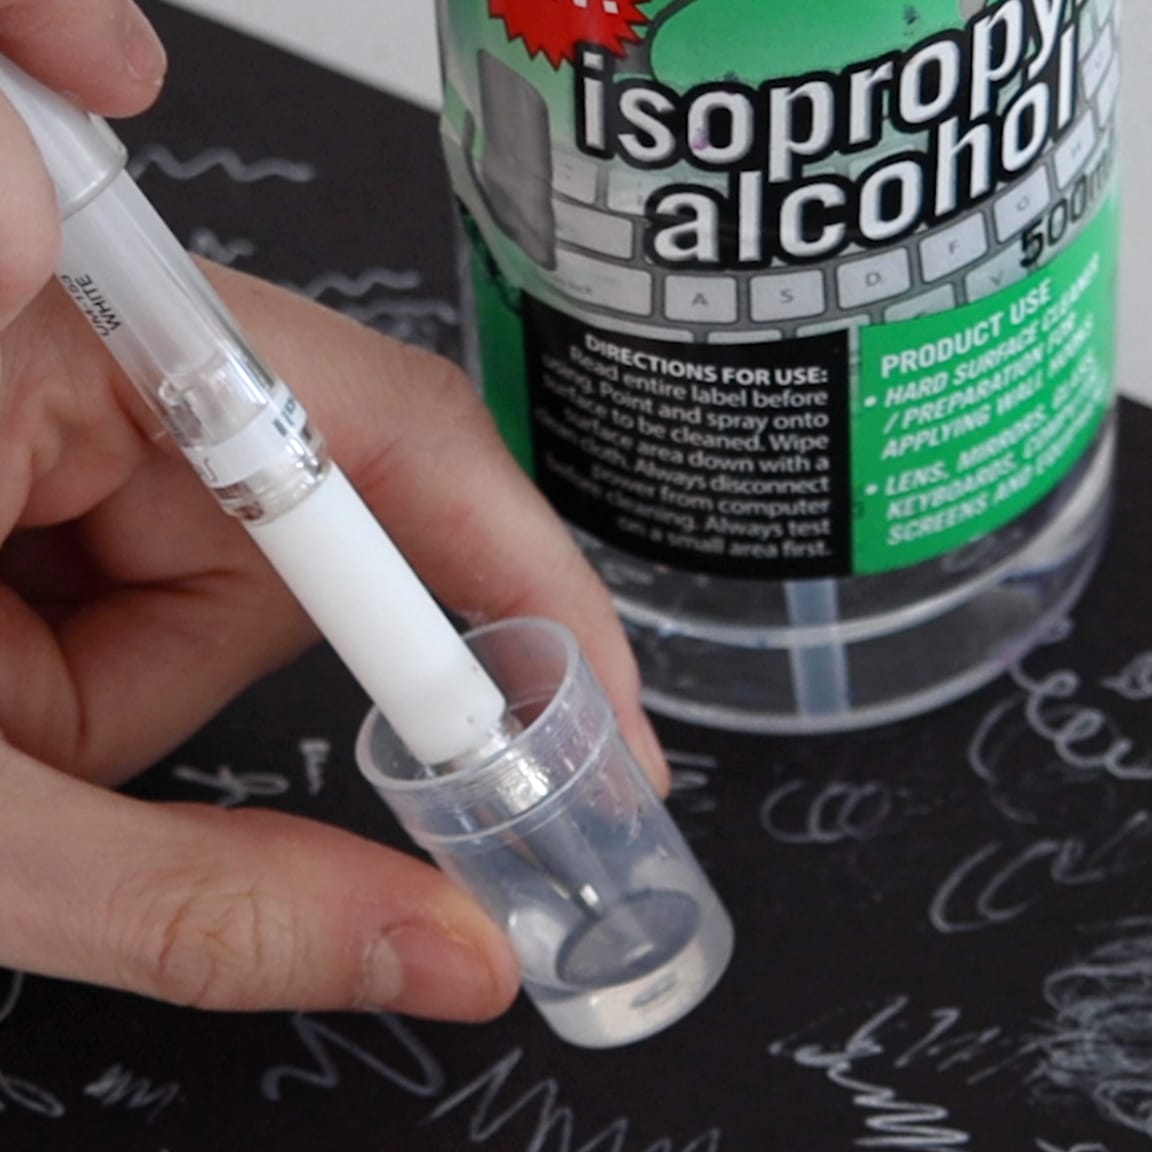
- Dip the tip in some rubbing alcohol (isopropyl) to give it a good clean.
Out of the above, I found that the wood worked the best. I also got surprisingly good results from gently tapping the pen like I mentioned above. But your results may be different, depending on the age of your pen and how dried up the ink is. Using it frequently will help to avoid this happening in the first place.
As an extra note, I’ve heard some people recommend heating up the pen with a flame or opening it to clean it out – neither of which I would recommend personally.
I hope you’ve found some of these tips helpful! If you want to show me what you’ve been doing with your white pens, please head over to my free Facebook group, I would love to hear from you!
If you have any other tips that you’d love to share with me or questions you have about using markers in different scenarios, please pop in the comments below and I will do my best to help you.
Where can I buy white pens?
The best way to find a white pen to buy is to choose your favorite from this review, and then search online for a supplier near you. Many can be found on Amazon or online craft stores like Blick Art Supplies.
Do you have any other white pen tips I missed?
If you have a tip that you’d like to add, please let me know in the comments!
Don’t forget to save this for later on Pinterest, and subscribe to my YouTube channel and email updates so you’ll get notified when I post new articles and videos like this one. I hope these tips were helpful!

I would love to see you draw animals and how you would do fur and more. Ijust love your page you have helped me so much! I wanted to say Thank you for all the work you have done and shared!
to revive/fix old or air bubbled gel pen, cut a small piece of eraser small enough so that it will fit inside where the ink is. very slowly and gently push the eraser all the way down to where the ink is…carefully!! sometimes the pressure moves the eraser back up. text the pain again, this works every time for me
I am beginning with the color pencils and moving toward doing color on wood with the color pencils. Tried the color book routine and not too impressed with my results but like the relief of stress with this process. My wife is a good water color artist and I have had a good experience with a lot of mosaic projects over the years. (not interested in the mess now) I am 89 and like the color pencil & made my own designs on color pencil paper. (mosaic on paper) They look good but not happy with working with paper. ( Although have a “paint steer stick” as interesting frame idea)
The birch wood idea seems like a try for surface because you can buy the wood ready for starting and finish with out doing much with the wood surface. (rounded corners and different size for different type projects) The pencil in softer wood, I am told is a problem. I guess the wood idea is a male thing, but making on wood does away with a frame.
Spilling this all out is my purpose to give you some information about me and maybe you might have some suggestions. (I am a retired Management Consultant working with the Human Behavior Science of employment issues. ( In retirement Do opinion research on twitter & have a Blog)
I find when I use the uniball white with alcohol ink it bleeds and even when I seal it it bleeds. I see the white outlines on line and would like those results but can’t seem to achieve it,. Any suggestions? Thank you!
What do you do with all your finished work? I started making cards and donating them to an organization that makes homemade music boxes. I always like to see what others are doing with their finished work.