It always amazes me what people are able to create with simple pencils or markers, and I love learning new coloring techniques to use in my adult coloring pages.
I have never tried coloring gemstones yet, so when I saw these turquoise gemstones that Sue Curry created on this coloring page, I asked her immediately if she could share her process with us… and she said yes!
So it’s my privilege to introduce Sue Curry to take us through the steps she followed to draw these turquoise gemstones with tombow paint markers. It’s not as hard as it looks!
Note: This post contains affiliate links to products and I may earn a commission if you click them and make a purchase (at no cost to you).
The coloring page that Sue is using in this tutorial is from the Creative Faces Adult Coloring Book by artist, Andreja Vucajnk.
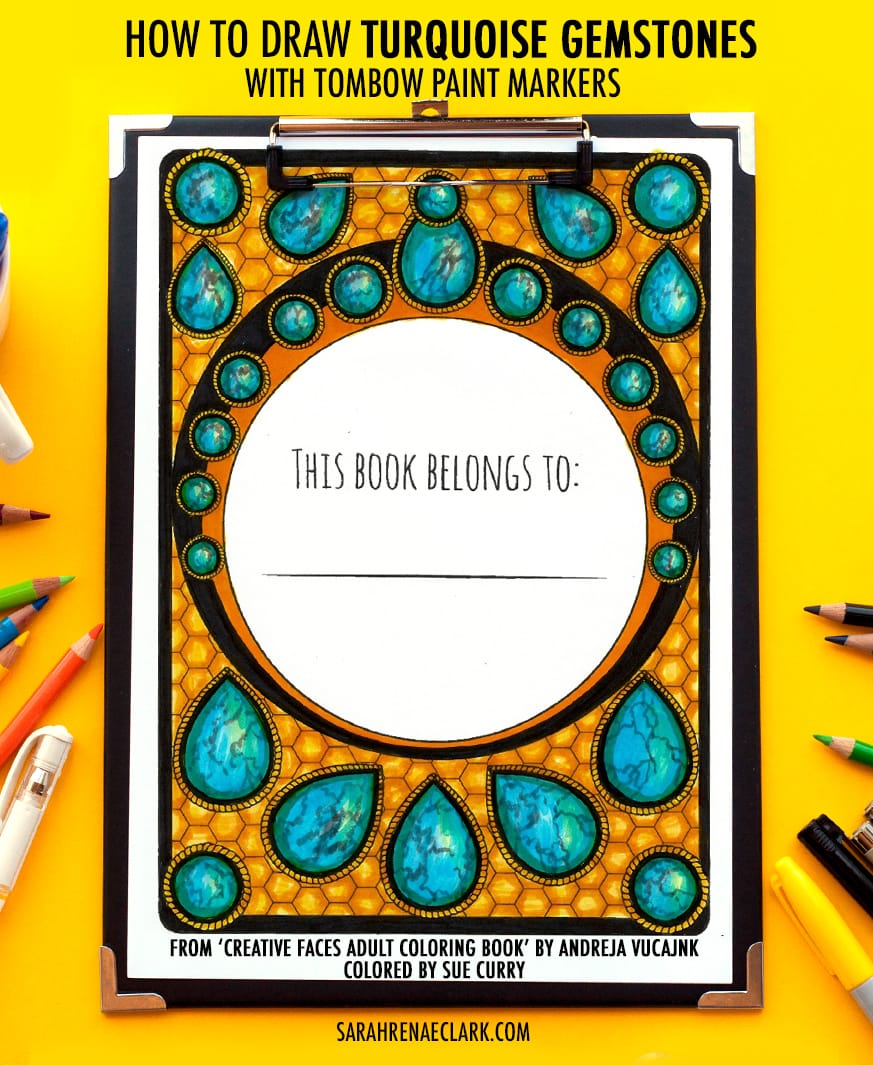
Sue used Tombow Paint Markers in this tutorial. Here’s a list of the colors she’s used:
- Tombow N35 (dark gray)
- Tombow 090 (light yellow)
- Tombow 055 (yellow)
- Tombow 481 (pale aqua)
- Tombow 451 (aqua)
- Tombow 452 (light blue)
- Tombow 443 (dark aqua)
- Tombow 025 & 055 (light orange for outline – optional)
Let’s jump into Sue’s gemstone tutorial!

How to Draw Turquoise Gemstones – Coloring Tutorial by Sue Curry

I knew that Andreja’s coloring page really called for gemstones, but that scared me.
Those blank, white shapes were intimidating to me, when I first saw them. I didn’t think that I could create realistic-looking gemstones. Then I found my inspiration in a picture of turquoise stones formed in cabochons. (Like these examples on Google Images)
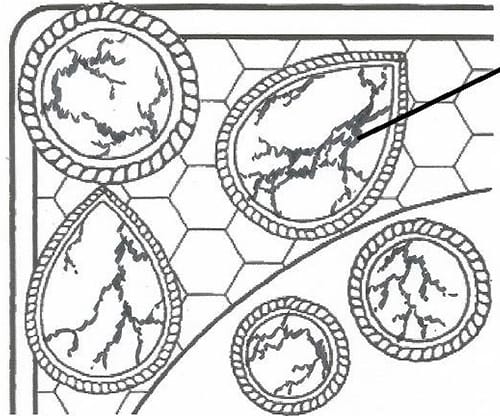
Step 1: Using the Tombow N35 (dark gray), crack your eggs!
The pattern should be random and a bit shaky. It kind of looks like the fractures in the shell of a hard-boiled egg or even bolts of lightning.
The patterns don’t have to be perfect. They are designs formed in the turquoise over time… not exact in any way.

Step 2: Using the Tombow 090, locate the highlight on the stones.
Tombow 090 is a light yellow and it will smudge when applied over the dark gray.
That’s okay, because turquoise has discolorations too. You won’t even see much of these undertones when we are done.
Tip: Put all your highlights in the same place on all the stones you are coloring. No matter which way they are laying, the light source doesn’t move. I chose the upper right side in my picture.

Step 3: Add some Tombow 055 yellow to the side of the paler 090 yellow. When the blues are added, this color will become a beautiful shade of turquoise green.
Yes, it’s looking like a mess; but it will get better. I learned that playing with colors can provide some happy results. Of course, if this doesn’t work, you can always start over.

Step 4: Let’s add some aqua blue. Tombow 491 is such a lovely shade of pale aqua until you smudge it into yellow and gray.
If we were going to leave these stones with only one shade of aqua, this would really be a mess; but we are going to add at least two more darker aqua blues before these stones are done.
Tip: Leave a little bit of yellow showing through as you apply more layers. Just keep moving toward the edge of the stones with each new layer, getting darker as you go.

Step 5:Use the Tombow 451 to add more layers of aqua. Now we are starting to look like a turquoise stone!
Tombow 451 will get darker as you add layers, so don’t add too many or you will start to damage your paper. Let your paper dry a bit before our next step with the darker aqua layers.
Tip: Please notice how I applied the 451. I put more to the left side of the stones than to the right to keep the highlighted area from being covered up. *On one stone, I purposely put the 451 equally on both sides and that made the highlight move to the center, so you can see the difference.

Step 6: We’re almost done! Use Tombow 452 to cover most of the stone.
Though I was careful not to completely lose my highlighted area, this is the color that gives the turquoise its rich color.
Tip: Tombow colors get darker when added to the previous layer.

Step 7: It’s time to add the last layer of blue and a bezel for the edge of the stones.
Tombow 443 is a very dark aqua and gives some real depth to the stones. They are starting to look like real stones now.
I added a quick edge with a black sharpie and a bezel made from a blend of Tombow 025 and 055 (optional step).

That’s how I made white spaces into turquoise stones. It may not be perfect, but nothing ever is :)
I hope you enjoyed this tutorial and maybe got some ideas. Keep in mind that coloring is always supposed to be fun. Don’t be afraid to experiment. With courage and practice, you will increase your level of expertise and add techniques to your ‘bag of tricks’.
Believe it or not, I never colored a turquoise stone before yesterday. This was just something I discovered through experimenting with my Tombows; and I believe it can be done just as easily with other mediums too.

Save this tutorial to Pinterest for later
Thank you to Sue Curry for sharing this tutorial with us. If you have any questions or comments for Sue or would like to share your own tips for coloring gems, please talk to us in the comments section below!
If you enjoyed this tutorial, please share with your friends :)
About the Artist

Australian born but raised in USA from age 2, I grew up loving to draw. In 2016 at the age of 71, Sue created her first adult coloring book ‘Living on Memory Lane’. Sue brought together her own family’s history, the stories that her husband told of growing up in the Central Valley of California on a dairy farm and much research to recreate a farming community in the early 1900’s. In 2017, Sue went on to create 3 more adult coloring books. ‘The Adventures of Little Sister’, ‘Adventures with the Country Cousins’ and her newest book ‘Christmas on Memory Lane’ which brings back memories and tidbits of information about Christmas tradition and history.
Sue’s Etsy store: Memory Lane Art
Coloring books on Amazon: Susan Curry
Connect with Sue on Facebook: Sue Curry Art





Lovely work! Was this colored straight into the coloring book or copied onto paper? If so, what paper is recommended? My Tombows warp my printer paper when layered or blended.