
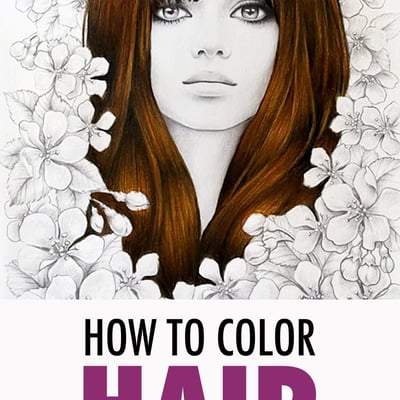
Coloring hair can seem quite daunting – how do you make it look like individual strands without it becoming a tangle of lines? How do you add shine and shadow to give it dimension? The following method allows you to create both realistic textures and sleek shines easily!
Which Colored Pencils are Best for Coloring Hair
Choose your pencils carefully. Rather than opting for a soft waxy pencil like Prismacolor, select your harder lead pencils, preferably oil-based, and make sure you keep them sharp at all stages of coloring the hair. This is going to be the key to creating what looks like individual strands rather than using a soft blunt lead, which is great for blending but wouldn’t achieve the texture we’re looking for.
Today, I’ll be using Faber-Castell Polychromos as they have a great range of natural colors for hair, are very pigmented, and keep a good sharp point.
Choosing Your Colors
Once you have decided what color you want the hair to be, you will need to select pencils from that color family in several shades, from light to dark. I have decided on a warm brown tone for this demonstration, and therefore I went straight to the more reddish-brown tones in the Polychromos set.
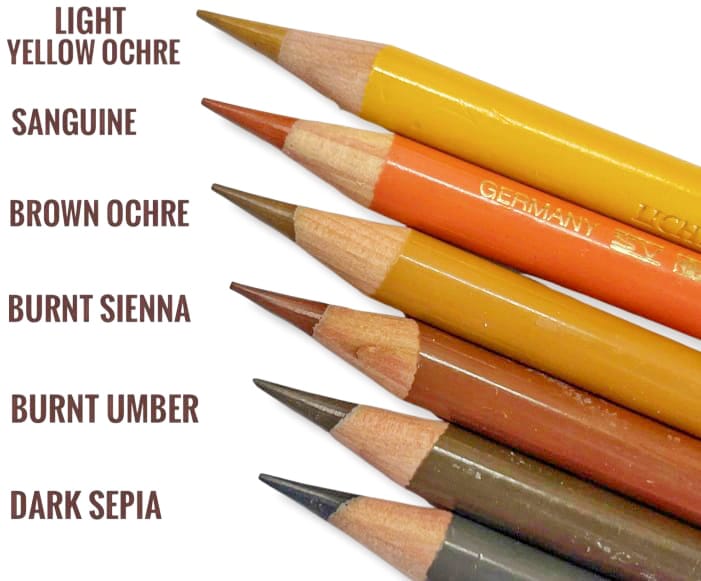
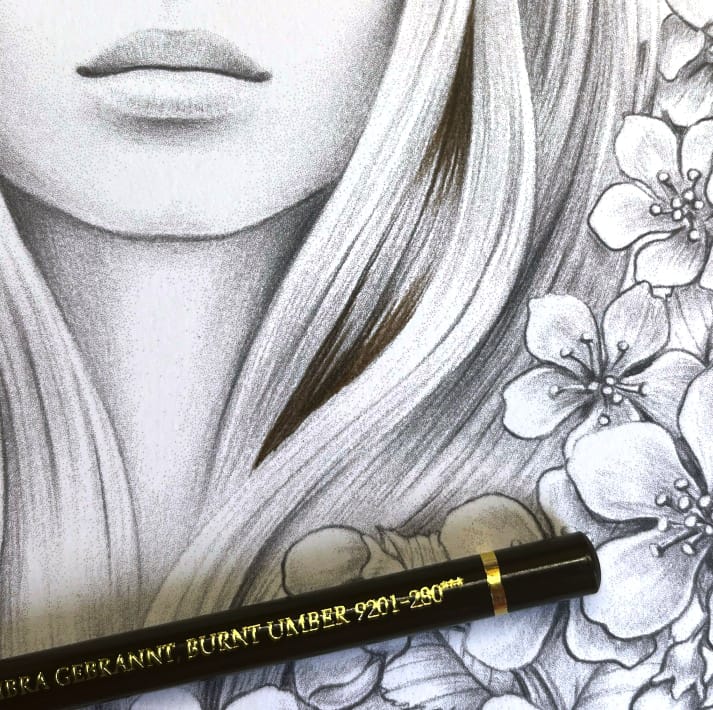
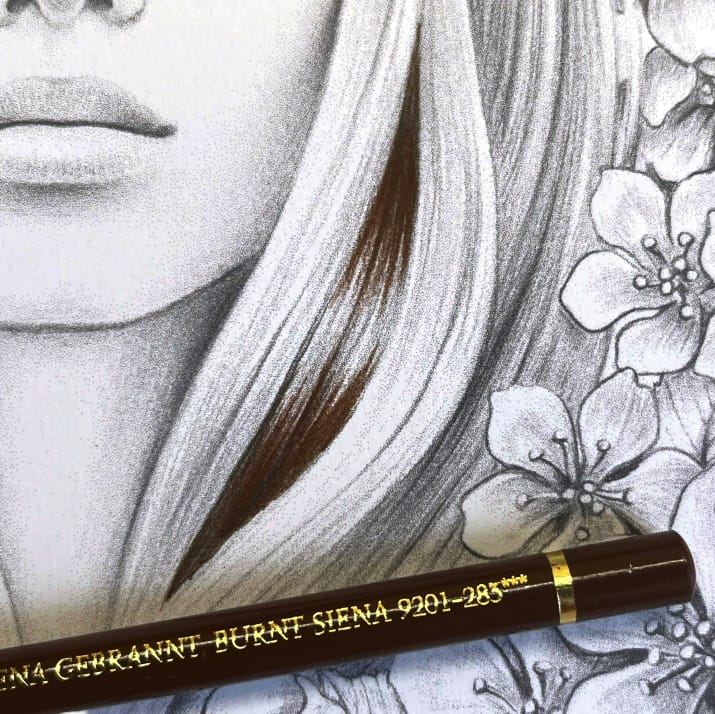
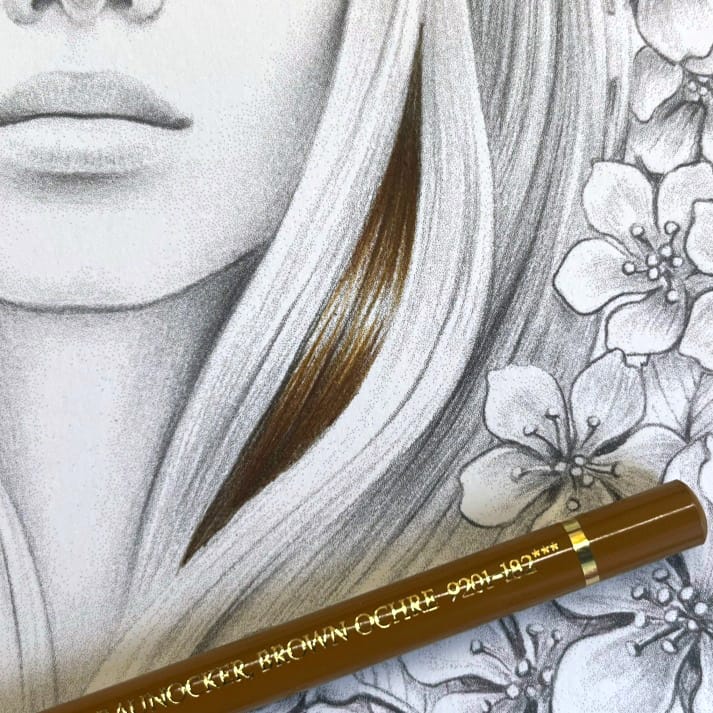
First, I chose my main color, BURNT SIENNA, and then a pencil, which is a few shades darker, BURNT UMBER, and one that is a few shades lighter, BROWN OCHRE.
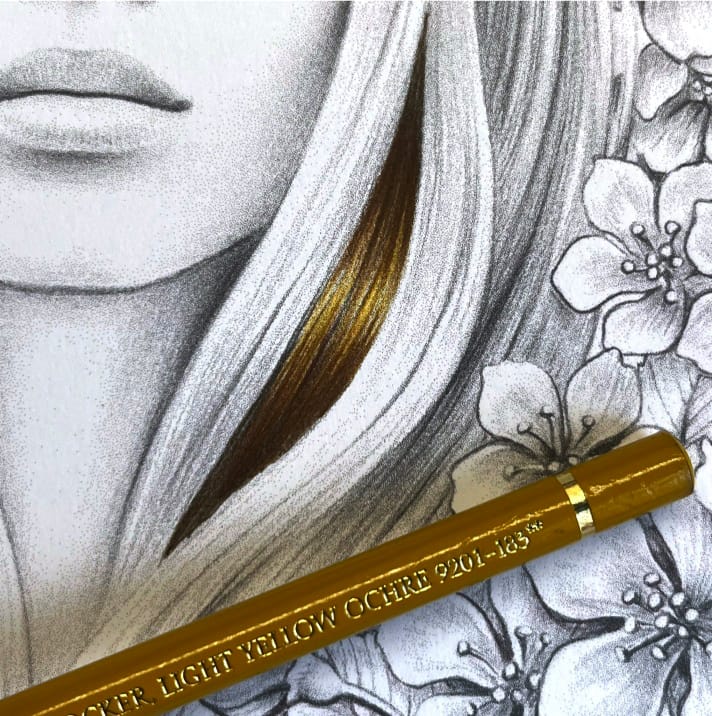
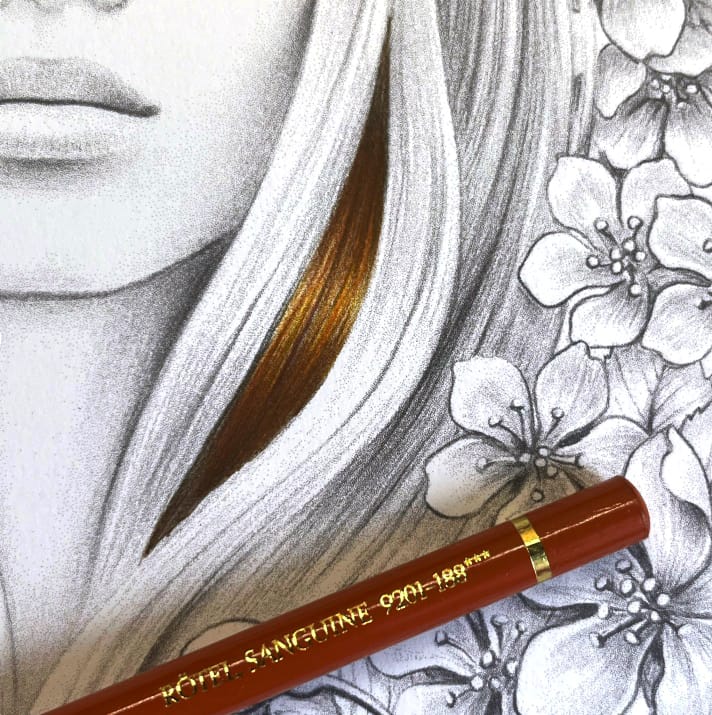
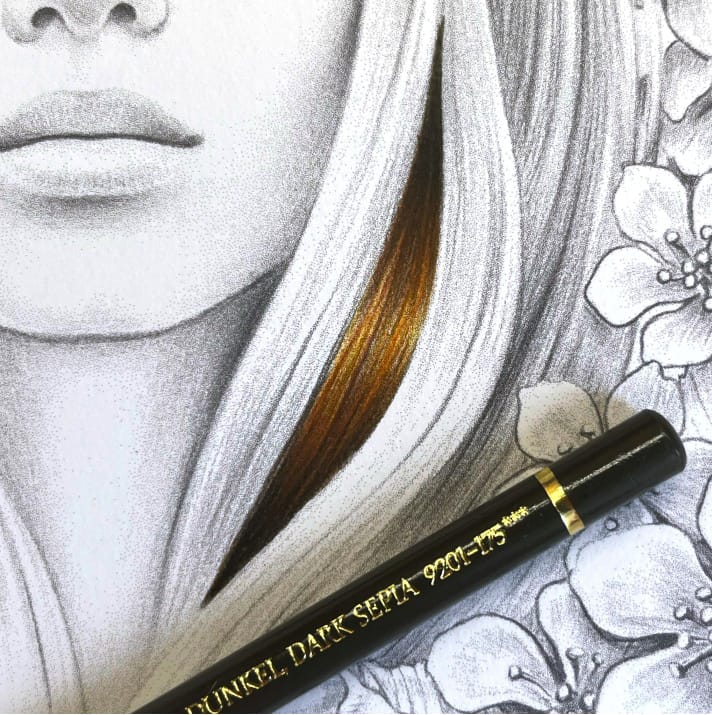
Then I chose a very dark shade for the deepest shadows, DARK SEPIA, and a golden yellowish shade for the highlights, LIGHT YELLOW OCHRE. These will be used sparingly as they are extremes of the brown I’m looking to achieve. Finally, to add a bit of fire, I’ll use SANGUINE in places here and there.
It is helpful to swatch out some different options to see which work best together because some browns are cooler (they have blue/green/purple and sometimes grey undertones), and some are warmer (red/orange/golden undertones). But how can you tell what undertone a color has? This is where you get into color theory, but don’t worry, I won’t dive all the way in! Brown undertones can be difficult to identify at first, but I like to differentiate them by thinking: does this remind me of fire or ash? Here’s an example with two different brown hair colors.
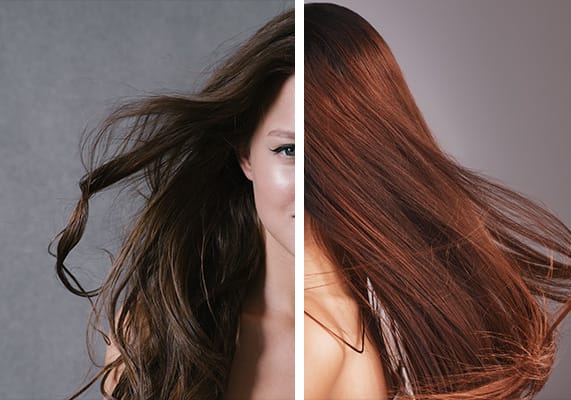
The hair on the left-hand side has intense tones of copper and burnt orange with some yellow ochre highlights – all warm colors that would invoke a description of “fire.” The brown on the right has none of that reddish intensity but feels cooler, smokier, and ashier. I’d say it’s mushroom, whereas the warm tone is cinnamon. Hopefully, some of that makes sense!
Okay, so now I’ve chosen my shades of brown, let’s get onto coloring!
Coloring Hair – Getting Started
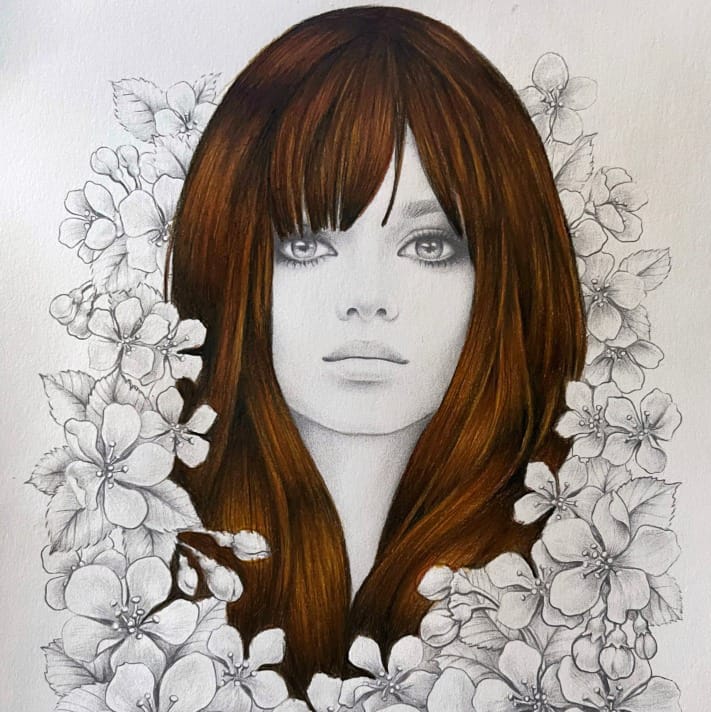
I’m using a coloring page by Mariola Budek for this tutorial. Her illustrations have some light shading, which is handy for beginner colorists to figure out shadows and highlight areas.
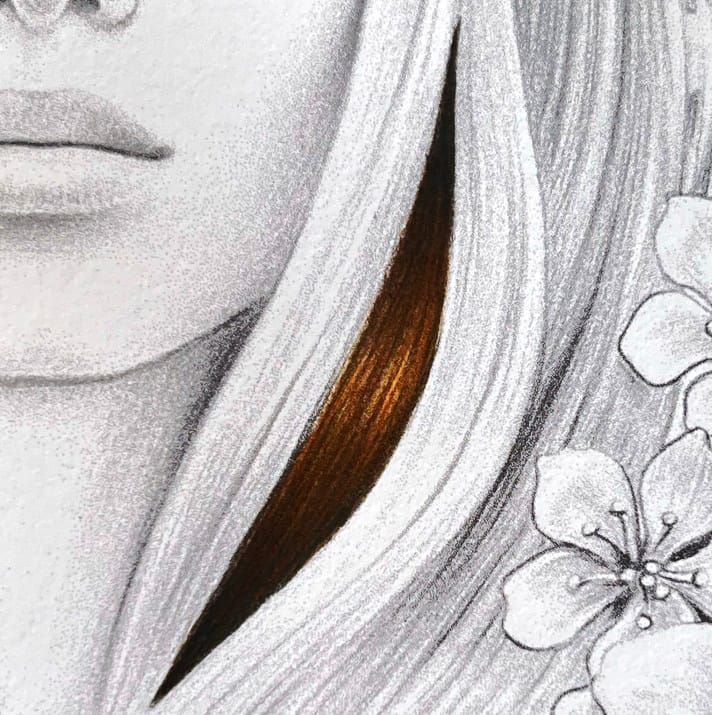
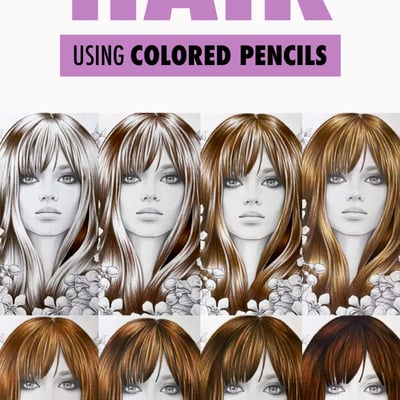
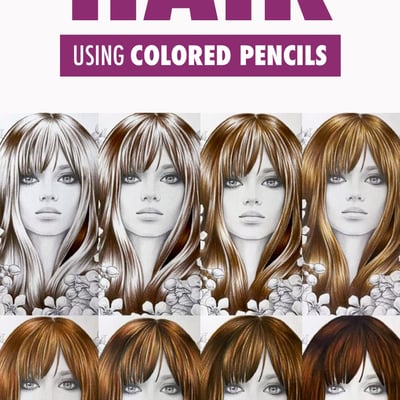
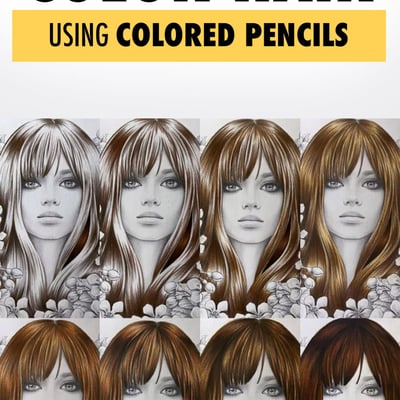
Choose a small section of hair to begin your coloring. Usually, the top and bottom area of the section will be darker, getting brighter towards the center where light hits the middle part of the curve, see steps below:
Step 1: Using Burnt Umber, use flicking motions to add some lines at the top and bottom of the section. Vary the length of each stroke so they are staggered rather than all being the same length.
Step 2: Using Burnt Siena, continue the same flicking motions, making sure your pencils are consistently sharp, getting closer to the center. Always keep the stroke length varied and try not to let your strokes meet in the middle yet.
Step 3. Do the same with Brown Ochre, getting closer still to that center point. Notice how some of my strokes are longer than others, but they still don’t meet in the middle.
Step 4. Using Light Yellow Ochre, continue the flicks but allow them to finally meet. This will be the lightest part of the section.
Step 5. Time to get some fire in there! Sparingly, flick some Sanguine strokes over the whole section. You don’t want to go too far, or it will end up being too red.
Step 6. Now, we’re going to deepen the shadows even further with Dark Sepia. Again, we want to be quite restrained with this color; otherwise, it can quickly take over and make the whole thing too dark. Add it to the very top and bottom of the section where we started with the Burnt Umber, always using flicking motions to keep the individual hair texture.
Step 7. Flick some Burnt Umber back in to blend out the Dark Sepia. Drag some of the lines over the centre highlight but be careful not to cover it too much.
That’s it! Now let’s finish all the hair in the same fashion…
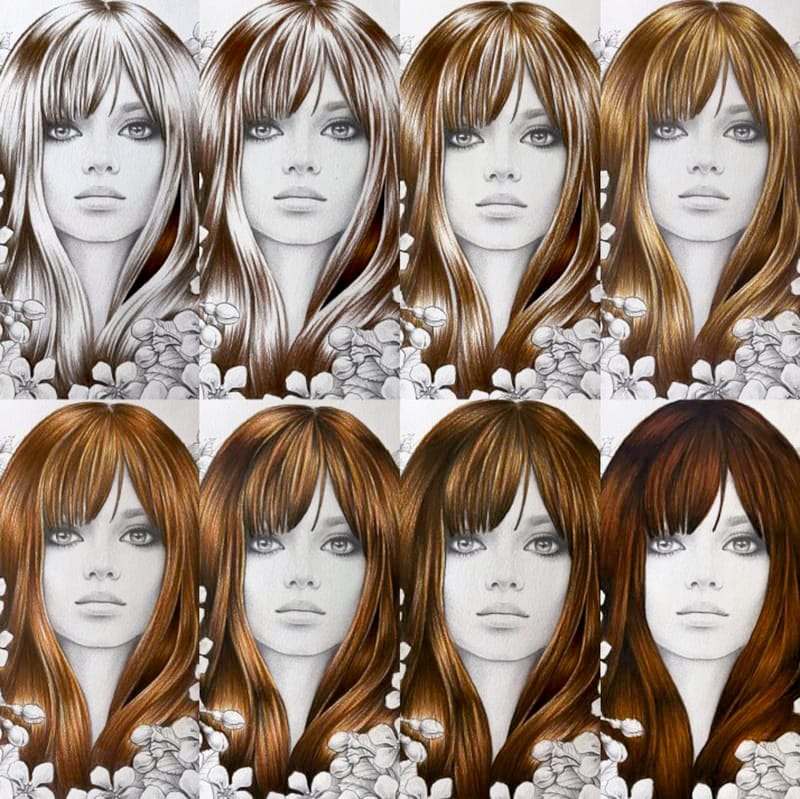
I hope you have found this tutorial helpful. You can use the same technique for any color hair, as long as you choose your highlight, mid-tone, and shadows, plus any extra tints you want in there (like I did with the Sanguine).
Have fun!
If you enjoyed this blog, you may also enjoy:
How to Blend Colored Pencils: The Best Method for Beginners
Blending colored pencils is a skill every artist should learn, and in this blog, I’m going to teach you the BEST blending method for beginners that I use almost every time I draw. You don’t need solvents, you don’t need extra tools – all you need is a set of pencils. Click here to read.
How to Use Colored Pencils in Adult Coloring Pages – 10 Tips for Beginners
You don’t need to be a professional artist to create something amazing, and in this blog, I’m sharing my top tips to help you get started with colored pencils so you can move past the confusing beginner questions and focus on the fun part of getting creative. Click here to read.
I Tested Every Colored Pencil to Find the BEST ONE!
… and in this blog, you will find ALL the results!
Of course, taking 90+ pencil brands through 11+ different tests (along with extra research on other factors) adds up to a LOT of information for one blog post. So I’ve broken it up into a (hopefully) easy-to-navigate mini website for you, where you can go on a mini journey to find the best colored pencils for any situation. Click here to read.
About the Author

Claire is a 35-year-old mum of two from the UK who has hosted her YouTube channel ‘Colour with Claire‘ since 2015. She is an enthusiastic colorist known for her vibrant coloring style and beginner-friendly tutorials. Her videos range from coloring techniques and reviews to art challenges and product comparisons, all with a focus on helping fellow colorists improve their skills and find inspiration.
![]()
![]()
![]()
![]()
![]()
@colourwithclaire
Love this, it’s similar to the blog I wrote a few years ago but focused on Prismacolor pencils more. Now using Faber Castell Polychromes. Well Done!