
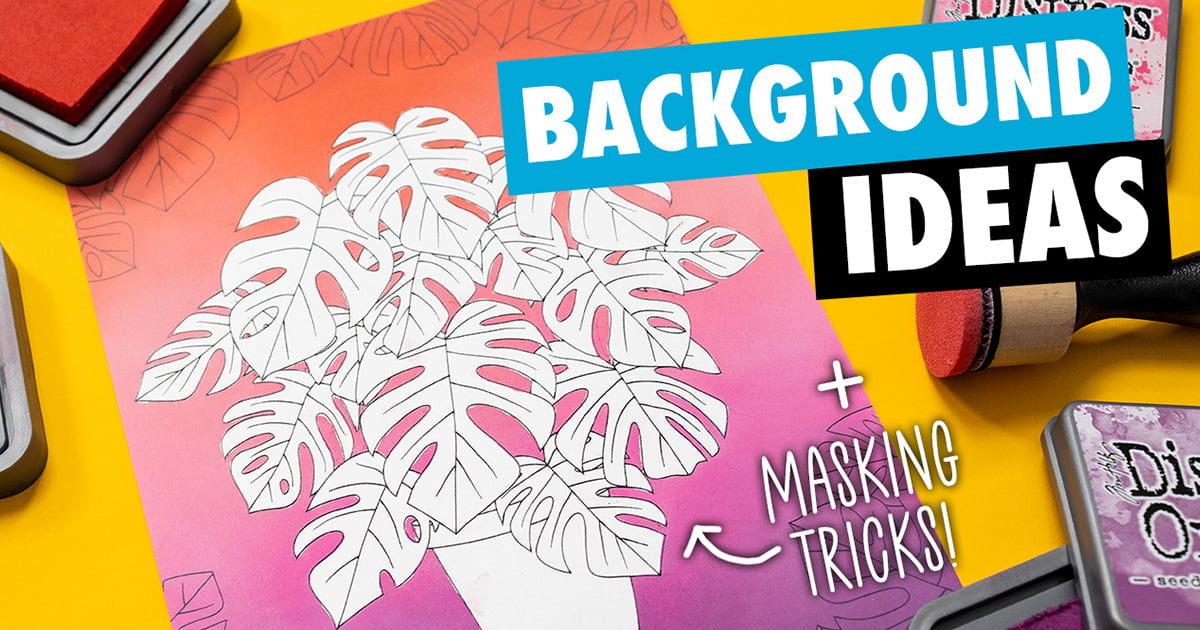
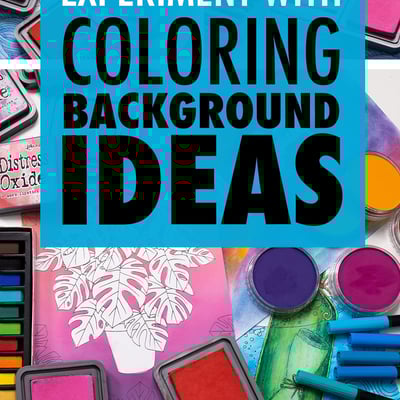
When it comes to coloring pages, coloring the background can be one of the most intimidating elements, because you’re often starting from a blank canvas.
I decided to explore some different ways to color backgrounds, such as pastels, ranger inks and a few other supplies as an alternative to my usual markers and pencils.
I also tried some different masking methods to create unique effects. Masking markers, tapes and fluids can be a great way to apply a whole bunch of different methods to the backgrounds of our coloring pages. You can see how each went in the video below!
This post contains affiliate links and I may earn a commission if you click them (at no cost to you).
Quick Steps to the Methods I tried:
Background:
Resources Used in This Video:
- 4 Collection coloring pages: Buy in my shop
- The Color Catalog: Buy in my shop
- Pebeo Drawing Gum Pen: Buy on Amazon
- Molotow Masking Marker: Buy on Amazon
- Masking Film: Buy on Amazon
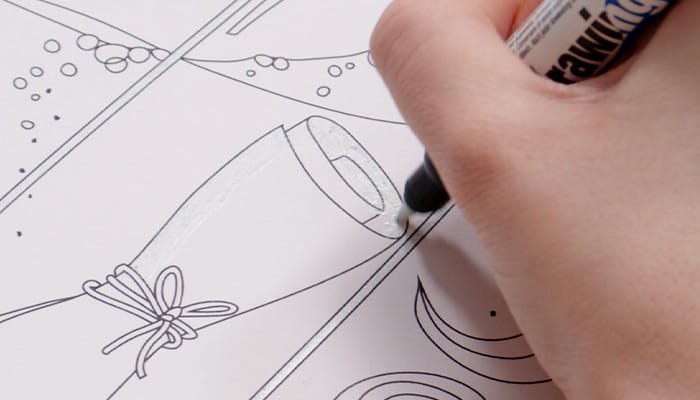
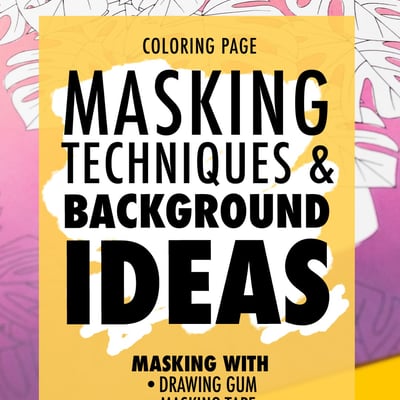
Masking with Drawing Gum
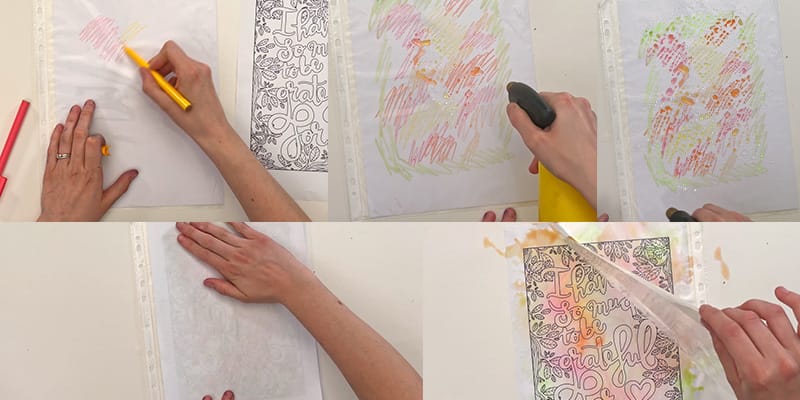
I started with the drawing gum that I was sent by Upcrate in one of their subscription boxes and chose a coloring page from my Nature Collection.
You activate the drawing gum, the same way you’d activate a paint marker and then simply apply it to the part of your coloring page that you’re trying to mask. The downside I found with this marker was that it dried very quickly, and it didn’t allow me to go over the same area twice. The gum built up quite a bit and then clogged up the marker slightly. Coloring large areas of the page didn’t seem to be what this marker had been designed for, but it was definitely effective for the finer details.

Buy drawing gum on Amazon

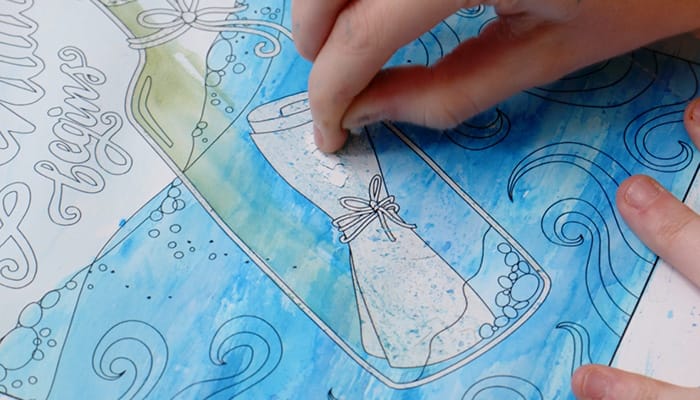
Background with Tombow Markers + Water
Because the page I had chosen was a water theme, I wanted to try a creative water background and because we’re using the masking, I wanted to try something that we couldn’t traditionally do if we weren’t. I previously did a 5 Minute Crafts video where I used markers and water to create an interesting, watercolor-style effect. (You can watch that HERE) It didn’t quite work out the first time…
But I wanted to try it again.
I took all of my different blue-toned markers and colored them onto a plastic sheet. The ink didn’t absorb into the sheet at all, which is the desired effect because when I added a little water, it allowed me to transfer the marker ink to the page. It didn’t quite give the effect that I wanted so I tried the markers without the water but I wasn’t really happy with this result either. I did notice, however, that the paintbrush that I had used to mix the colors picked up a lot of the ink and was performing a lot like a watercolor paintbrush. So a combination of these techniques seemed to be the way to go… but my personal preference was to use the paintbrush with the marker ink and paint it directly onto the page.
It’s important to remember that if you’re using wet mediums like this, you need to use a thicker paper. I used a mixed media paper and even that buckled a little under the moisture, so a watercolor paper might have been a better choice. Remember paper choice matters and you can check out my paper comparison video HERE
When it came time to take the masking off, I just rubbed off the masking gum and then continued over the top with the marker ink and paintbrush. This was an effective masking agent for sure, but better designed for small areas and finer details.

Buy Tombow markers on Amazon

Masking with Molotow Art Masking Liquid Pump Marker
Next, I used the Molotow Art Masking Liquid Pump Marker. This was also a little bit like a paint pen, but unlike the drawing gum, the Molotow had a soft tip. The tip was also a bit thicker, and the liquid came out quite blue in color, so I was keen to see if this was easier or harder to use. Like a paint pen, I gave it a good shake, primed it, and then was ready to draw.
The instructions indicated that instead of rubbing off the masking liquid, this masking needed to be peeled off, however, this was harder to do than I expected. When I did try to rub it away, it removed the top layer of my paper and some of the line work on the page. Luckily I had only done a small portion of my page! When I tried it on other papers, I got mixed results, so my suggestion is to definitely test this marker before you commit to using it on a large art piece.
My last attempt was to use the Molotow Pump Marker on my Strathmore Bristol paper and use a lightboard to transfer my artwork onto the new paper. This lightboard was just a $20 one I grabbed from Amazon and it was the perfect board for tracing something like this project. I just traced straight onto the new paper with the Molotow Pump Marker easily.


Buy Molotow Masking Marker on Amazon
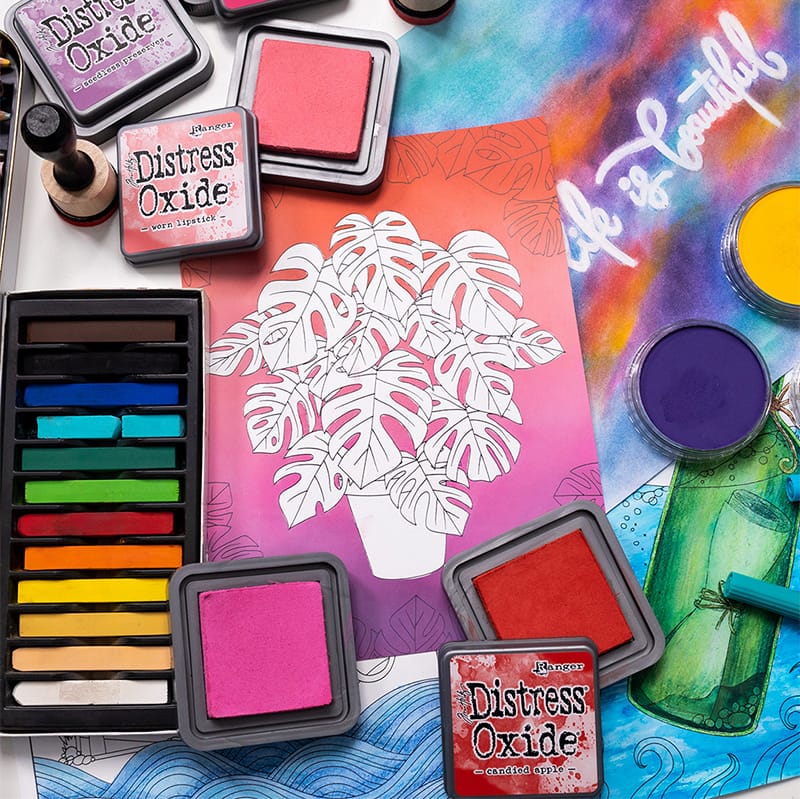
Background with Pan Pastels
I received my pan pastels as a Christmas gift and I’d been waiting for an opportunity to use them. I chose a palette from the Color Catalog that I thought would be a great use of the colors I had. I wasn’t familiar with this medium, but I experimented with blending and combining what I had, using the stick applicator.
The pan pastels did a great job and created a really vibrant background but when it came to unmasking, the Molotow Masking Fluid pulled up the paper yet again and the rubbing affected the pastel background. Ultimately, it was the wrong masking technique to use with this background method and I ended up fixing the lettering with my Posca Paint Pen and some pencils.
So far the masking pens I’d tried appeared to be made for watercolor art so they just wouldn’t work in the way I had hoped for coloring pages. They both took a long time to apply and they both ripped up the paper during the unmasking. They’d both created effects that I probably could have created with pencils or white pens. But I had more methods to try!
The next one on my list was another masking fluid but based on my first trials, I decided to skip this and go to something completely different.
Buy PanPastels on Amazon
Original Frisket Masking Film
There are two ways to apply this product to your page, I decided to stick the film down first and use an artist’s knife to cut out the pattern. The film was quite thin of course, so I had to be very careful not to cut through to the artwork. The other method is to trace your art onto the film and cut it out before you apply it, almost like a sticker. It’s up to you which method you want to try, maybe try both and see what suits you.
It was great that the masking film had a glossy finish as this made it easier to see which parts I’d cut out and which parts were the paper underneath.

Buy Masking Film on Amazon
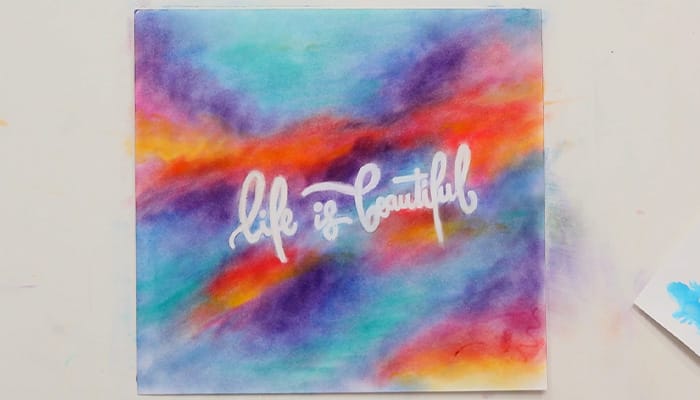
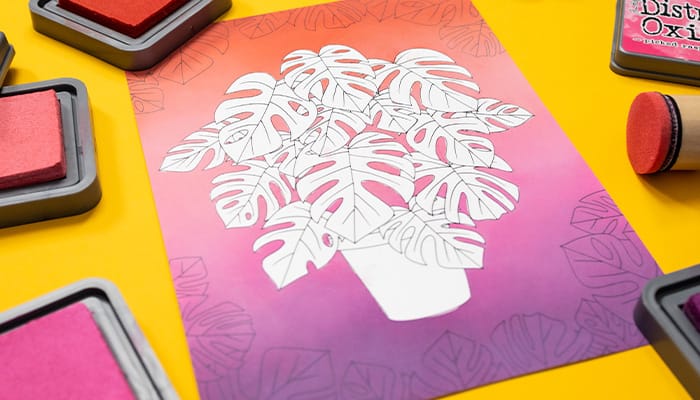
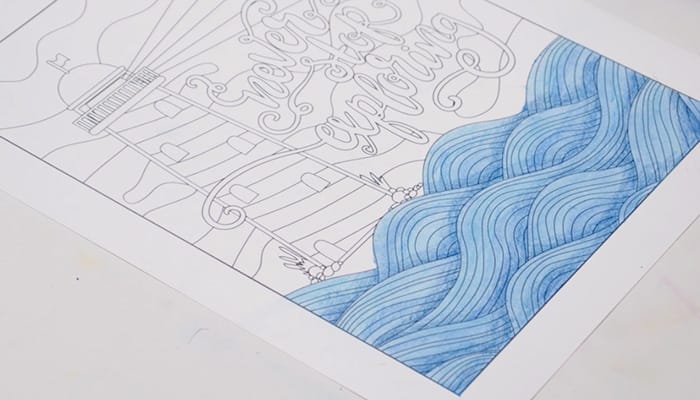
Background with Ranger Inks
This was another completely new medium for me, so this was the perfect chance to experiment. I applied the ink dry, straight onto my page with the applicator, and found that the color laid down really smoothly. I also found that the colors blended really well together and were not messy like chalk pastels – while still giving the same look.
I was super impressed at how well the ranger inks filled the background of my coloring page with beautiful vibrant colors and how easy it was to create a gradient from one color to another with such little effort.
Peeling off the film was really easy too. There were no tears in the paper and the film did a fantastic job of keeping the area underneath clean. I think it’s fair to say, this was my first success! I’m happy to recommend these two methods for coloring pages but always be sure to test your film first, just in case.
Buy Ranger Distress inks on Amazon
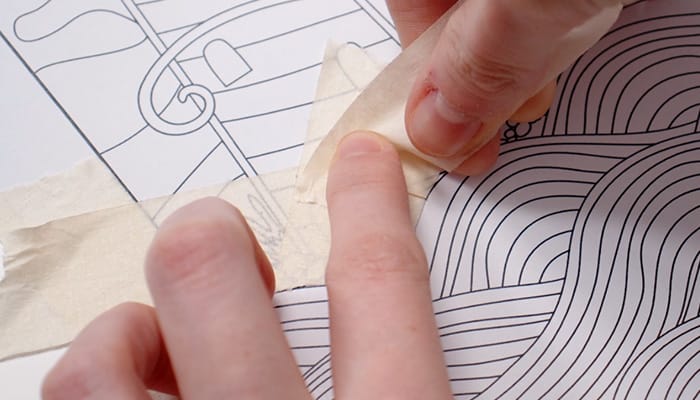
Masking with Masking Tape
For my last experiment, I used masking tape and washi tape. Washi tape was a more expensive method because it’s designed to be decorative. But if you have some spare, it’s perfect, because it is a low-strength adhesive so it’s not going to rip up the paper. But like everything else, not all tapes are suitable for paper so be sure to test it first before applying it to your art.
You can use tape in curved areas as long as you work in small sections, make cuts when you need to and just work around the edge. This method is not ideal for fine details like some of the previous methods. Like the film, you can put it down and then trace and cut it, or you can fold it and cut it to get around curves, which is what I did.
I used both painter’s tape and washi tape on this page and I found that the artist knife method worked really well for getting an accurate edge, so it was worth getting used to. Just be careful! If you’re not comfortable cutting, just fold around the edge and don’t worry about the creases, as long as your edge is straight.


Background with Soft Pastels
I found a set of basically new Mungyo Soft Pastels in my Mum’s old art supplies. She bought them in 2008 and I didn’t know if pastels age, but they made for a really great base underneath my pencils.
When it came to unmasking, both the masking tape and washi tape worked really well and this is a great method because it’s something that most people have laying around at home already. The tape was cheap to buy, easy to apply, and easy to take off so I’m counting that as a win!
Buy Mungyo Soft Pastels on Amazon
Ultimately I had some wins, and some fails, but I hope that you got some new ideas here.
I think I will stick to the tape or film for my pages. They were the most reliable for masking and safest on all types of paper.
My favorite products to use were definitely the Ranger Inks and the Pan Pastels, and I plan on using those more underneath my colored pencil projects moving forward.
If you’ve got some other ideas for coloring page backgrounds, make sure to comment below to share them!
Want More Background Ideas?
I have a great collection of videos and articles all about creating backgrounds if you’d like even more ideas. Some even have step-by-step instructions so you can recreate some of the effects!


Eye Shadow works wonders . Cut up a scrub daddy into cubes, rub on the eye shadow, perfect. buy the shadows cheap at the dollar store.
Ty
Hi. Thank you for all your comparison work on colored pencils. I’m wondering about Prang colored pencils vs. Prismacolor colored pencils, can you please give me your take? Thank you in advance for considering my comment.
Hope you do not mind me replying to with what i think of the Prang colored pencil range.
In my opinion do not waste your money on these cheap and nasty pencils they are the worse ones out there they do not blend they smudge very easy and the pigment is rubbish and patchy,(i wouldn’t even purchase these for my kids) I could go on but we would be here all day lol,
I LOVE Prismacolor colored pencils ( they are in my top 3 favs) Yes granted a little bit pricey but so worth the extra few pounds and a must have for any budding artist,( im sure others will agree!
They are easy to work with, Very vibrant unique colors ect, So with xmas (yes i did mention xmas lol ) coming up treat yourself to a nice set you wont regret it and they will be your number 1 pencil for years to come.
Happy coloring.