
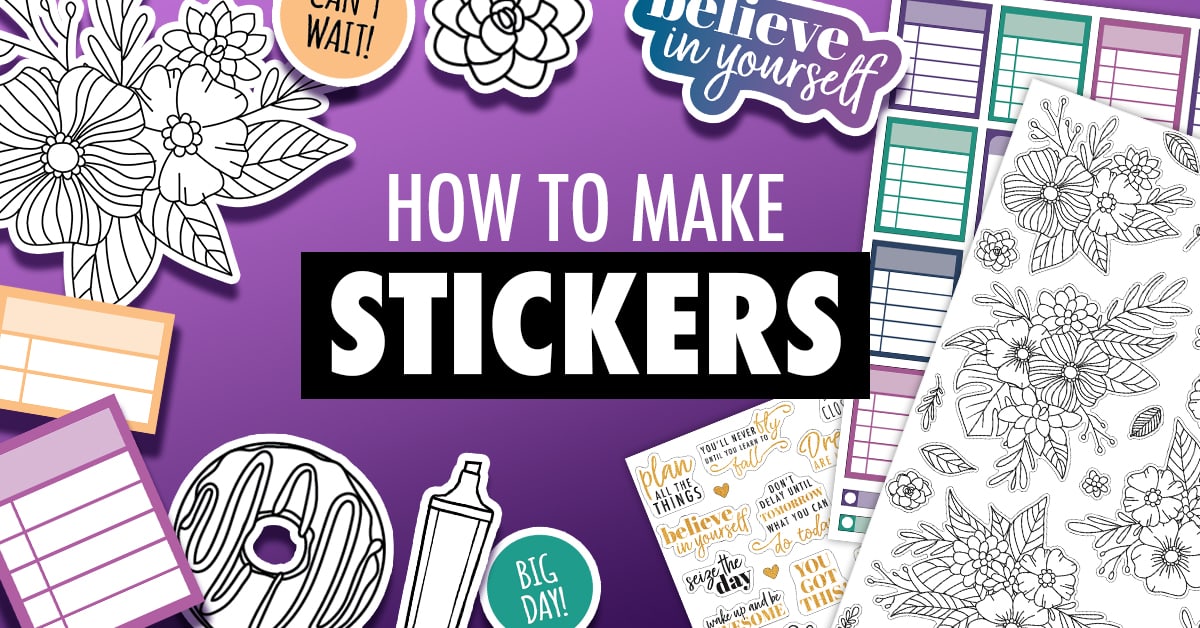
Today we’re making stickers!
I’m going to walk you through exactly how to make your own planner stickers, either using a printable sticker pack you’ve purchased or even using your own artwork – and how to cut out your files for a professional finish using a professional die-cutting machine, such as a Cricut Maker® or Silhouette Cameo®.
Check out the full video walkthrough below, and then scroll down further for a step-by-step guide and access to my range of printable stickers (+ FREE Valentine’s Day stickers!)
Note: This content is NOT sponsored or endorsed by any of the brands mentioned in this post or video, however I was provided the Cricut Maker® for free by Cricut Australia for a previous video. This post contains affiliate links and I may earn a commission if you click them (at no cost to you).
Jump Ahead: How to Cut Stickers with a Silhouette | How to Cut Stickers with a Cricut
What is a Printable Sticker?
In my shop, I sell 3 different types of stickers: physical stickers, digital stickers, and printable stickers.
Physical stickers are sticker books or packs that are sent to your door, just like the stickers you’d buy in a brick-and-mortar shop.
Digital stickers are like clip-art, saved with a clear background that you can use in almost any software. These are designed mainly to use in a digital planner, but you can also use them to decorate your school projects, word documents, or even in digital scrapbooking.
But today, we’re talking about printable stickers.
These are like a DIY sticker kit that you can print out to create your own planner stickers – and you can print them as many times as you want, making them a perfect option for savvy planners. You can cut them by hand or use a die-cutting machine (Cricut or Silhouette) to give them a professional cut.
You can find a huge selection of printable stickers on websites like Etsy or on planner blogs, and I’ve got a growing range on my own website. You’ll only need to purchase the files once and keep a stock of sticker paper, and you’ll have an endless supply of stickers, without waiting or paying for postage.
And if you’re feeling ambitious, you can even make your own stickers from your own artwork. But more on that later.
What is the Best Sticker Paper to Use for Printable Stickers?
There are a lot of options when choosing the right paper to print your own stickers. So to keep things simple, I recommend looking for a matte finish sticker paper that comes in a full sheet, either A4 or US letter size.
You can buy glossy or even clear sticker paper, but If you’re wanting to write or draw on your stickers (which is often the case with planner stickers) avoid anything with a glossy finish. Instead, look for the word “matte” to find something more like a normal paper texture, but with the sticker backing.
And size. Choose a paper size that fits your printer, but also, avoid paper that has pre-cut lines, like label sheets. We’ll be cutting these ourselves, so we want a full-page sticker with NO cut lines.
Here are a few sticker paper options that you can purchase online (Note: I haven’t tried these brands personally, but they have been recommended by many other crafters):
Matte stickers:
- Avery Matte White Sticker Paper, US Letter 8.5 x 11″
- Online Labels White Matte Sticker Paper, US Letter 8.5 x 11″
- Avarrix Matte Sticker Paper A4 (Australia)
- Avery Matte White Full-Page Labels, A4 (Australian site)
Other types of stickers:
How Do I Cut Printable Stickers?
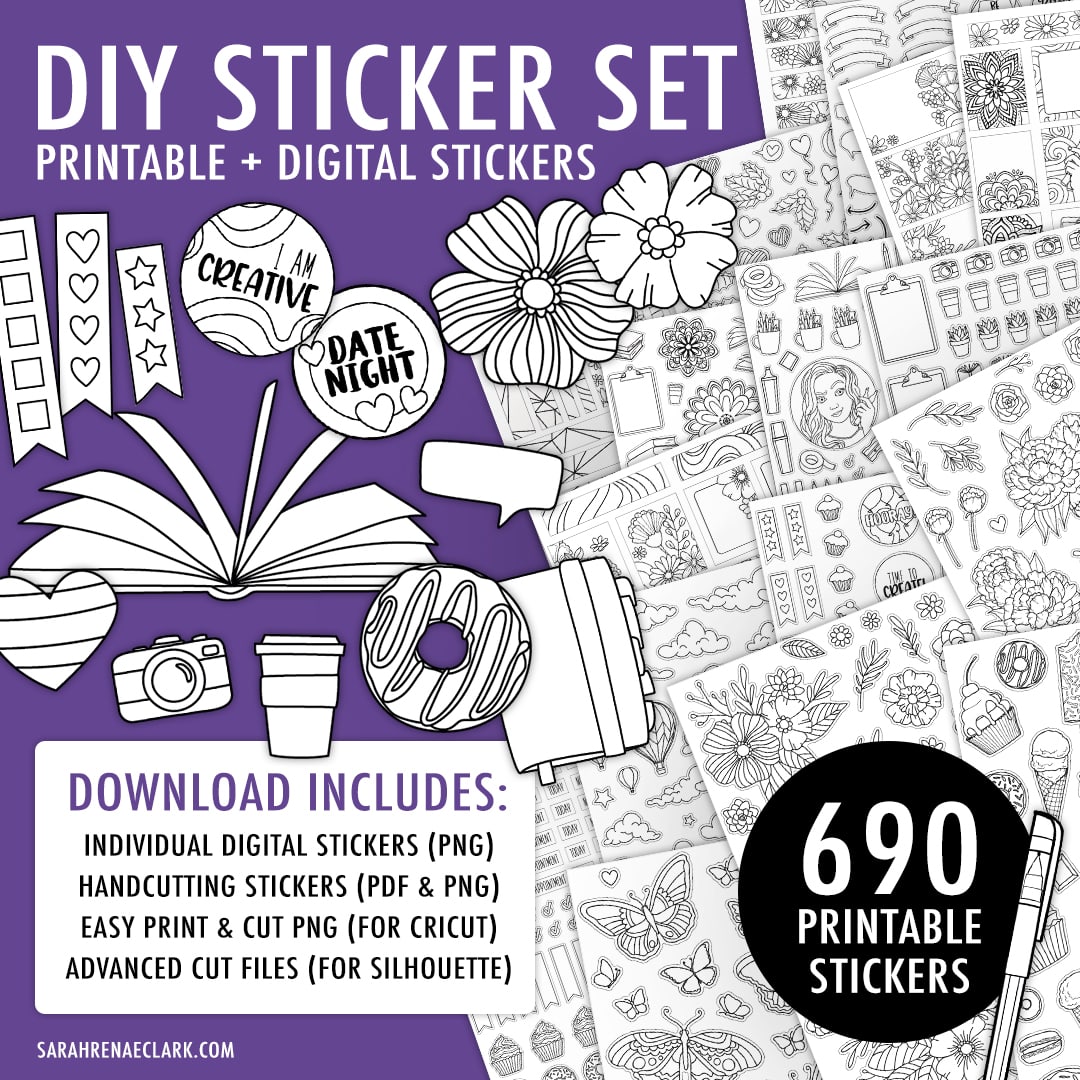
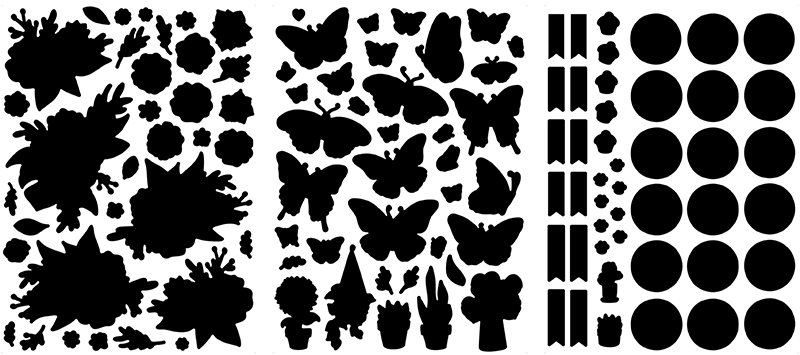
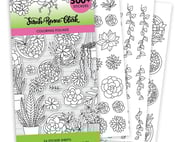
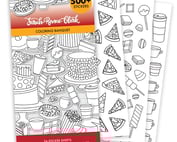
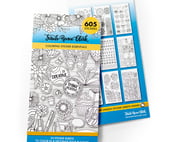
In the video and the below examples, I’m using the Coloring Essentials Printable stickers.
These are inspired by the Coloring Essentials Sticker Book, but the pages have been reformatted to fit more stickers on less pages for at-home printing.
Option 1: Cut Your Stickers by Hand
Most sticker sets come with a simple PNG or PDF version that you can print and cut by hand.
They don’t usually have any extra bleed or machine cut lines (which I’ll explain in a moment), and are the easiest version to use if you’re unsure what everything else is.
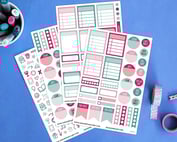
With my sets, the hand cutting files include a white border and thin guideline so you can easily see where to cut out each sticker, and the boxes are the perfect size for your coloring planner and the same width as many other popular planners.
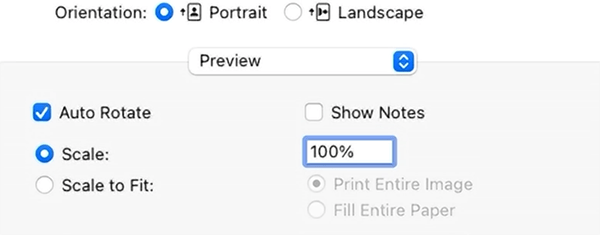
All you need to do is print your files on sticker paper at 100% scale, DO NOT scale to print.
Option 2: Cut Your Stickers with a Die-Cutting Machine
Then we’ve got our professional cutting files that you can use with a die-cutting machine like a Cricut Maker® or Silhouette Cameo®.
I’ll go through the process below with each machine.
A quick note: If you purchased my stickers before 2022, your files might look a little different to what I’m showing you, so if you’re missing a particular file for the machine you use, feel free to email my support team and they’ll email you the updated files.
Which Machine is Best for Cutting Stickers?
I love my Cricut Maker for so many projects, but when it comes to printing stickers, the Silhouette Studio® has a number of features that give it an advantage.
When I get my stickers professionally printed, I spend a lot of time creating the perfect cut line files to make sure every sticker is easy to peel, with no awkward corners, and with the perfect amount of white space around my stickers.
But my box stickers don’t have white space – they have what we call a bleed.
The bleed is the artwork that prints around the edge of the sticker, beyond the cut line, so that you don’t accidentally end up with a white edge along your artwork. Even the most professional industry-level machines don’t always make perfect cuts, so professional artists sometimes include a small bleed around artwork to avoid white edges along brochures, business cards, stickers, or just about anything you’ve ever seen printed.
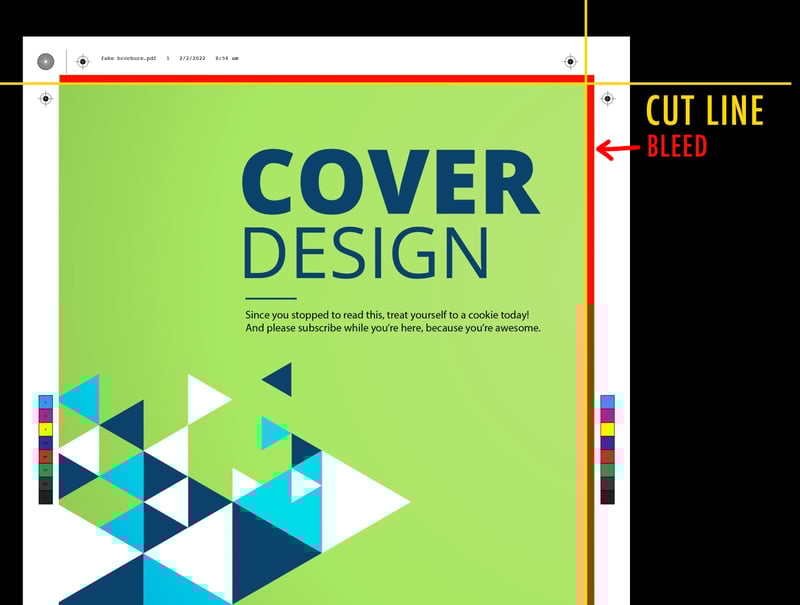
So in your sticker files, I have included cut files with the correct bleed you can create a quality cut on your stickers at home. The cut file is sometimes referred to as a blackout file.
Now, it’s confession time. Until this week, I was completely under the impression that Cricut could work with the same cutting files that I’ve been providing for the Silhouette.
But I’ve spent HOURS trying to find a way to keep the bleed AND the cut lines – and this is NOT as easy as it should be. Cricut is designed to print and cut from a single image, and it doesn’t like me trying to give it a cut layer separate to the artwork layer.
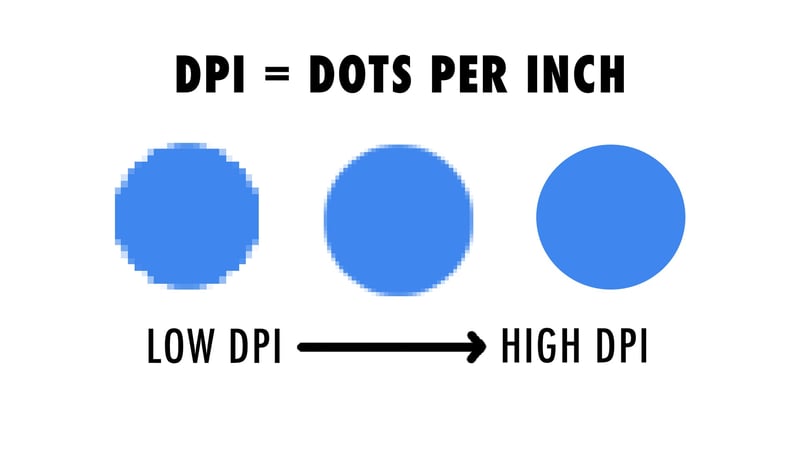
I LOVE my Cricut. But when it comes to stickers, I’m feeling a bit let down in their ability to take a simple art file and a simple cut file. I was also surprised to find that the Cricut Design Space® only works in a DPI** suitable for screen, not for printing.
So print-quality images come in 2-3x their actual size onto the canvas. I’d like to see Cricut resolve this to allow for higher quality printing, but in the meantime, it just means resizing the files when you import them.
**For the non-graphic designers watching, DPI tells the computer how many dots or bits of artwork to fit in every inch of space. Your computer screen only uses 90 dots per inch. But printers use 300 dots per inch, sometimes more. That’s why that picture on Facebook might look blurry when you try to print it out on photo paper.
So, after hours of troubleshooting, calling customer support, and calling in some help from my friend and sticker-making expert, Mim Jenkinson, I’ve redesigned my sticker files to work around these limitations and make the cutting process MUCH simpler with the stickers in my shop.
For the average user, the Cricut still does a great job. But if you’re wanting to open a sticker shop (and if so, my friend Mim has a free workshop to help you!) I’d suggest that a Silhouette might be a better choice.
But let’s look at the process with both machines. I’ve also included the next section of information in my Printable Sticker Help Guide that you can download for quick reference.
How to Cut Stickers with a Silhouette Cameo® (Part 1)
What You’ll Need:
- Silhouette Studio® installed on your device
- Silhouette Cameo®, Silhouette Portrait®, or similar machine (Visit the Silhouette website)
- A separate printer
- Sticker paper (I recommend a matte-finish paper, sized A4 or US Letter)
- Advanced Die-Cut sticker files OR .Studio3 Silhouette Studio® Files
NOTE: If you already have .studio3 Silhouette file for your sticker page, you can skip ahead to How to Cut Stickers with a Silhouette Cameo® (Part 2)
How to Set Up Your Sticker Files in Silhouette Studio®:
1.In Silhouette Studio®, open up a new project, open up the Page Setup Panel by clicking the top page icon on the right side of the screen.
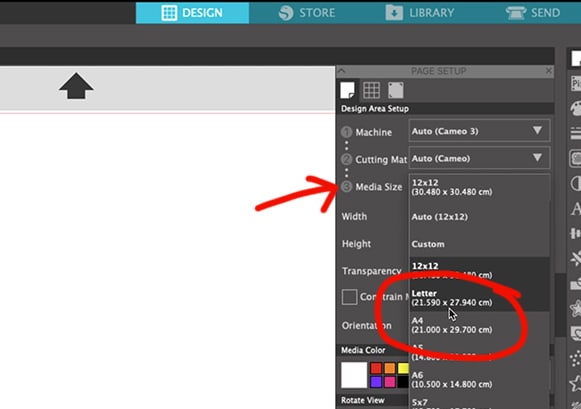
TIP: If you can’t find it, click VIEW, then SHOW DESIGN PAGE SETTINGS.
Then set your media size to the size of your paper.
This will be either A4 or US Letter. Both are suitable, so choose whichever works for your printer and the sticker paper you have purchased.
2. Open up your LIBRARY view. The best access to the library is the small button at the bottom left of your screen, because it will open up the library side-by-side with your design area, making it easier to drag and drop your files into your project in the next step.
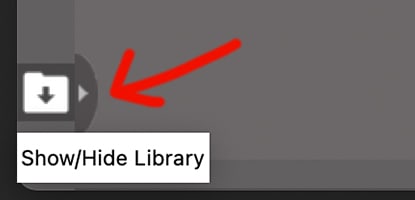
3. Import your sticker files into the library. This is where you can store all of your images and cut files for quick reference. You can import them all at once if you drag-and-drop from your files program. Make sure you include both the art-layer and cut-layer for each sticker file.
Or, you can go to File – Library – Import to Library.
4. Then, drag the CUT-LAYER file from your sticker page from your library onto your mat in the design area. It can be a bit slow, so hold your mouse and don’t let go until it loads and you can see the image. Place it anywhere for now. (We’ll line it up later) and hide your library.
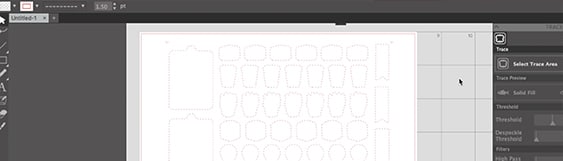
5. Select your cut layer, and open the TRACE PANEL on the right side menu.
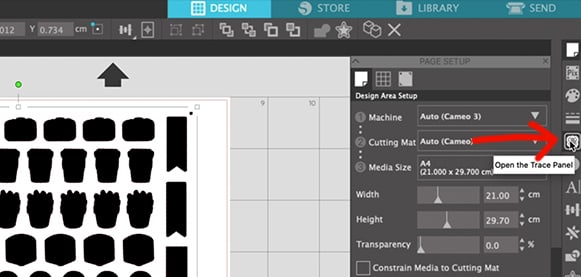
6. Click SELECT TRACE AREA, draw a box around the entire page, and click TRACE.
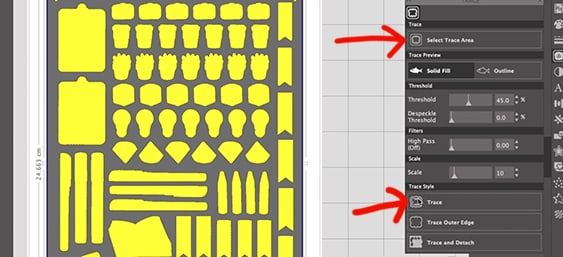
There should now be a fine red line around all of the black sections. (It might look slightly different based on your program settings.) But these new lines are your cut lines.
7. Delete the black layer (so it doesn’t print) so only the cut lines are visible.
8. Open your library again, and drag your ART LAYER onto your design space in the same way you did in steps 2-4.
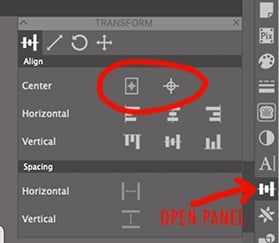
9. Once you’ve added the artwork,select the artwork AND cut lines and use the align or centre tools to centre them with each other and the page.
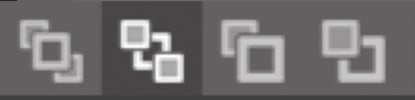
To do this quickly, click both icons circled in this picture in the TRANSFORM PANEL. These icons also appear across the top menu when you select more than one item.
TIP: If your artwork is on the top, you use the arrangement buttons to send it to the back (or bring the cut lines to the front) so you can see that your cut lines are in the right place. You’ll find these buttons in the top menu when both layers are selected.
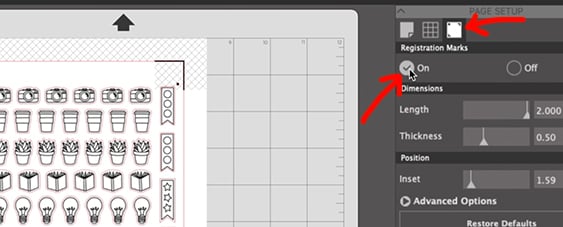
10. Finally, turn on the registration marks. This will help your Silhouette to line up the cuts with your printed artwork perfectly.
11. You can now save this file as a .Studio3 file, and skip these steps if you ever want to reprint this page of stickers. We’ll use the .Studio3 file to print and cut these in the next section below.
How to Cut Stickers with a Silhouette Cameo® (Part 2)
If you already have a .studio3 file for your stickers, start here. Otherwise, head back up to PART 1 to learn how to create this file using the cut layers and artwork layers from your sticker purchase.
How to Print & Cut .studio3 Files with a Silhouette Cameo®: 1. First, load your sticker sheet into your printer, then go to FILE then PRINT.
2. Line your printed sticker sheet onto your cutting mat in the top left corner, and turn on your machine. In Silhouette Studio®, press SEND. (Or go to FILE, then SEND TO SILHOUETTE)
3. Choose the kind of paper you’re using, in this case – just a white sticker paper, and set the blade depth. This might vary depending on your paper brand, so try the default setting first and adjust it lighter or heavier if it cuts too deep or too shallow. Ideally, you want the cut to go through the sticker completely but not through the backing sheet (this is called a kiss cut)
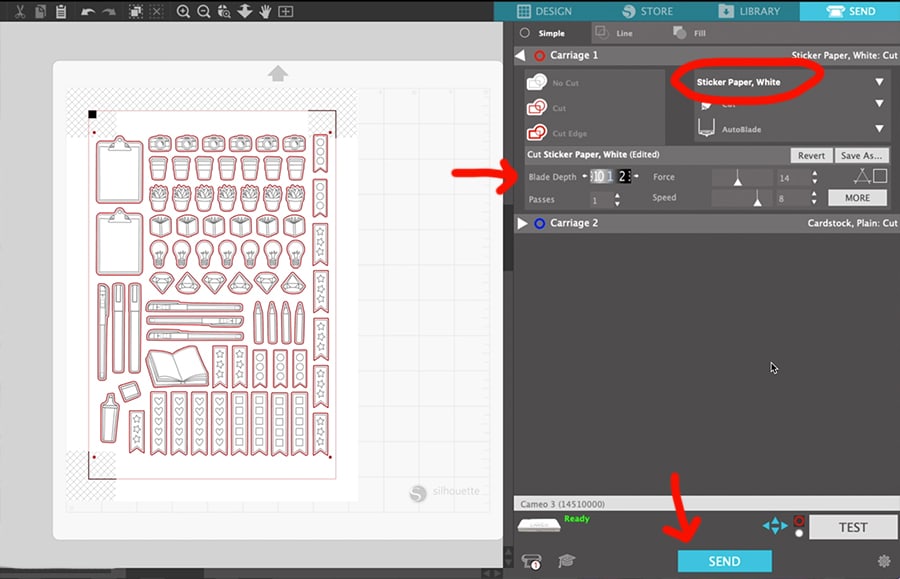
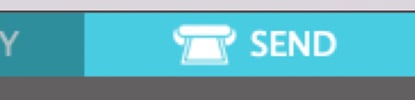
4. When your machine is ready, and your paper is loaded, press SEND to start cutting.
Once you’ve learnt these steps, the process will feel much easier and quicker to repeat and you’ll be able to print as many stickers as you want.
How to Cut Stickers with a Cricut Maker®
What You’ll Need:
- Cricut Design Space® installed on your device
- Cricut Maker®, Cricut Explore®, or similar machine (Visit the Cricut website)
- A separate printer
- Sticker paper
- Easy Print & Cut sticker files (provided in your printable sticker purchase)
How to Set Up Your Sticker Files in Cricut Design Space®:
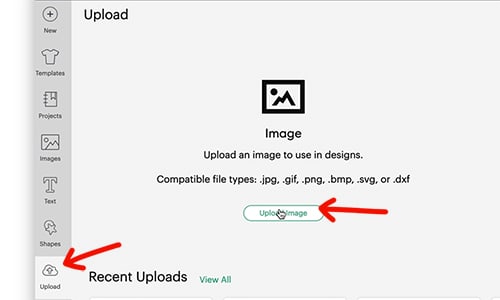
In a new project, click UPLOAD and UPLOAD IMAGE. Then select the Easy Print & Cut sticker file.
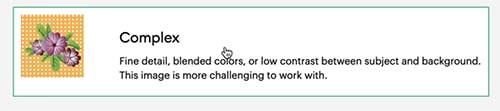
2. On the next screen, select COMPLEX IMAGE and click CONTINUE.
3. This will take you to the BACKGROUND REMOVER, where you can remove certain elements or a white background from your stickers. If you’re using the Easy Print & Cut sticker files, you can skip this section. Just press APPLY & CONTINUE in the bottom right corner.
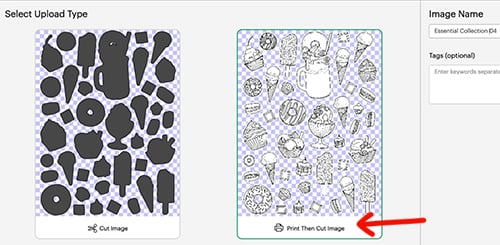
4. For Select Upload Type, choose PRINT THEN CUT IMAGE and name your image (or leave the default name), then press UPLOAD.
5. You should now see your new sticker file at the top left in your Recent Uploads on the screen. Select it and click ADD TO CANVAS.
6. This is where the image will almost always come in much bigger than it should be. Cricut will only print up to 9.25” x 6.75” (17.145cm by 23.495cm). Resizing is easy – select your imported artwork, and changed the W & H (Width and Height) at the top of the screen.
TIP: Depending on your location, this might be shown in inches or cm. A quick way to find out is to hover over the alert icon that will show up when you first import the picture at the larger size. It will use the same conversion as the software is currently running.
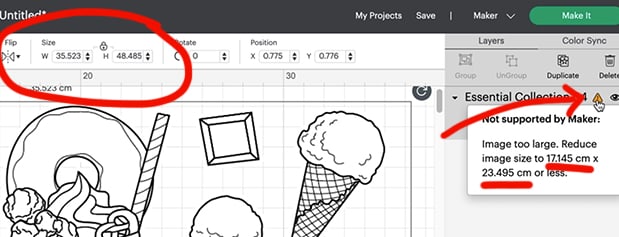
All of my sticker files (as of 31/1/22) are sized 9.25” x 6.75” (17.145cm by 23.495cm) exactly.
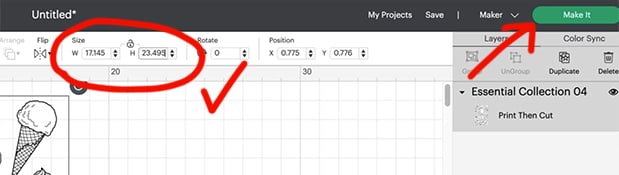
Sometimes keeping the size proportions ‘locked’ in Cricut changes this by a fraction (which is unusual) so I personally choose to unlock the proportions and enter both the width and height manually.
If you’re unsure, you can always print the page from here on normal paper to see how it compares to your Planner pages before printing it on your sticker paper.
7. Once you’re happy with the size, press MAKE IT. Turn on your printer and Cricut Machine.
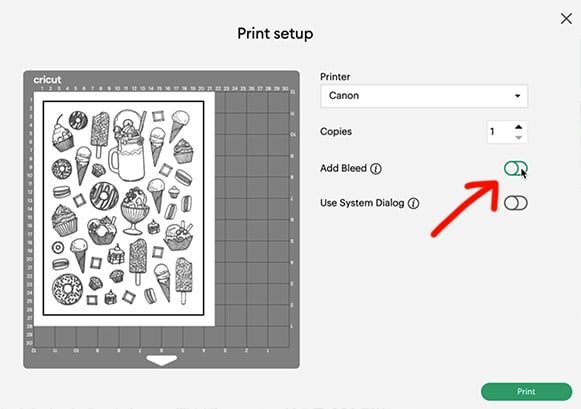
8. From here, you can load your sticker paper into your printer and press print. Make sure you UNCHECK the ADD BLEED box in the print setup before you print.
9. Line up your printed sticker paper in the top left corner of your Cricut mat (to match the image above on the print setup screen) and load it into your Cricut Maker® or Cricut Explore®.
10. Set your base material – I recommend either the Printable Sticker Paper (White) or Sticky Note settings as a good starting point. From here, you can adjust the pressure – although I’d suggest trying the default settings first. The pressure required will vary depending on your brand of paper. Ideally, you want to cut through the sticker layer, but not the backing layer, making the stickers easy to remove but keeping the whole sheet together. This is called a kiss cut.
11. Follow the on-screen prompts to load your tools and get your Cricut to start cutting! You can save your project in Cricut Design Space® to come back to anytime for quicker access to reprint this same page of stickers whenever you run out, without needing to go through the import & resizing steps again.
Free Valentine’s Day Planner Stickers
If you want to give this a go, you can download my free set of Valentine’s Planner stickers below, or check out my other range of printable planner stickers here! They’ll all been reformatted in 2022 to fit more stickers on less paper, and the digital files are included as well.

How to Design Your Own Planner Stickers
Once you’ve got your head around how to cut these printable planner stickers, if you’re ready to get a little more creative, it’s time to look at customizing these or creating your own.
You can use almost any design program to create basic stickers. They might not be as fancy as some of the ones you see artists sell, but they can be a great way to bring some of your own art or personality or even just customize your planner a little more to your own needs.
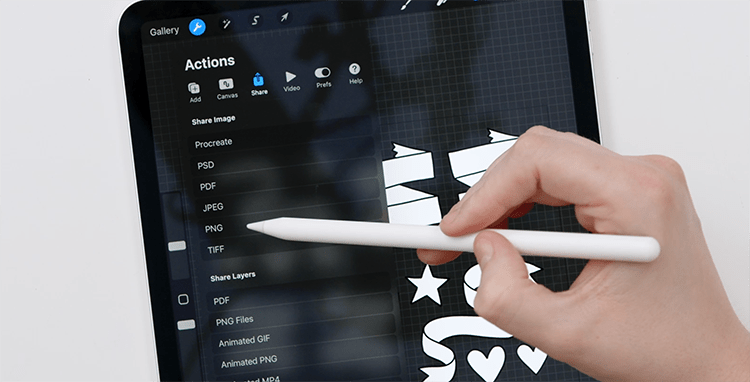
You can use Procreate on the iPad, Canva, the Silhouette or Cricut design studios, or if you’ve got the budget and skills, any of the Adobe programs. All of my stickers are designed in Adobe Illustrator, but that’s because I do this at a professional level and print in bulk. This is definitely not necessary if you’re designing stickers for your own use or just starting out.
Whatever you choose to use, draw or design your stickers in a workspace that’s the dimensions of your paper and 300 DPI – this is the print resolution you’ll need for your stickers to be high enough quality to print on paper without looking blurry or pixelated.
Keep your background as a clear layer if you can, and create all your stickers on a new layer, then save them as a PNG file.
If you’re wanting some ideas on stickers you can draw, I have a video right here that shows you how to draw some of these simple floral shapes and banners for yourself.
And if you’re not an artist, you can use buy cheap clipart, icons or stock photo packs online for just a few dollars that you can pull apart and use for your own sticker sets. Here are some places you can find licensed art or templates to use:
Stock photos: Unsplash | Depositphotos | Pixabay | Pexels
Sticker templates, fonts and clip-art: Creative Market | Design Bundles | Freepik | Designcuts
If you’re wanting to customize a template you’ve purchased (if it includes a license allowing this), you can often bring those PNG files into a design program or the Cricut and Silhouette to add your own text, move stickers around, copy your favorite stickers or delete the ones you won’t use – although all of this gets a little more advanced, so it’s not something I recommend for the average sticker maker if you’re just starting out.
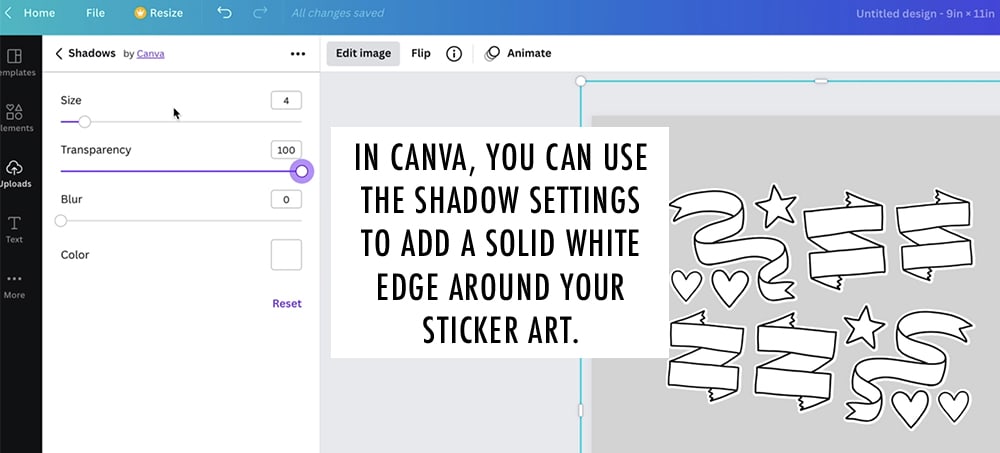
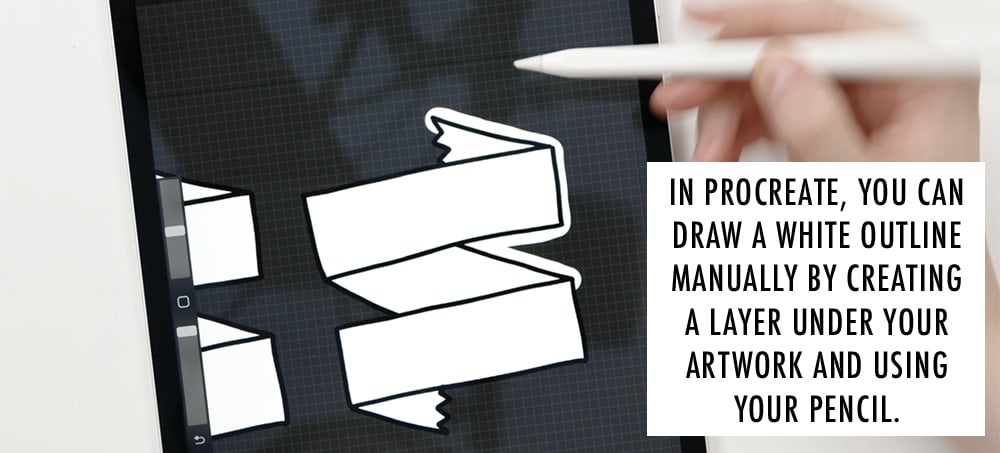
Think about whether you want a white section around your stickers like I’ve done – and you can either do this by drawing a white layer underneath your art, or in some programs you can copy your artwork to a new layer and create an outline.
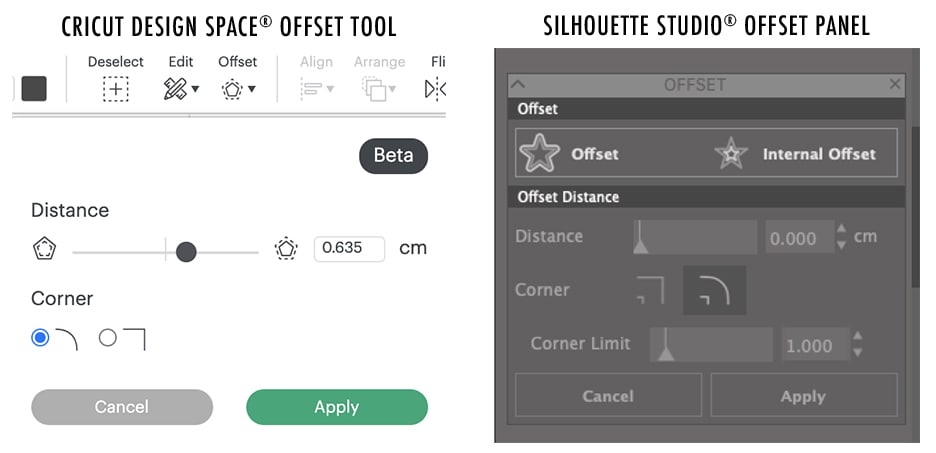
You can also do this within both Cricut and Silhouette using the “offset” tools.
From here, save your files, and the print and cut process is the same as we’ve already covered above.
A huge bonus with printable stickers, is that even if you run out of sticker paper, you can use print these on cardstock or colored paper and use them as cute little die-cuts too, for your planner or for scrapbooking or mixed media. I showed an example of this in my Plan With Me Livestream on YouTube. (Watch it now)
Can I Make Money Selling Planner Stickers?
If you’re someone who’s already dabbling in customizing stickers and designing your own, selling them may feel like a natural next step.
My friend, Mim Jenkinson, has some great resources, including a few free masterclasses that can help you take the next steps to making stickers, even if you’re not a graphic designer or artist. She has helped hundreds of aspiring sticker creators to start businesses and I know she’d love to help you get started.
You can check out her current free masterclasses and resources here.
(Note: I will get a commission if you end up signing up to her paid courses later, at no extra cost to you.)
But if you’re not wanting to make stickers, or even print stickers, and would rather just buy them ready to go – I’ve got a growing range on my website for you to enjoy. The current stock are selling out fast this year and some of my older sticker sets won’t be printed again once they run out. Check out the full sticker collection here!
Once you’ve got your stickers, you might be a little unsure how to get started using them to decorate your planner, and that’s exactly what I did in my Plan with Me live stream that you can watch right here. I share some ideas for layouts, different hacks and a closer look inside my Coloring Planner.

Leave A Comment