
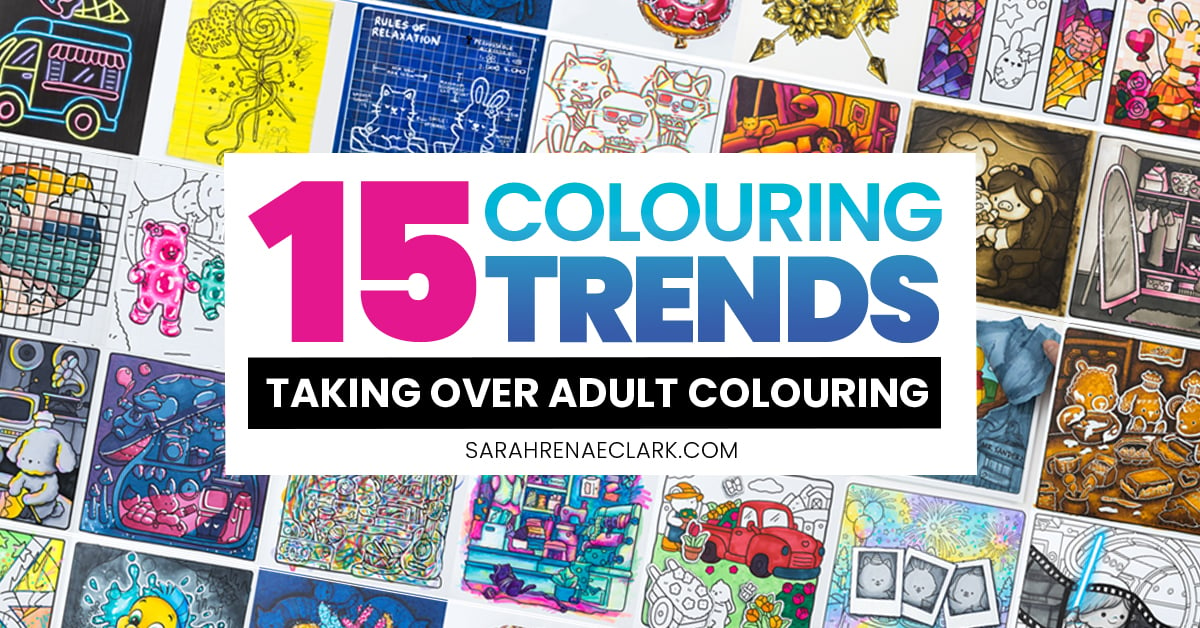
Adult colouring has been popular for more than 10 years now, but there’s been a resurgence in “bold and easy” and “cosy colouring” books. And with it, everyone is learning new colouring techniques and trying interesting online challenges or trends, especially with alcohol markers.
I’ve been trying every possible cosy colouring book trend that I can find on Tiktok, Youtube and Instagram. From simple masking tricks to chaotic colour combinations, I’ve included all the details below of the first 15 Cosy Colouring Trends, including the supplies I used and my basic thoughts.
I tried 30 trends in total, which I’ve shared in my video below! Part 2 of this blog is also live (click here to read).
While you’re here, please also check out my best alcohol marker recommendations and favourite art supplies… or grab a free colouring book by joining my email list!
Please note: This post includes affiliate links. If you click on them, I may earn a small commission (at no extra cost to you). I received some of the supplies used in this blog from the brands, but they are not sponsoring or endorsing this post or the related video. These include supplies given by Ohuhu, Meeden, Sakura, OLO, Copic, Sharpie, Windsor & Newton, Creative Paula and Luchetti.
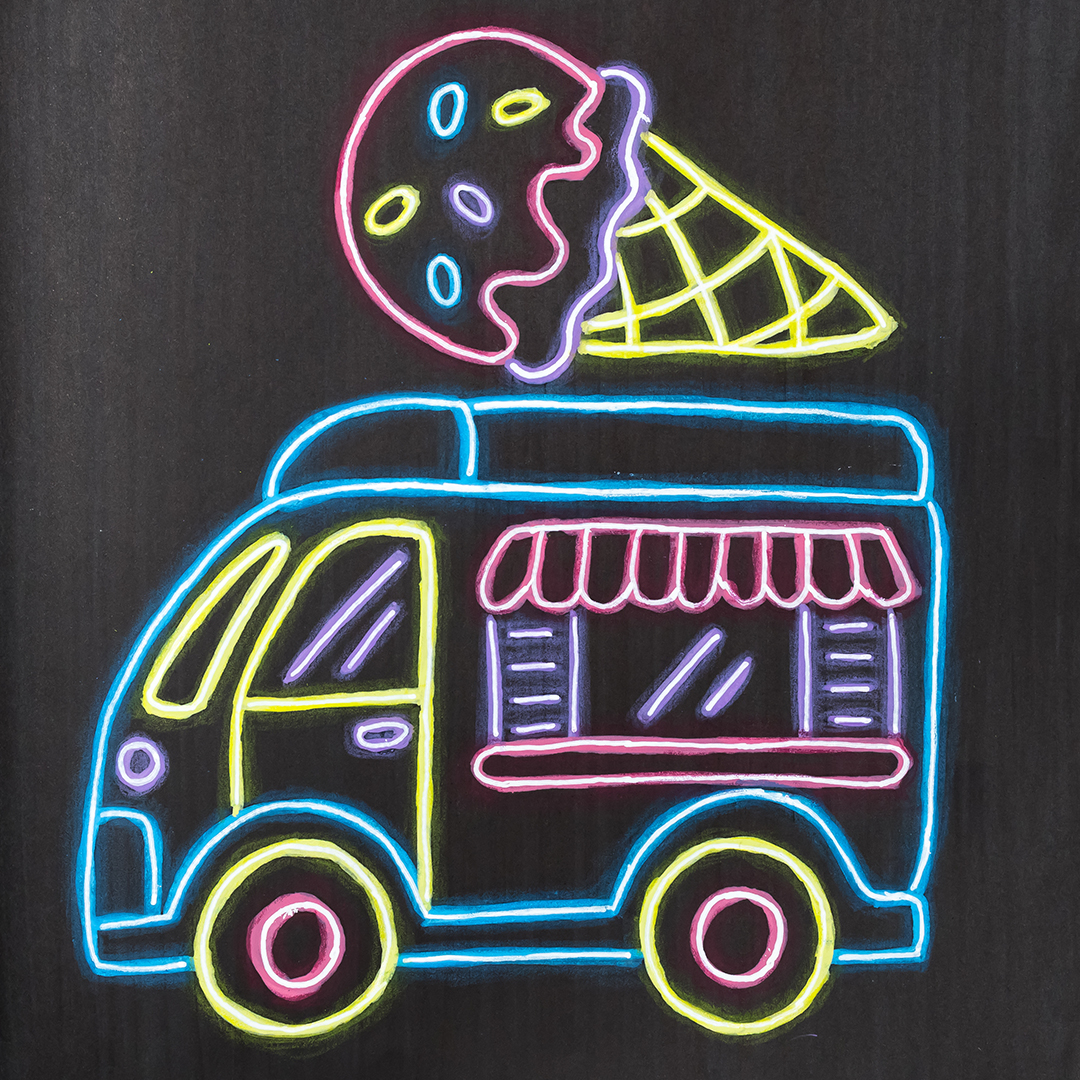
Neon Colouring Page Effect
Technique Difficulty: Easy
Colouring Book: Stress Relief Bold Easy Colouring Book by Coco Wyo
Supplies Used:
Palette 633 from Colour Cube Vol 3
ENMY Direct Ink Acrylic Paint Markers: G3, V1, VR1, B1
Arteza White Fine Line Paint Marker
Prismacolor Premier Coloured Pencils: PC956, PC1022, PC195, PC989
This is a fun and fairly easy technique to try. It helps to choose a page with bigger lines and simpler shapes – imagine it being made as a neon sign.
Start by colouring your whole page black – and yes, this uses a lot of ink! If you’re using alcohol markers, you’ll still be able to see the lines underneath for the next step.
You don’t need neon supplies – any bright colours will work. Because once we apply the effects, they’ll look brighter and neon-ish. I’m using a palette from the Colour Cube Neon Collection in Volume 3.
Use your colours to trace each outline, leaving gaps between the colour changes (like a real neon sign) and then re-trace each line with a smaller white marker. Each white line will look like it is glowing in the colour under it.
For an extra step that makes the effect even better, grab some pencils in the same colours (or slightly lighter) and lightly colour around the edge of each “neon tube” to make another subtle glow effect.
That’s it!
Sketchy Notepad Colouring Page
Technique Difficulty: Easy
Colouring Book: Kalas Marlkarbok by Hanna Karlzan
Supplies Used:
A ballpoint pen or graphite pencil
Ohuhu Honolulu Alcohol marker: Y080
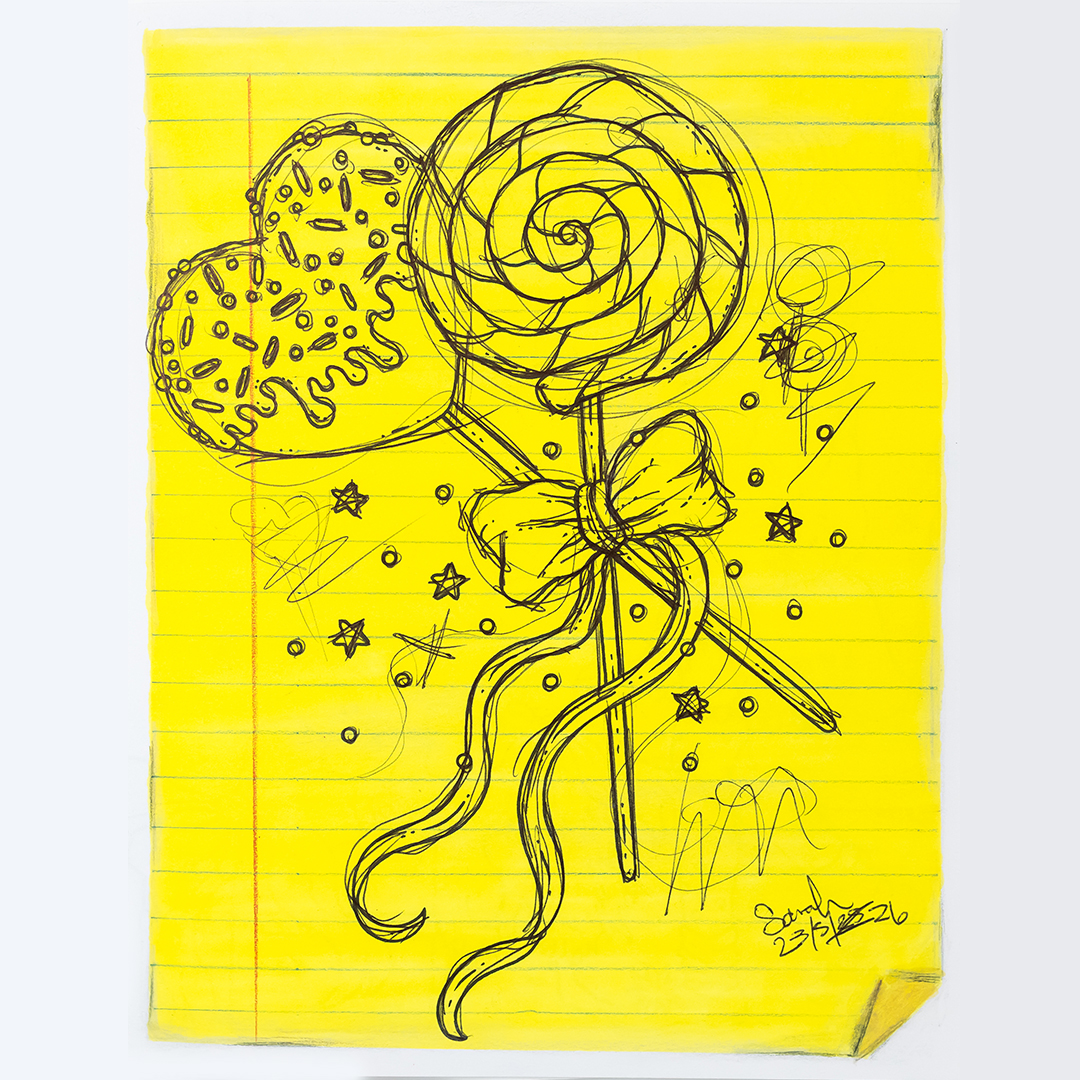
This is a trend that you can do in any kind of colouring books, not just the cozy colouring books. I’ve seen a few different versions of this and I love the overall sketchy looks and I love the different embellishments that other people are adding. Like stickers and notes and even damage to the page.
I’ve chosen to try the yellow legal pad look, so I’ve used a sharp blue pencil to create my background lines, and even added some grunge and shadows around the edge of the whole page.
Because this is supposed to look like a rough sketch, I grabbed a simple ballpoint pen and basically just drew over all the art. I thought about the mistakes or scribbles I might have on a page if I were trying to draw this, but overall I kept this a lot simpler than some of the examples I’ve seen.
This was fun, and a really good exercise overall to challenge perfectionism and just have fun. I think it’s another good option for beginners, but it also leaves a lot of room to make it your own and really get creative with it.
Inspired by: @annarosebooks on Instagram.
Blueprint Colouring Page Trend
Technique Difficulty: Easy
Colouring Book: Fuzzy Friends by Tina Vita
Supplies Used:
Ohuhu Honolulu Alcohol Markers: BV312, BV315
White Meeden Acrylic Paint Marker
Sakura Gelly Roll: White 3 pack
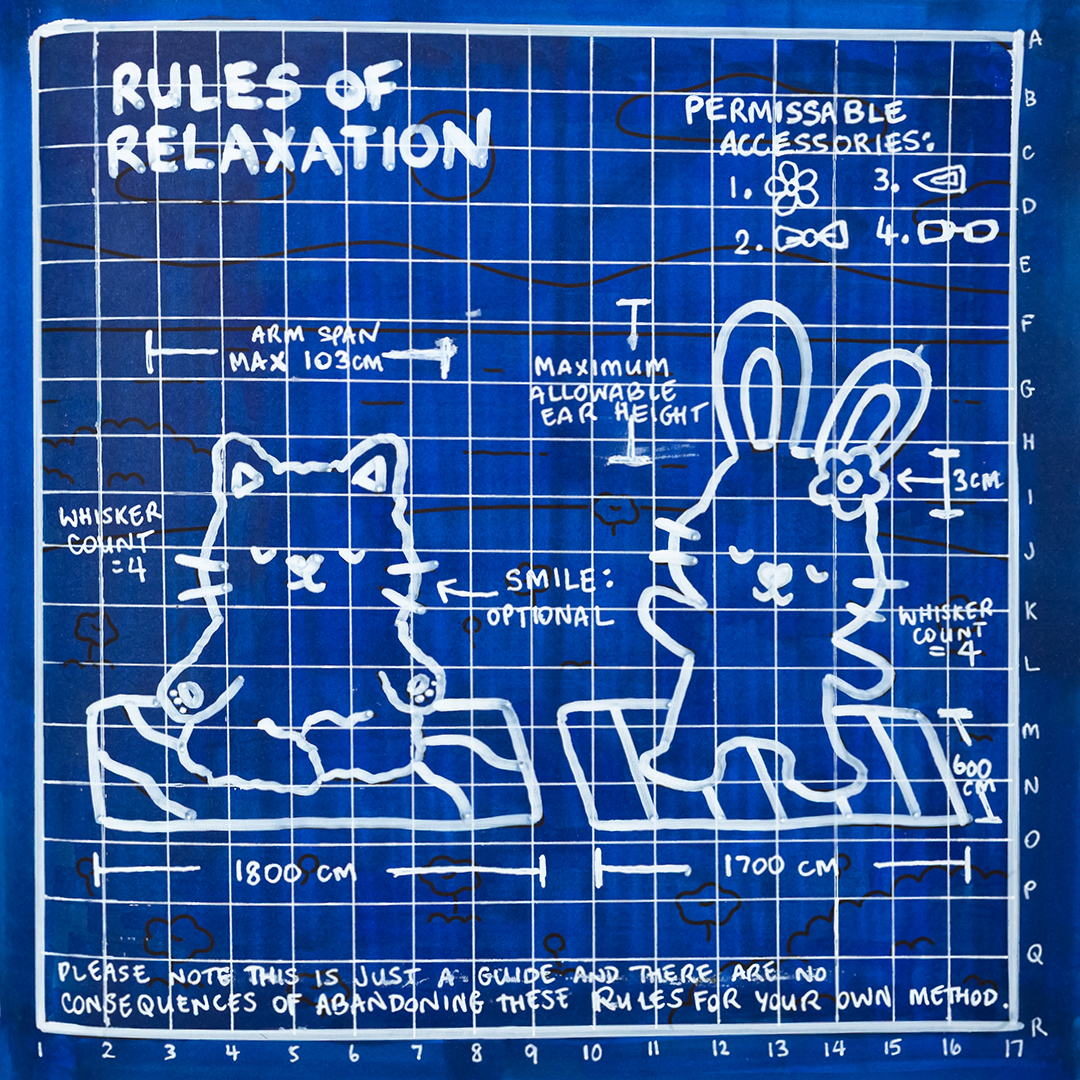
This page is as simple as colouring everything in blue, then adding white highlights.
It does use a lot of blue ink – which is why I ended up using 2 different markers for this.
For the white art, choose some main objects or just focus on the characters, then trace over the original white links. You don’t have to trace everything on the page – give yourself space to add measurements and fun little annotations around the page.
I did my main lines with an acrylic paint pen, but used my gelly-roll white gel pens for all the finer details and the lines in the background.
I love the final effect and it didn’t need many supplies!
Inspired by: @sassyfeistycoloring on Instagram.
Colouring Page Glitch Trend
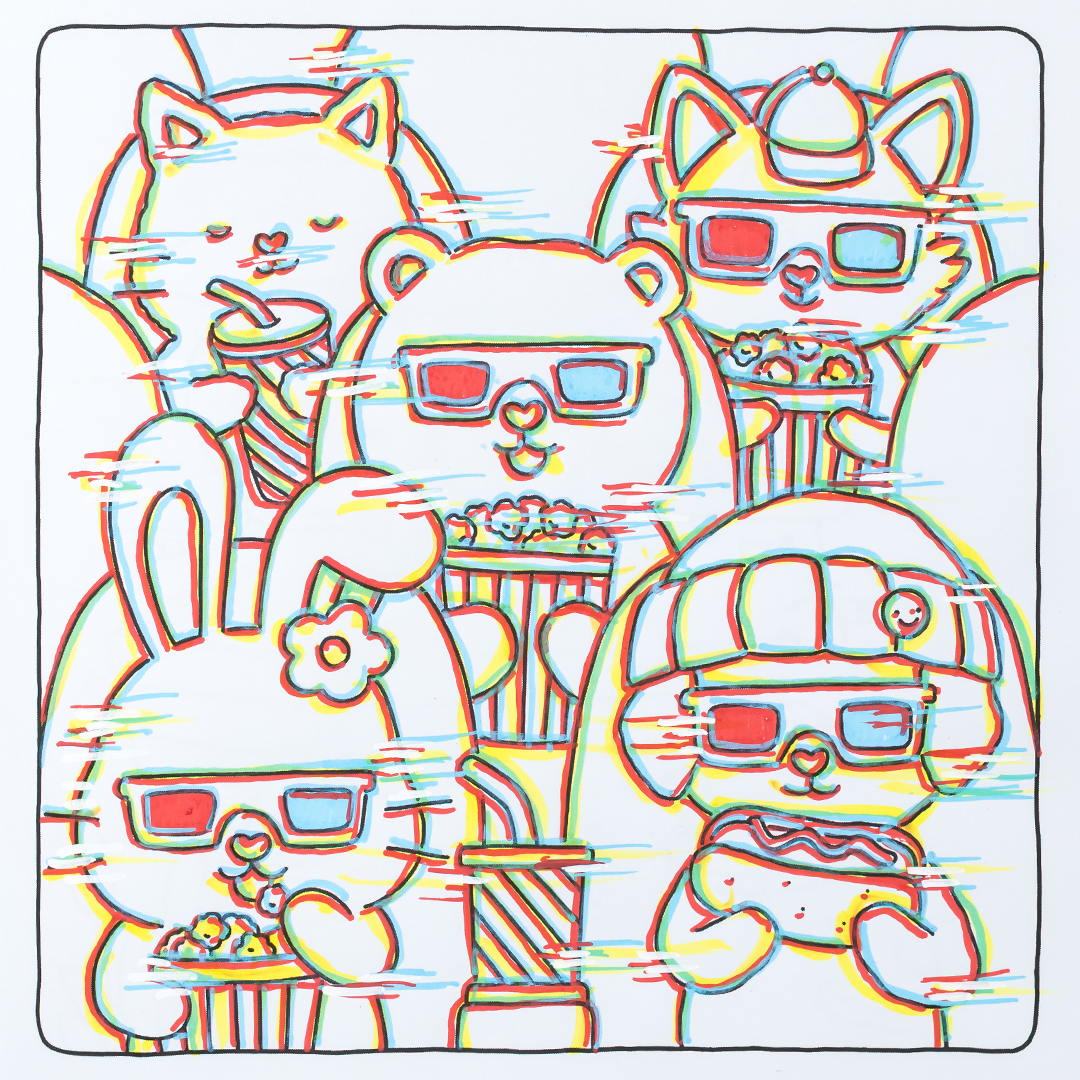
Technique Difficulty: Medium
Colouring Book: Fuzzy Friends Supercute Colouring Book by Vivi Tinta
Supplies Used:
Posca PC3M Acrylic Paint Markers: Red, White, Light Blue
Ohuhu Honolulu Alcohol markers: Y080
The glitchy page effect has been around before it became a cosy colouring trend. It actually started back around 2020. The goal is to look like the black lines have separated into their colours like a digital or printing glitch – and the choice of blue and red is similar to looking at an old 3D image without the red/blue glasses on.
So separating the black lines – the red lines all end up on one side, and the blue on the other.
To create this look, just draw red along one side of every line, and blue along the other. I also added a 3rd colour, but used an alcohol marker so it would look like it was mixing and unmixing with the other colours.
Then, you can add a further glitch effect by drawing horizontal lines in your same colours, along with white to cover up some of the original lines. You can keep these as simple or as complex as you want – I recommend starting with just a few and focusing more on keeping the lines as straight as possible.
This was fairly quick to do, and I think the final effect is fun!
Inspired by: @nashvibes on Instagram.
Gradient Colouring Page Effect
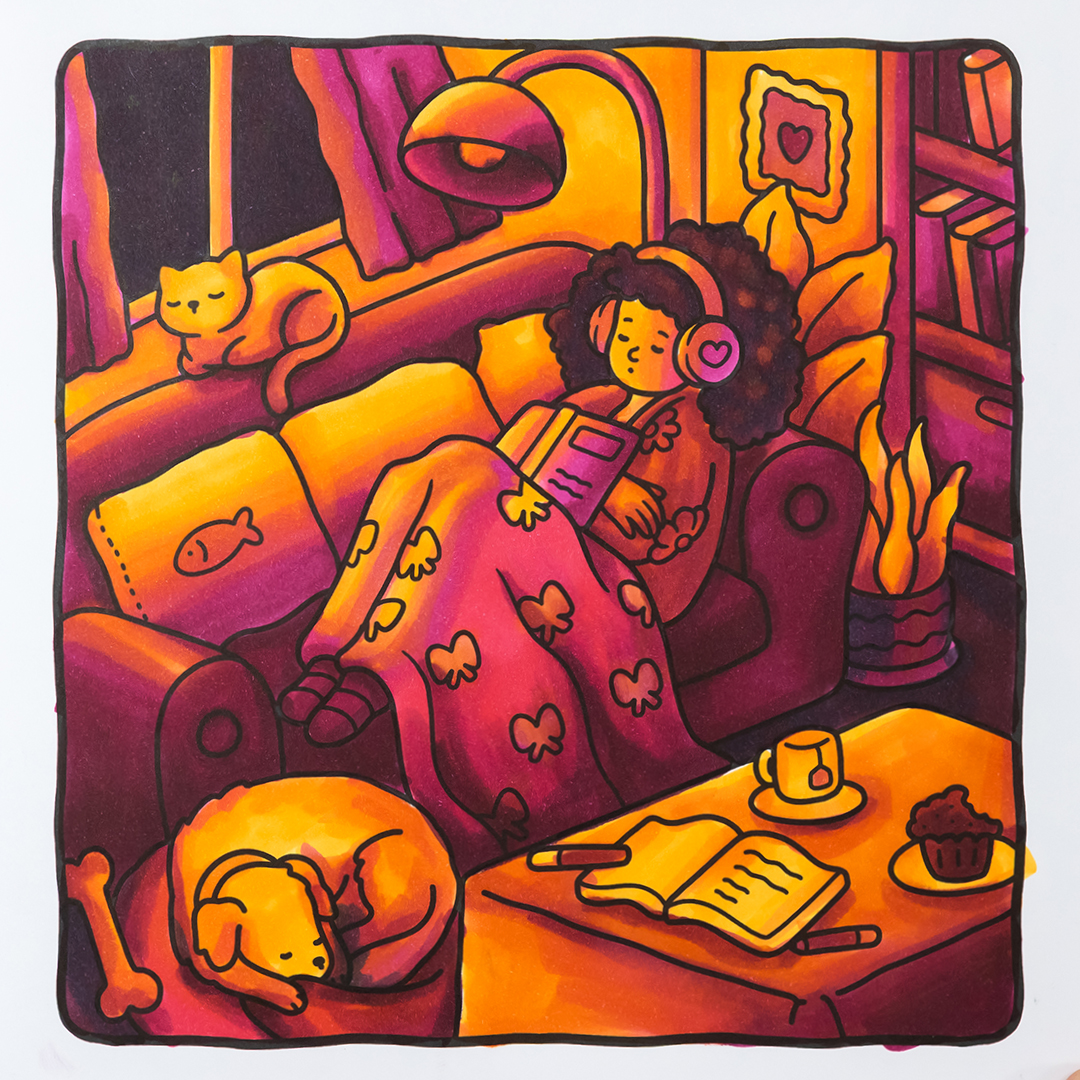
Technique Difficulty: Medium
Colouring Book: Girl Moments: Cute and Comfy Colouring Book by Coco Wyo
Supplies Used:
Palette 508 from Colour Cube Vol 3
OLO Alcohol Markers: V7.8, OR1.4, O1.3, RV1.8, RV3.7, RV3.5, R2.4
This is a trend you can try over and over and get completely different looks, just by changing the colours you use.
At a basic level, this is just about choosing a gradient of colours, and colouring each object with some or all of those colours, following the same pattern. And you can do this with any set of colours, and without knowing anything else about lighting or shading, and it will still look cool.
But it’s also a wonderful way to experiment with colours, and develop your blending skills. If you choose colours that are similar to each other, they’ll blend more easily. If you’ve got a Colour Cube, I recommend looking at the different sky and sunset palettes for colours that naturally blend together.
And if you can choose a gradient with colours that go from light to dark, you can play around with lighting effects, using the darker colours for shading.
This is a great colouring challenge to build your skills and really practice your blending without worrying about making it perfect.
Sepia Colouring Page with Markers
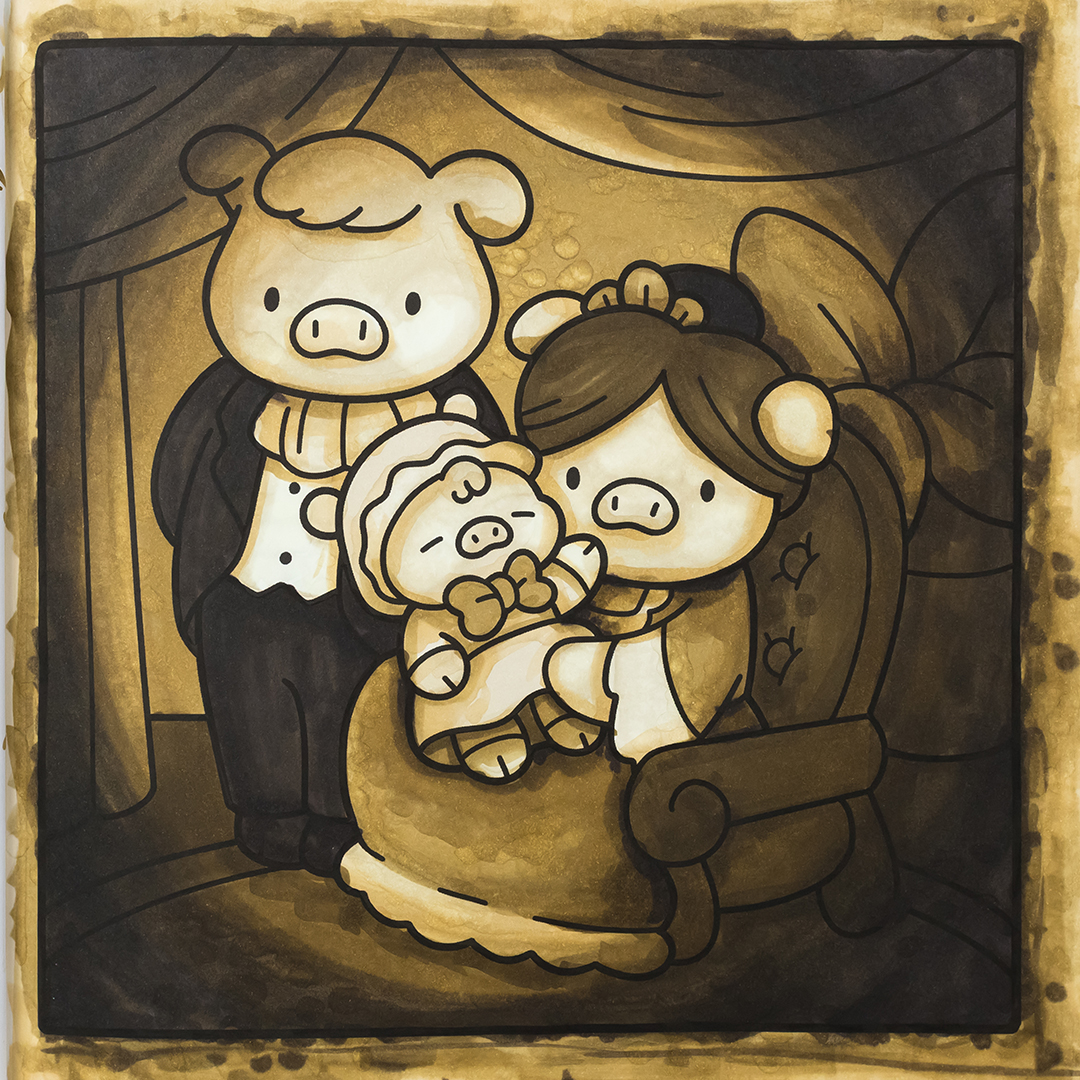
Technique Difficulty: Medium
Colouring Book: Cosy Eras: Cute Colouring Book by Jade Summer
Supplies Used:
Ohuhu Honolulu Alcohol Markers: Y00, E14, Y62, Y69, E211, E313, E314, WG37
This is similar to the gradient concept above, except that it’s monochrome – all variations of one colour.
I’m using the sepia colours from @bnewiscoloring, and I’ve found a colouring page that reminds me of those old-timey photos at tourist spots. I started with the vignette first, although you can choose to do this last if you prefer.
I’m first choosing a lightness for everything and just colouring it all in, then I’ll go back in with darker markers to add more and more shadows wherever they feel right.
I then created a rough edge, still with the alcohol markers, but colouring roughly and adding spots for texture.
I overcomplicated this page (and definitely spent more time on it than I planned) but I like how it turned out!
Inspired by: @bnewiscoloring on TikTok.
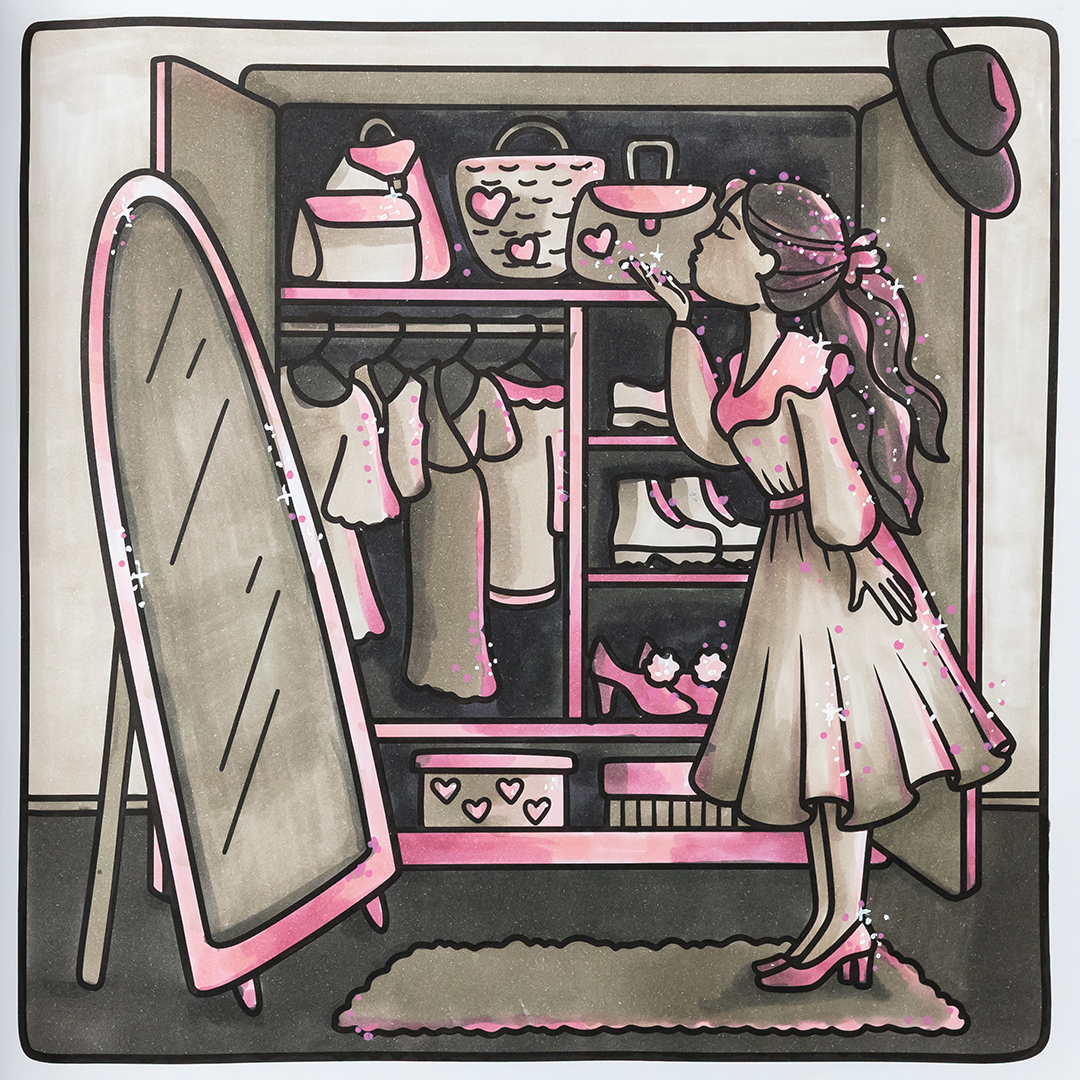
Vintage Pink Colouring Effect
Technique Difficulty: Medium
Colouring Book: Living my Best Life by Ameila Green
Supplies Used:
OLO Alcohol Markers:
Pinks: R2.0, R2.2, R5.3, R5.5
Greys: W-G3, W-G5, W-G7, W-G9
Meeden Acrylic Paint Marker: 25
White Copic Acrea Paint Marker
If you want to find a way to make a sepia or monochrome page even more interesting, this is a fun one!
Before you start the main colouring, choose a colour (like the pink here) and choose some areas to use this instead of your greys.
I chose to replace most of the highlights with the pink, but also used the darker pinks to add some contrast in other areas and along some of the edges.
There are no particular rules on which areas to colour, just get inspired by the art on the page and see what you can create!
Inspired by: @colorwithstephh on TikTok.
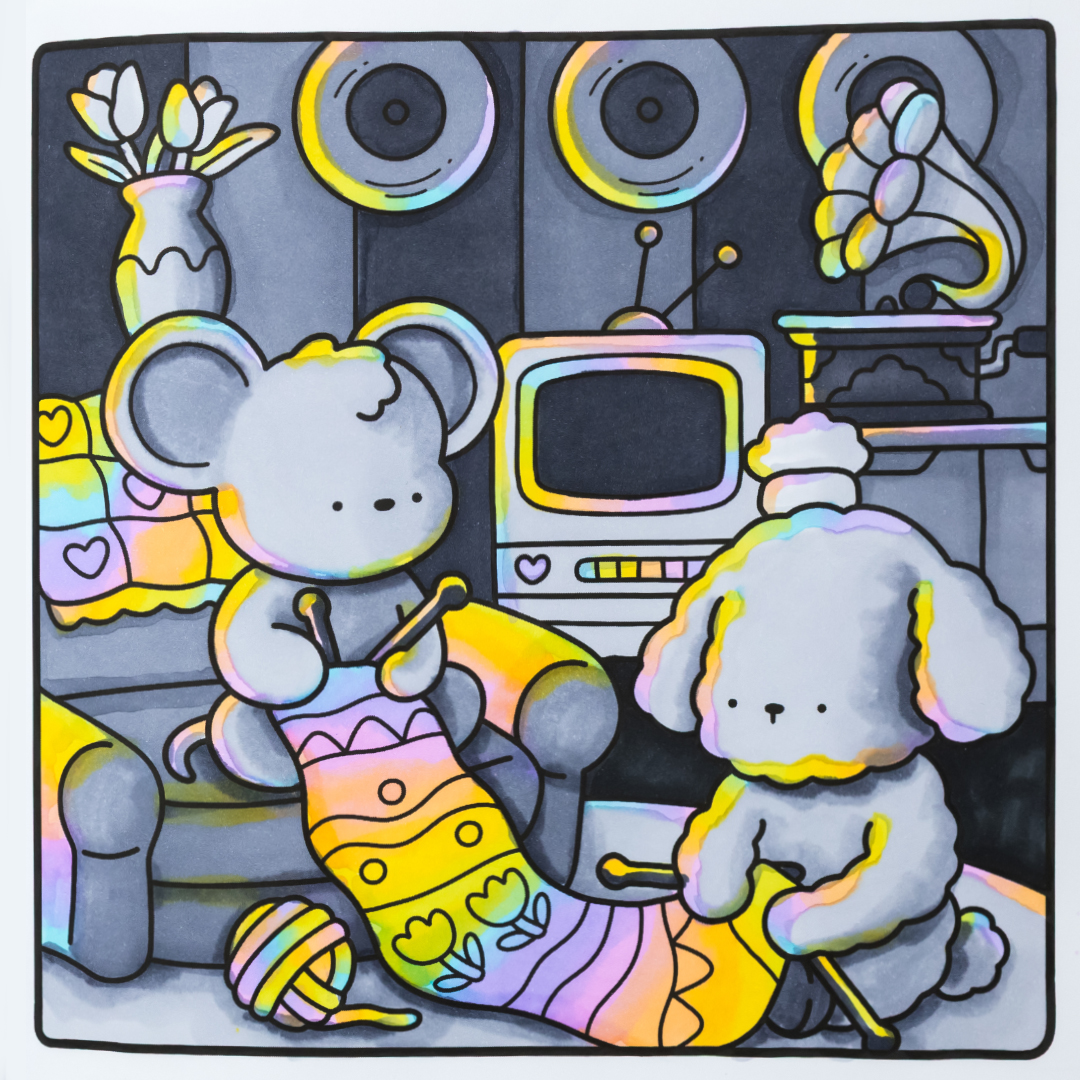
Rainbow Highlights Colouring Trend
Technique Difficulty: Medium
Colouring Book: Cozy Friends by Coco Wyo
Supplies Used:
OLO Alcohol Markers:
Rainbow: V2.1, BV1.2, B1.3, YG1.2, Y1.4, O2.2,
Greys: C-G7, C-G9, C-G3, C-G5
Similar to the vintage pink trend, this is another trend where the main colours in your image are monochrome (either sepia or different greys) and the “wow” happens on your highlights or edges.
Instead of a single colour, use a rainbow of pastel colours – and it’s better to use just a few instead of too many here. Draw your rainbow colours along any edges, or limit it just to the “highlight” areas if you’re feeling brave. I also chose to colour a few objects in rainbow to really make them stand out.
If you want more advice on lighting and shading, I have a detailed guide here.
But you don’t need to be an expert. By the time you’ve created your beautiful rainbow edges and highlights on your cute colouring page, nobody’s going to be judging the accuracy of your shadows.
Inspired by: @DoodlyBugs on TikTok.
2-Colour Challenge: Lo-Fi Colouring Page
Technique Difficulty: Advanced
Colouring Book: Comfy and Cosy: Cute Colouring Book by Jade Summers
Supplies Used:
Ohuhu Honolulu Alcohol markers: RV28, BV414
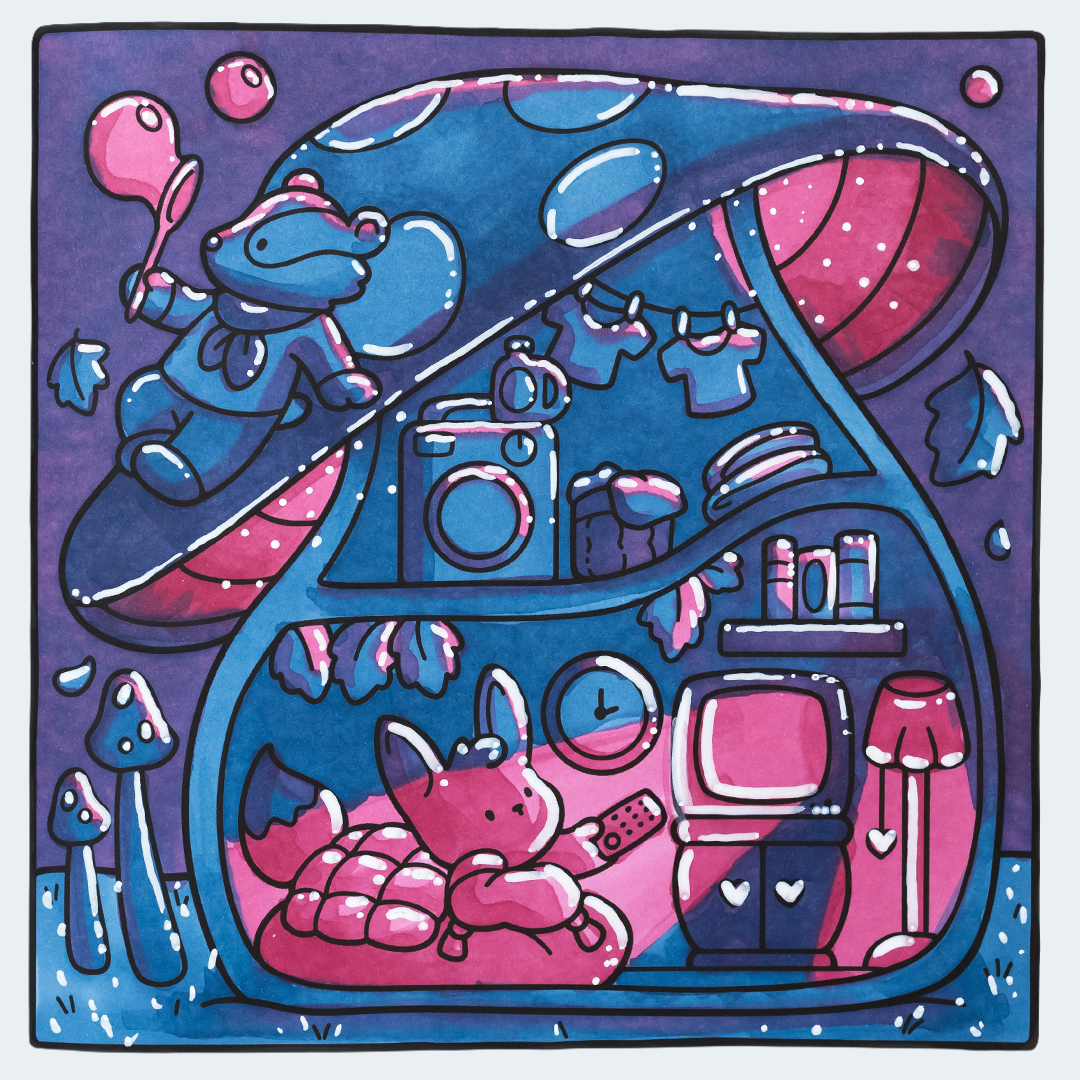
My next page is kinda 2 challenges in one – I’m using just 2 markers and I’m trying to create a lo-fi look.
The lofi aesthetic is all about muted colours, high contrast, and dreamy scenes. But the challenge of just 2 markers is what makes this interesting, because I wanted them to overlap and make a 3rd colour.
I used the pink as more of my highlights colour, and the blue as the more general colour, then used the mix of both to create shadows in purple.
I didn’t blend or create any gradients (it would be impossible with these colours) and I changed my mind on a few things as I went. I ended up using a white paint pen at the end to bring back some of the contrast… and while this isn’t maybe what I was expecting, I think this turned out pretty well. It was an interesting challenge, and I’d probably try it again – maybe with a bit more planning ahead for my lighting and shading next time.
Inspired by: @Allycoloringbooks on TikTok.
Chaos Colouring Trend
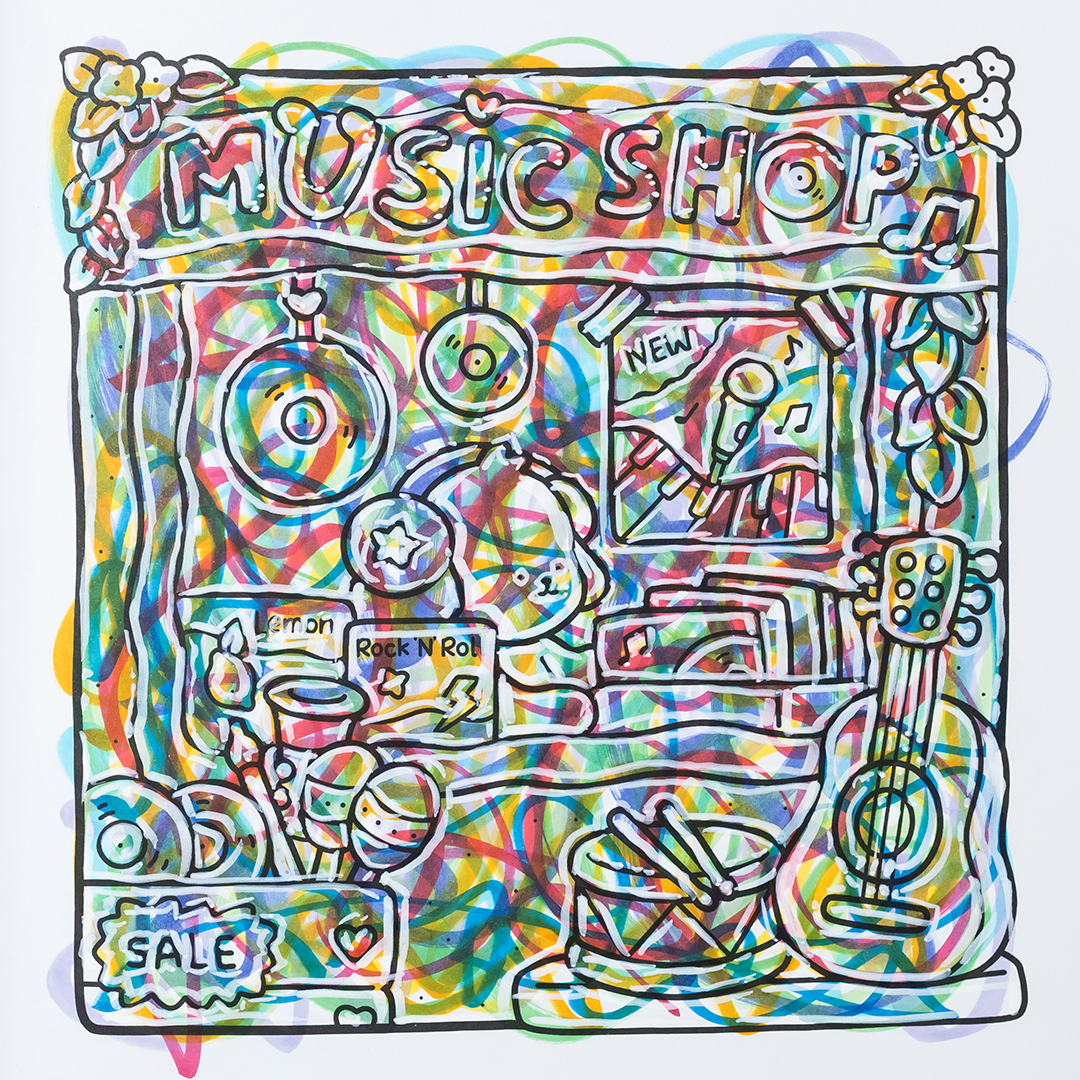
Technique Difficulty: Easy
Colouring Book: Cozy Corner Cute & Comfy Colouring Book by Coyo Wyo
Supplies Used:
Any colours of alcohol markers
White Paint Marker (any brand)
So this…. is chaos colouring. A lot of mess. A bit of fun. A headache for the perfectionist. But it all comes together when you add some white highlights.
This was super quick to do. And even if you don’t like the end result, it’s actually just a really fun way to loosen up and free yourself to experiment. Take the pressure off – because colouring shouldn’t be stressful!
Just make a mess, and add some highlights!
Inspired by: @ColoringwithLyra on TikTok.
Dopamine Colouring
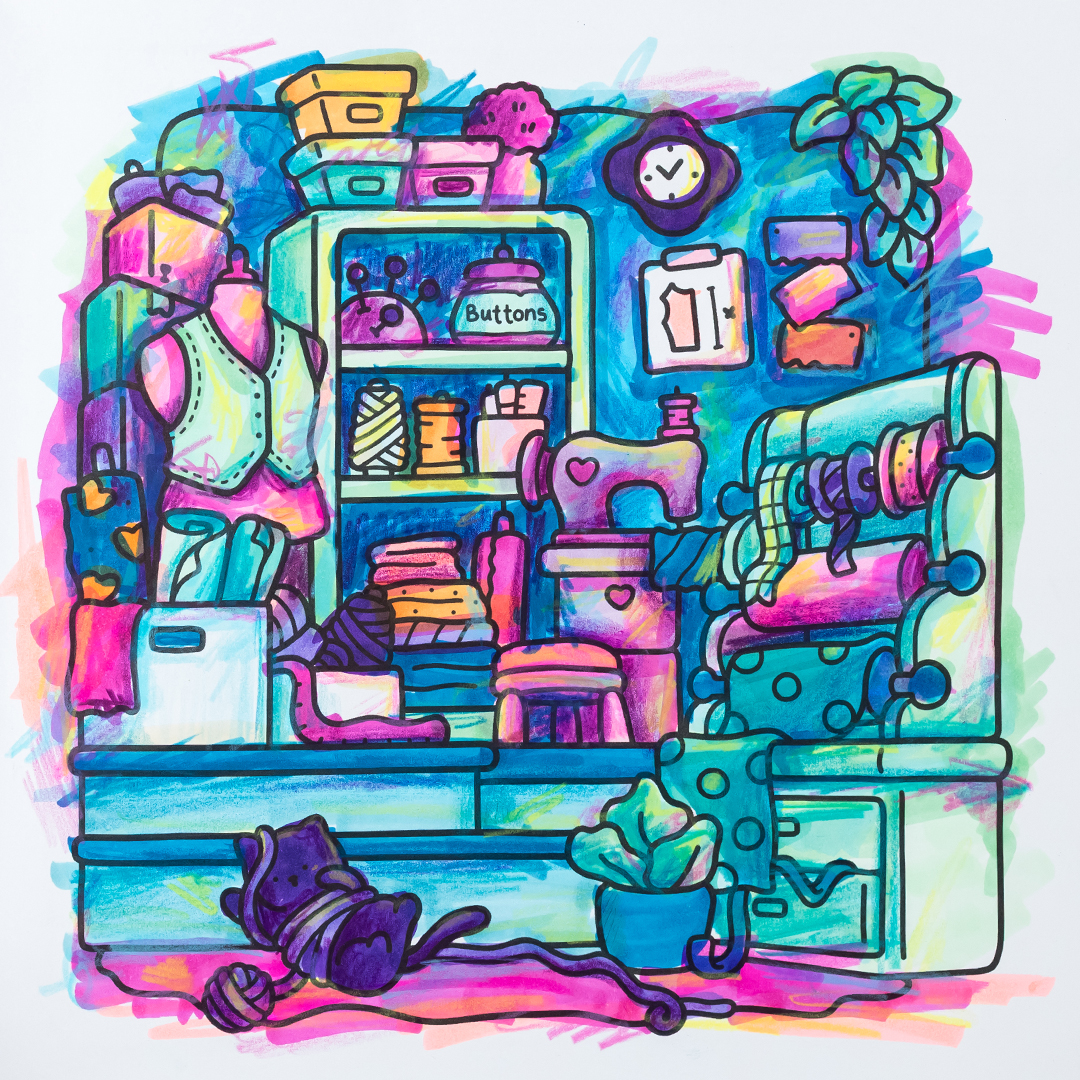
Technique Difficulty: Medium
Colouring Book: Cozy Corner Cute & Comfy Colouring Book by Coyo Wyo
Recommended Supplies:
Alcohol markers in “dopamine” colours – bright, pastel, neon
Coloured pencils
Acrylic paint pens, including a white
In my own creative journey, I’ve been exploring ways to help loosen up, push aside my perfectionism, and find ways to just make colouring fun again. It’s called Dopamine Colouring.
The goal here is to start with a mess, play with colour, and find your own way to joyful art.
Start with a limited colour palette – but make it bright. Choose pastels, neons, dopamine colours… and if you have a favourite colour, add that too.
The colouring page and limited palette act as boundaries so that you can take a creative risk on other areas.
I always like to start with pastel alcohol markers and a chisel brush. The chisel reminds me to start messy. You don’t HAVE to colour outside the lines, but I highly recommend it… because it takes the pressure off for the rest of the page.
It’s going to look bad at first. Just enjoy it. If it’s quick and looks bad, there’s more permission to experiment.
Then, start using your stronger colours to experiment. Keep it abstract or start adding shading. Keep it messy or start colouring neat. This part is up to you – do what feels GOOD. And trust your instincts. No matter how it looks by the end of this stage, the next stage will bring it all together.
Next – grab your paint pens. Add dots, add scribbles, add outlines… and watch your messy experiment transform into a piece of art. Use lots of colours, even now – and add lots of white highlights.
I’ve already seen some wonderful examples from other people on Instagram and in person, so please tag me if you try this for yourself and I’d love to see it!
Colouring Page Sticker Effect
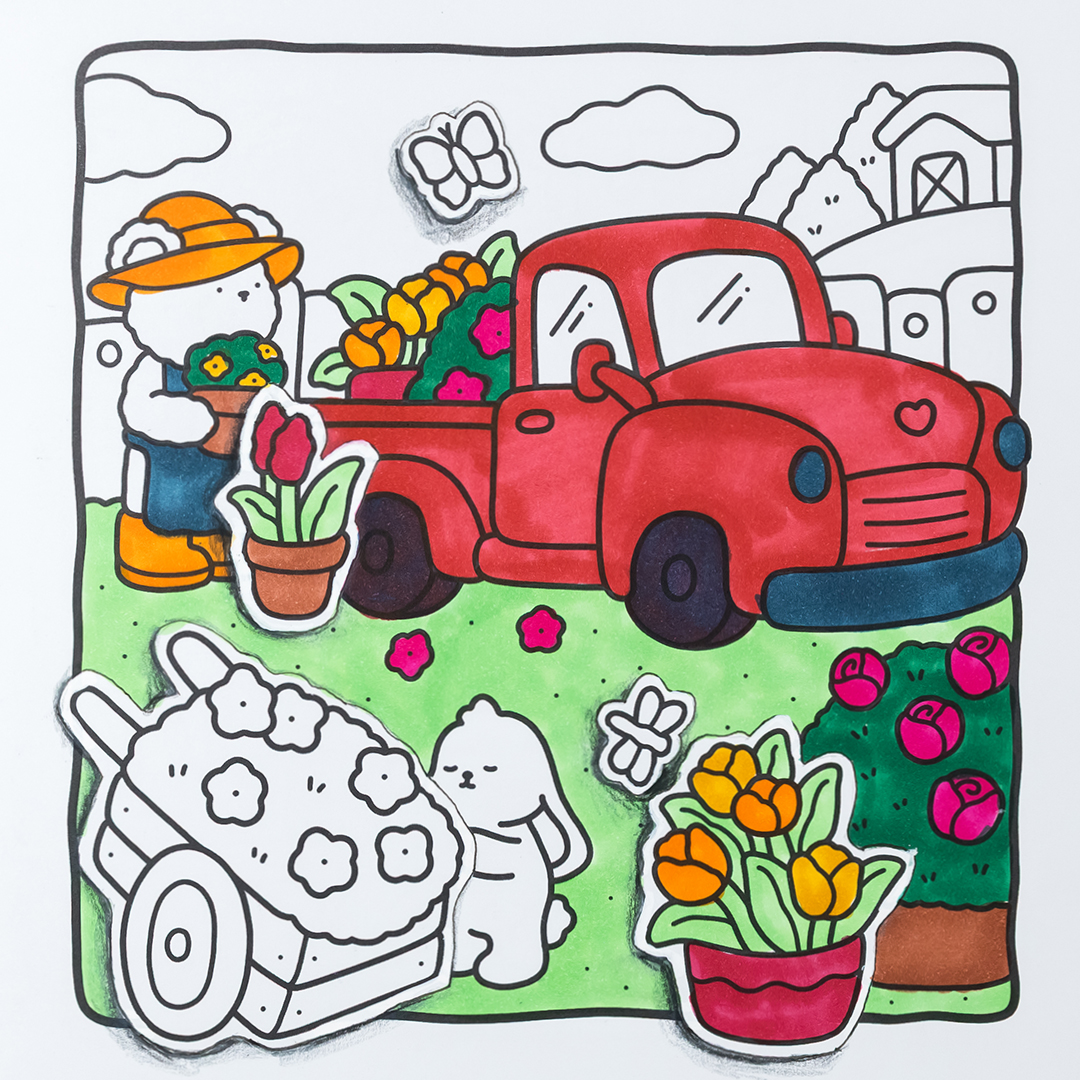
Technique Difficulty: Easy
Colouring Book: Cozy Corner, Cute and Comfy Colouring Book by Coco Wyo
Supplies Used:
White Ohuhu Nahuku paint pen
A black pen
Alcohol markers or pencils
I’ve seen a lot of people creating this sticker effect – and I did something similar a few years ago with coloured pencils – but I didn’t have to cover up any other lines to make it work.
Here, artists are using their white paint pens to outline the areas they want to be stickers. And then using alcohol markers to create shadows, like I did with the pencils.
Once you’ve created your sticker, you can choose to colour the rest of the page however you want. I don’t really like how mine has turned out, but this was pretty easy and I’m sure I’ll try it again.
And next time, I think I’ll try with markers instead!
Polaroid Colouring Book Trend
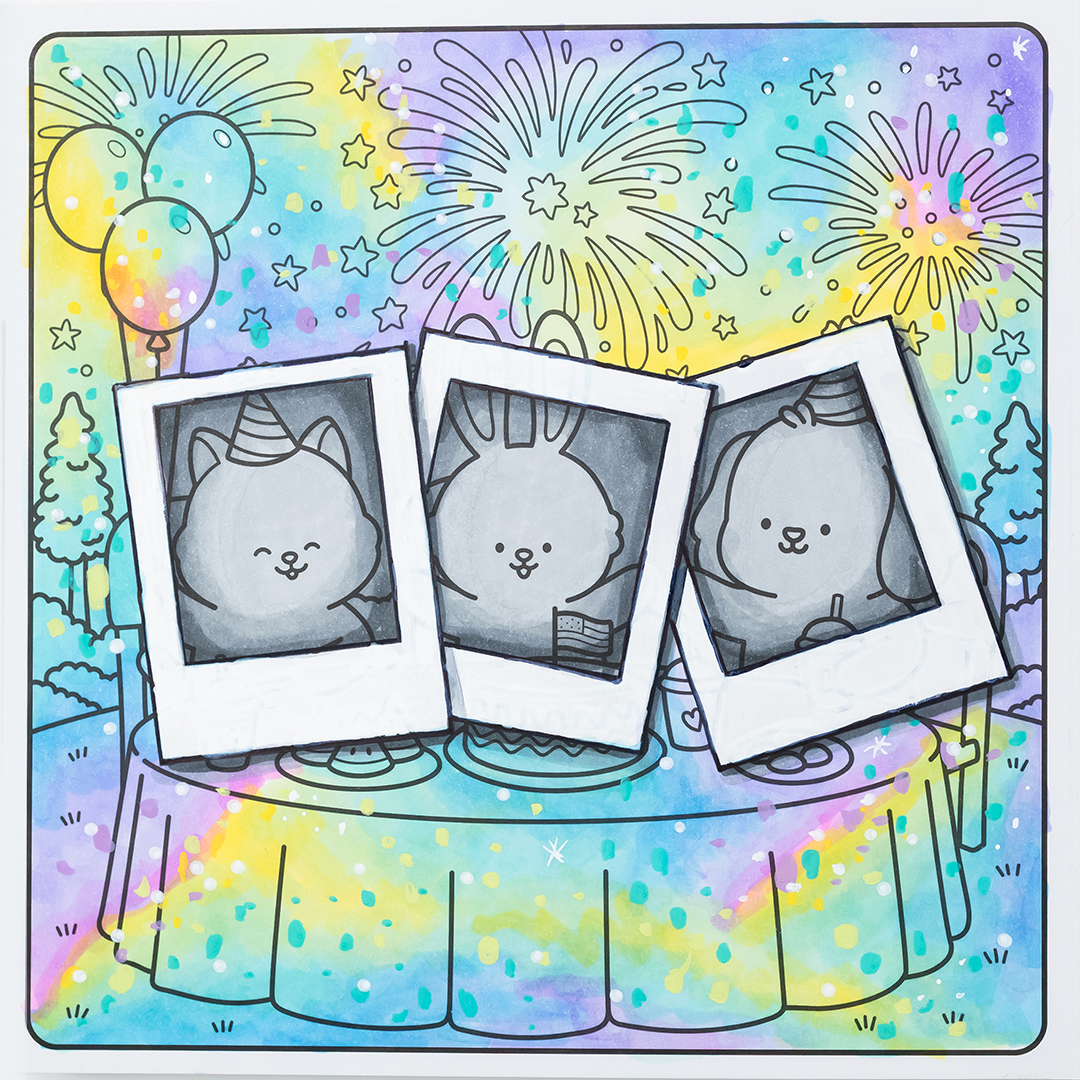
Technique Difficulty: Easy
Colouring Book: Cosy Adventures by Wonderflat
Supplies Used:
Palette 187 from Colour Cube Vol 1
Black Artline 210 Medium Fineliner
White Meeden Acrylic Paint Marker
OLO Alcohol Markers:Background: BG1.2, BG1.4, B0.4, B0.2, BV1.2, BV1.4, RV1.2, RV1.3, YO0.1,Y0.3, Y1.4, YG2.7, YG8.6, YG3.2Grey: N-G0, N-G1, N-G3, N-G5, N-G7, N-G9
Sharpie Creative Paint Markers: Yellow, Lavender, Mint, Teal
This is another fun “masking” effect. And it works great on a page with characters!
Choose where your polaroids will be, and use a pencil to trace out the frames. When you’re happy, use a white paint pen to remove any lines within the polaroid frame, and a black marker or paint pen to create the outline. (Tip: Don’t use a black alcohol marker if you’re planning to colour the rest in alcohol markers – it will make the black bleed!)
Then you can colour the inside and outside however you’d like.
I decided to do a fun rainbow abstract party background, and then just a single colour with some shading for each polaroid photo. This one was super easy and fun to do!
Inspired by: @keep.creative.channel on TikTok.
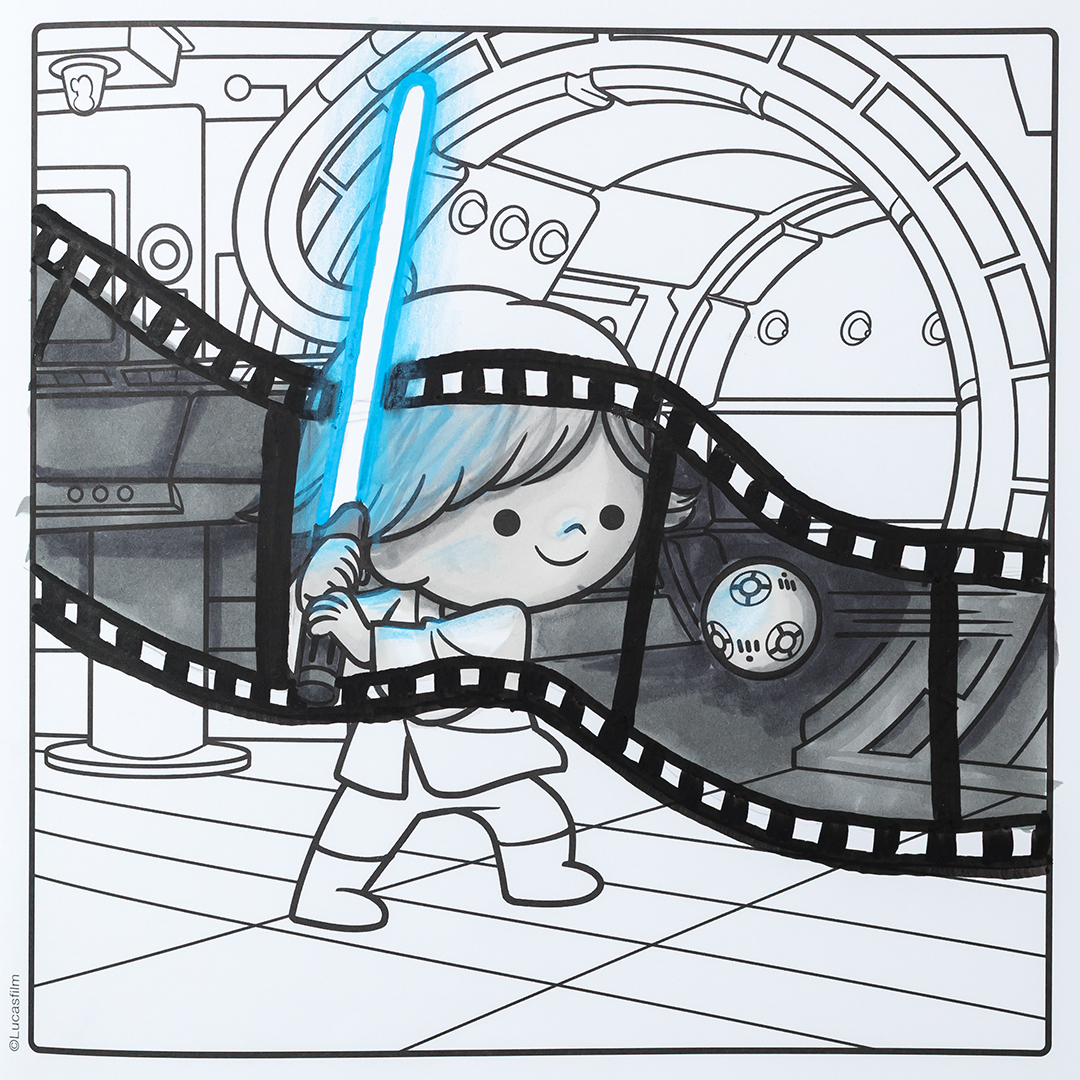
Film Strip Colouring Book Trend
Technique Difficulty: Easy
Colouring Book: Star Wars Cosy Colouring: Galactic Adventures by Hardie Grant Books
Supplies Used:
Windsor & Newton Alcohol Markers: G1, CG3, CG5, XB
Meeden Acrylic Paint Markers: 11, 6
Light blue coloured pencil.
For my filmstrip, I decided to leave most of the page uncoloured, and just used a few greys for the scene within the film strip… with one exception.
The film strip was easy to draw around the scene without needing any white pen cover-ups. I recommend drawing it with pencil first, then doing your colouring, then coming back to draw the reel itself at the end.
I kept the lightsaber separate, and used the same technique from my earlier neon page, with a paint pen for the main light, a white paint pen for the middle, and some final details (and extra reflected light) with a light blue pencil.
This was very easy, but very effective!
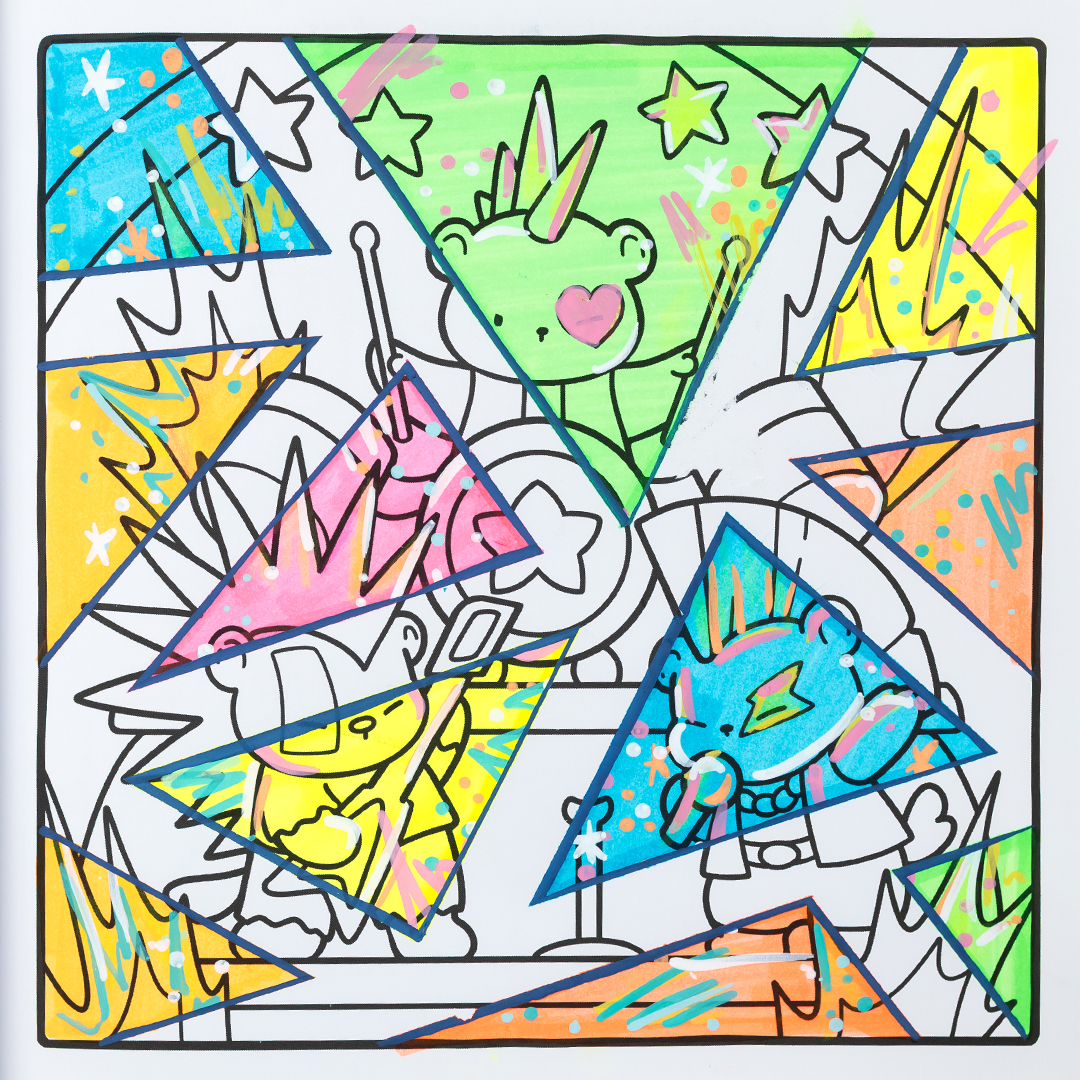
Washi Tape Masking Effects
Technique Difficulty: Easy
Colouring Book: Cosy Eras: Cute Colouring Book by Jade Summers
Supplies Used:
Winsor & Newton Promarker: Neon 6 Set
Washi Tape (any)
Various Paint Markers
For the washi tape – I’m just using this to separate different areas of my page. If your tape is very sticky, I recommend touching the sticky side to your clothes first – it helps make it less sticky when you attach it to your paper, reducing the risk of tearing when you remove it later.
After placing the washi tape down (to act as a “mask” and separate the areas of the page) I used some neon alcohol markers to colour each section, and then just a random selection of paint pens to add some fun, contrasting details.
I didn’t have a plan when I started, but this ended up being a fun graffiti-style neon page for something quick and bright.
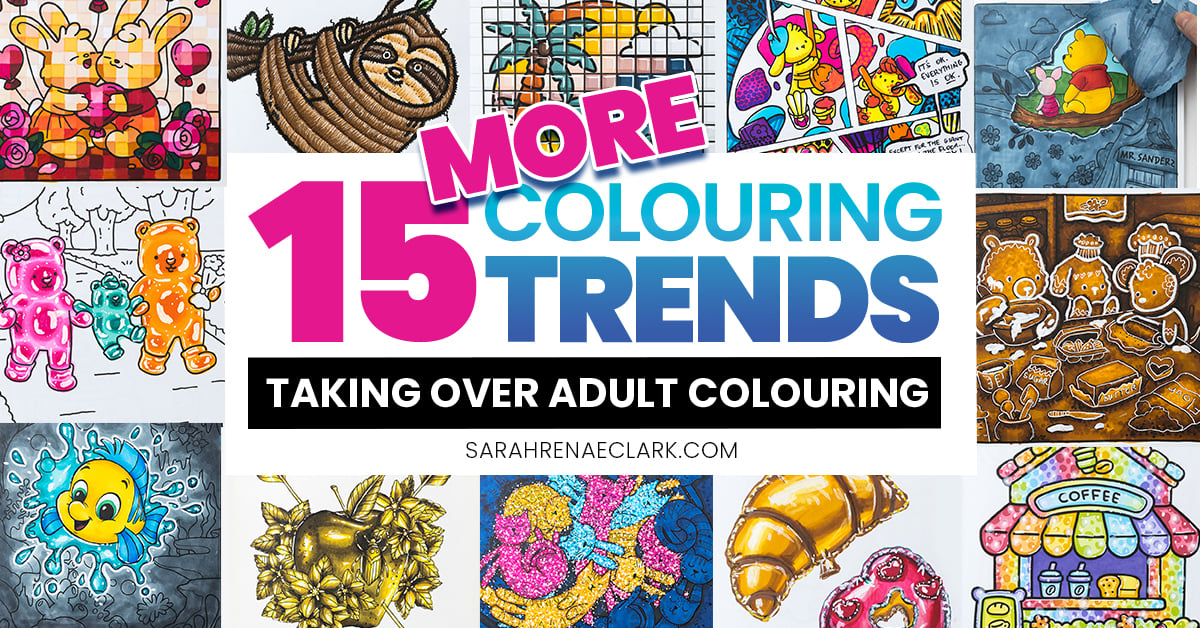
Looking for more colouring trends? Part 2 has 15 more cosy colouring techniques and ideas to inspire you!
You can join my email list to be notified when that post gets published.
While you’re here, please also check out these other posts you might enjoy:
Why is the pixel art of the bunny page missing? I really wanted to find out what colouring book that was from ans couldn’t find any links in your Youtube description.
I’m hoping there is a Part 2 soon!!!
You are my favorite website! I learn so much from everything you do. I also trust that all you say is genuine and not just for collecting followers, which I am sure you have no shortage of. Thank you.