
After using markers as a kid, I never expected to choose them over pencils in my adult colouring and art.
Markers were always streaky, hard to fill big areas, and they damaged the paper.
But then, I discovered alcohol markers – and my whole world changed.
All of a sudden, marker art was crisp, smooth, and looked so professional. And I thought that was the key – alcohol markers are the best for adults, and everything else is for kids.
And I was wrong.
Yes, alcohol markers are amazing – but they work completely differently depending on your technique and your paper. And they bleed through almost everything.
And the other markers – water based markers – have proven to be far more interesting than I first realised, and can create some amazing watercolour art and blending when used correctly.
With both types of markers, I heavily underestimated just how much technique plays a role – and how much paper choice matters.
I started noticing that neither type of marker was as straightforward as I’d assumed. Both had strengths. Both had quirks. And both could produce incredible results – or terrible ones – depending on how you used them.
So, in this blog, I’ll break down:
Want to dig even deeper? Start with part 1 of my 2-part video series, ‘Everything You Know About Markers is WRONG’, for side-by-side comparisons using both alcohol and water-based markers. Then check out part 2, ‘The BIGGEST Marker Test on YouTube’, to see how the tests were run, what surprised me, and which markers came out on top.
PLEASE NOTE: This post contains affiliate links and I may earn a commission if you click them (at no cost to you).
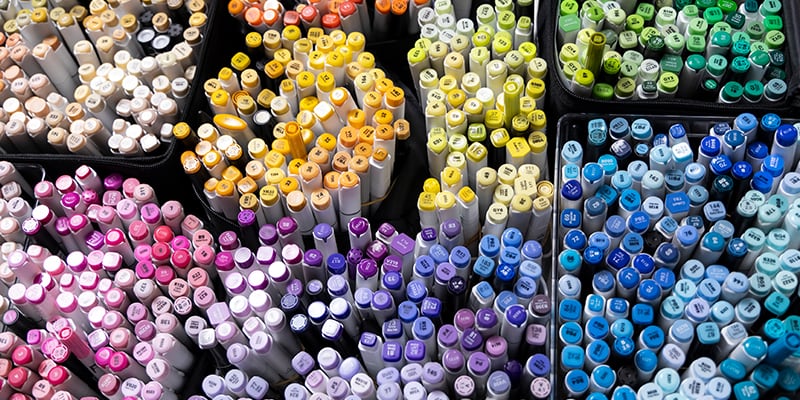
You can also find more in my detailed blog ‘The Ultimate Marker Comparison’, where I tested and compared 2,872 markers across 90+ brands on 15 different testing criteria, including blending, streakiness, colour accuracy, and more.
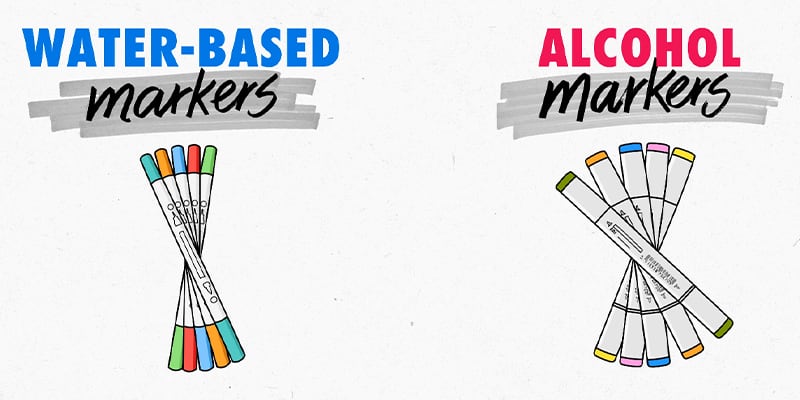
The Differences between Alcohol and Water-based Markers
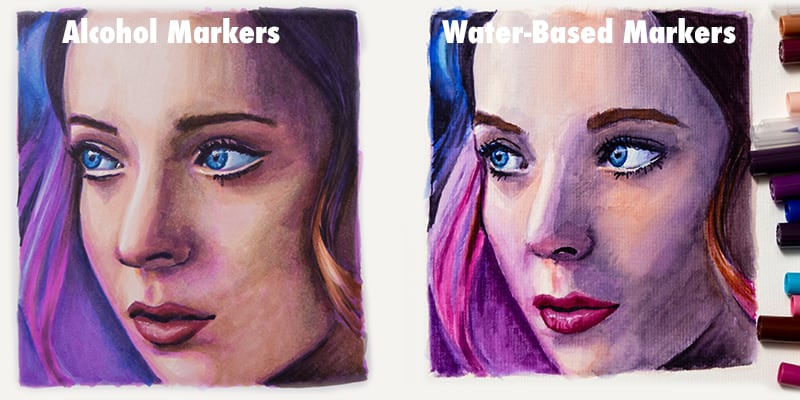
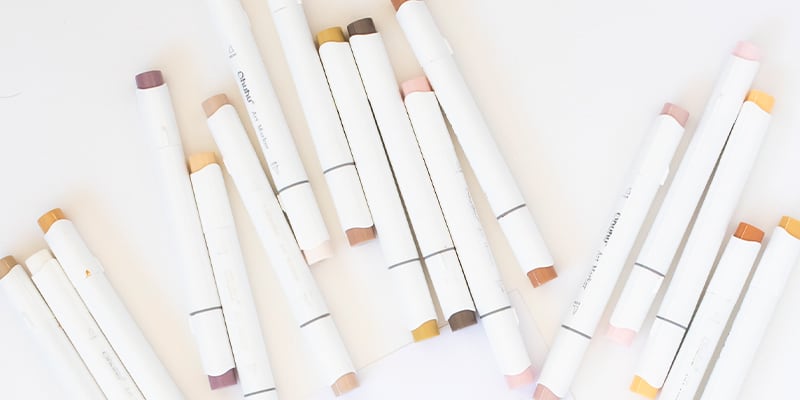
Alcohol and water-based markers can both produce stunning results – but not in the same way, and not always straight away. Alcohol markers are known for their rich, saturated colour and smooth, consistent blending. They can make art almost look digitally coloured with no streaks, especially when used on the right paper.
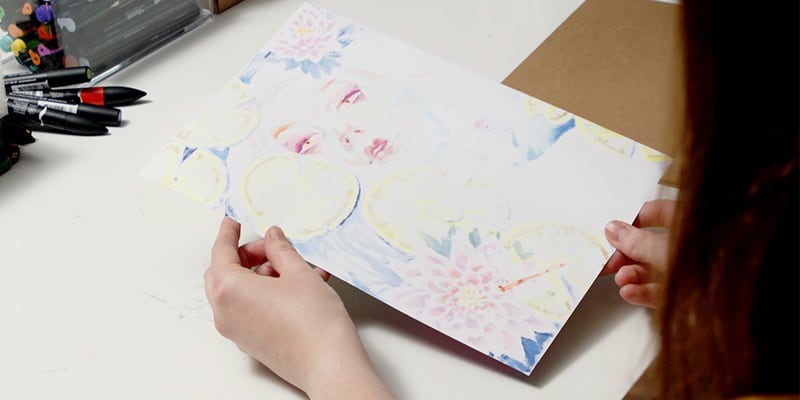
Water-based markers, on the other hand, can be trickier. They’re more likely to streak, tear the paper, or leave patchy coverage, particularly over larger areas. But with the right technique (and a bit of water!) they can behave more like watercolours, building soft transitions and delicate layers that alcohol markers can’t easily replicate.
So what’s the difference between alcohol and water-based markers?
The key difference comes down to the solvent each one uses.
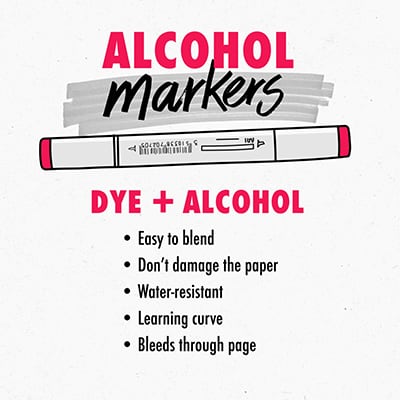
Alcohol markers rely on dye suspended in alcohol, which helps the ink dry quickly and spread evenly across the page. The result is smooth colours, especially on marker-friendly paper, and an easier time blending between colours without streaks.
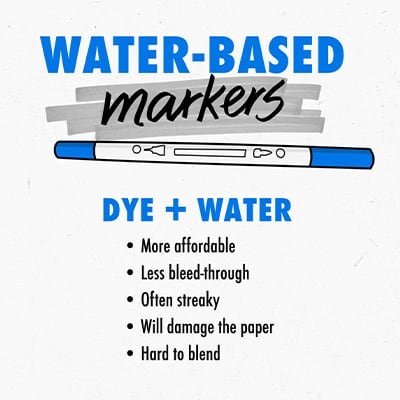
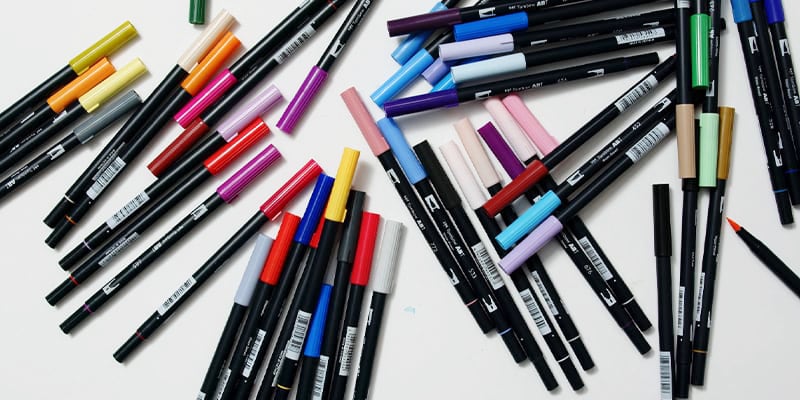
Water-based markers use water instead of alcohol, which changes how the ink interacts with the surface. The ink takes longer to absorb and can sit on top of the page, especially on paper that isn’t designed for it. On lower-quality or overly smooth paper, this often leads to streaks or tearing after just a few layers. But with paper that can handle water (like watercolour or mixed media paper), the ink soaks in more evenly, giving you more control over your layering and blending.
Another difference between alcohol and water-based markers is their toxicity. Alcohol markers sometimes come with a strong smell, so people often ask if they are safe to use or toxic, especially for kids.

Alcohol markers use isopropyl or ethanol-based solvents, which evaporate quickly and can give off fumes, especially in enclosed spaces. This can lead to some people experiencing headaches or irritation with extended exposure. Typical use isn’t considered harmful for most people, but it can be a good idea to use them in a well-ventilated area if you’re using them often. Most brands of alcohol markers are labelled non-toxic under standard safety testing, but they’re still not recommended for young children who might misuse (or taste!) them.
Water-based markers, on the other hand, have little to no odour and are generally safer for kids or anyone sensitive to smells. Without alcohol-based solvents, they’re often the better choice for sensitive noses, or curious little artists.
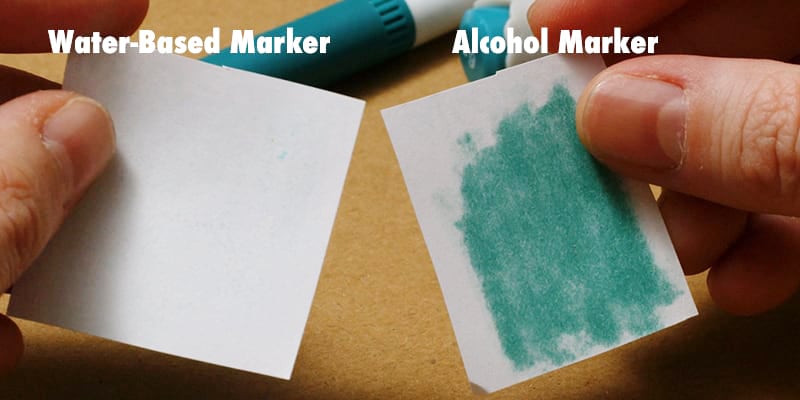
Marker “Bleeding”
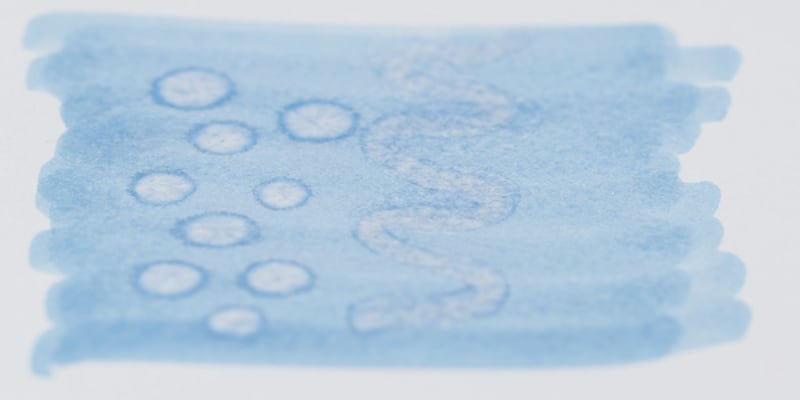
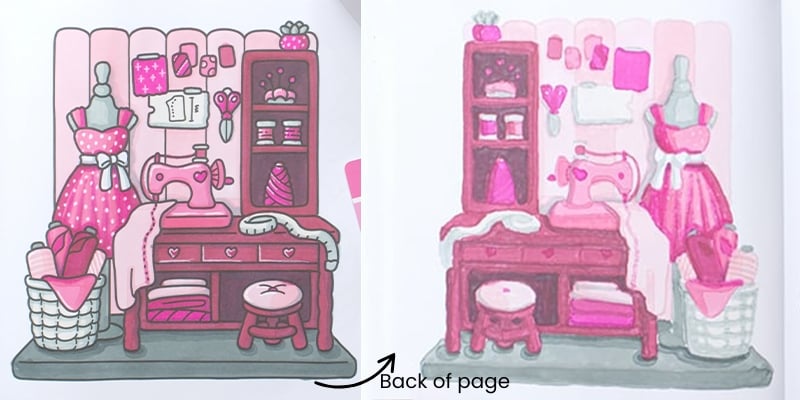
Bleeding refers to when the ink soaks through the paper and becomes visible on the other side. Some types of markers bleed more than others, and the amount of bleed you get can depend heavily on the paper you’re using.
Instagram: @katartillustrations
Alcohol markers are almost guaranteed to bleed through paper, even thick paper or paper designed for markers. The ink soaks through quickly and completely, which is great for layering but not so great if you’re working in a sketchbook or colouring in a double-sided colouring page. A spare piece of paper underneath can help protect your workspace or the next pages, but it won’t save the back of the page you’re colouring.
Water-based markers usually don’t bleed through in the same way. Depending on how much moisture the marker has, you can usually add a few layers of colour before they go through to the back of quality paper. Thinner paper will still struggle, and often won’t handle the moisture from the water. This varies a lot between paper types and between marker brands, so it’s worth testing a small area before colouring.
I’ve compared the moisture and layering of different water-based markers in my ultimate marker comparison, so you can see how they perform against each other.
How to Use Markers
Using alcohol markers and water-based markers involves more than just the ink – the entire process changes depending on the type you’re using.
How to Colour with Alcohol Markers
With alcohol markers, you can blend two colours together while the ink is still wet, but you can also build up multiple layers, or reactivate the lower layers of colour by adding more moisture.
You’ll get the best results by working in small sections at a time, especially for gradients or smooth transitions between colours.
Most artists start with a base layer of the lightest colour, then add mid-tones and shadows before going back in with the light colour again to smooth everything out.
Instagram: @katartillustrations
The paper matters too – blending paper gives you more time before the ink sets, while coated or marker-specific paper keeps the ink on the surface just long enough to blend cleanly without bleeding out.
You can also use alcohol markers on other types of paper, like printer paper or the thin paper in Amazon colouring books, and it will create solid blocks of colour really well, but will be much harder to blend multiple colours together smoothly.
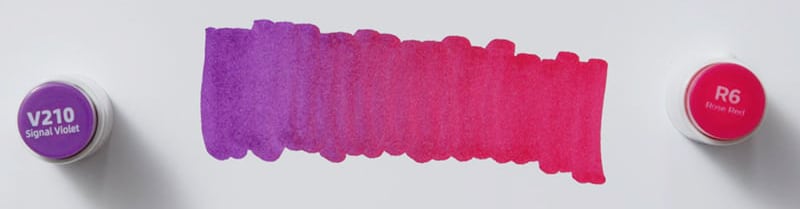
How to Blend Alcohol Markers
Blending alcohol markers is all about learning how the ink behaves. Alcohol ink dries quickly – but while it’s wet, it naturally softens and merges with nearby colours.
The easiest way to blend alcohol markers is to work from light to dark, layering colours while the surface is still damp. Start by applying your lightest colour across the area, then quickly add your mid-tones and darkest shades before the ink fully dries.
You can also use your lighter marker again to gently go back over the edges between two colours. This re-wets the ink and helps create a smoother transition. Some artists like to apply a little bit of extra ink with a circular motion to soften harsh lines.
Despite its name, you don’t need a colourless blender to blend your markers.
It’s filled with a clear alcohol solution and acts more like a clear marker, allowing you to blend any colour out on your page or lighten a colour.
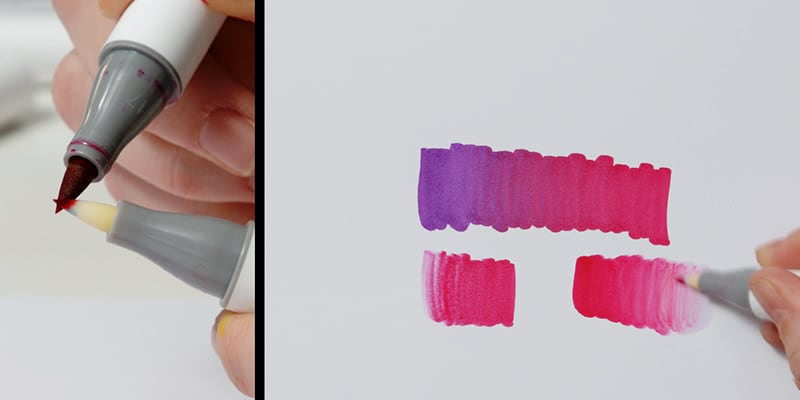
It can be useful as an “eraser” to lighten mistakes, or to create highlights and textures
The key to blending alcohol markers is to work while the ink is still wet, move steadily, and let the alcohol do its thing. Often a blend won’t happen while you’re drawing, but actually a few seconds later. It doesn’t need you to force it or scrub the colours – it just needs a moment to sit and let the ink naturally flow and mix while it dries.
How to Colour with Water-based Markers
With water-based markers, the process is slower and often more delicate. Dry blending (layering without water) can quickly damage the paper if you’re not careful, especially if you’re using basic printer paper or cheaper colouring books.
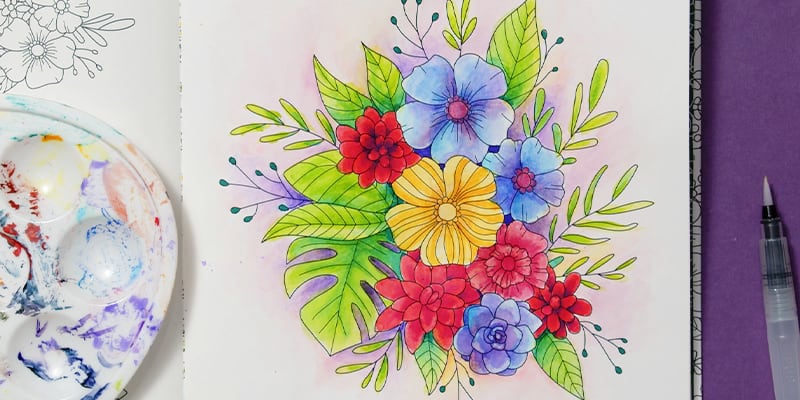
That’s why water-based markers really shine when you lean into their ability to activate with water. With the right paper (like watercolour paper or mixed media paper), you can soften edges, create subtle transitions, and even blend between colours using a damp brush or water brush pen. When used with water, they act a lot like watercolours, and can create many of the same effects.
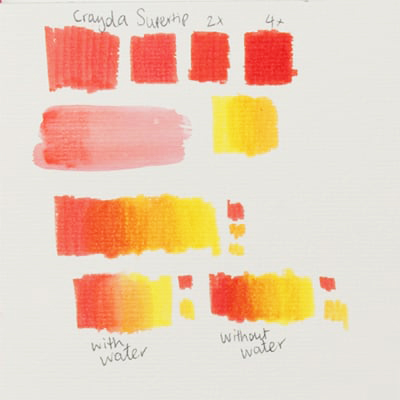
In my testing, I found that even the cheapest water-based markers worked really well when treated as watercolours, with the right paper. Crayola Supertips were a surprisingly good option!
How to Blend Water-based Markers
Blending water-based markers is all about working with water – not just the marker itself. Unlike alcohol markers, water-based inks don’t naturally blend into each other on dry paper. Instead, you can get smoother blends by introducing water into your process.
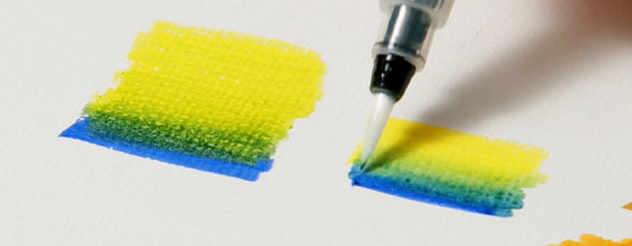
The simplest method is to layer colours while the ink is still slightly wet, similar to alcohol markers. But to get more natural transitions, it helps to either pre-wet the paper before applying colour or to go over your colours afterward with a damp brush or a water brush pen. This softens the edges and allows the colours to bleed into each other more gradually.
Another method is to apply the marker onto a smooth, non-porous surface first, then pick up the colour with a wet brush. This gives you much finer control over how strong or diluted the colour appears on the paper, similar to working with traditional watercolour paints or inks.
You can also blend two colours directly on the paper by overlapping them slightly, then brushing over the join with a little water to pull them together. Timing matters – blending works best when the ink is fresh, before it has fully dried into the paper.
With practice, you can create beautiful gradients, subtle colour transitions, and layered effects that are unique to water-based markers.
Learning to Use Markers
The learning curve for alcohol markers and water-based markers feels very different – and which one feels easier will depend a lot on your style and past experience with other media.
Alcohol markers are usually easier to start with if you’re wanting to create even colouring and don’t want any fancy blending. They’re more forgiving when layering colours, and they dry fast enough to keep the process moving without much planning.
Compared to the less-predictable water-based markers, alcohol markers can quickly make you feel like a pro! They won’t tear the paper, even with lots of layers, and they create beautifully smooth sections of colour on any paper.
The learning curve increases when you want to start blending a few colours together or adding textures. This is where the right paper will make a huge difference, along with plenty of practice!
And because many of us start with water-based markers, it’s easy to assume they are the lesser of the two types.
But if you lean into using water and learn to layer patiently, water-based markers can become incredibly versatile and fun to use. They also teach you a lot about timing, pressure, and colour control – skills that will carry over into your other artwork too.
In the end, both types of markers reward practice, but they challenge you in different ways.


Which Markers Should You Choose?
Choosing between alcohol markers and water-based markers comes down to how you like to create and what you’re creating.
Alcohol markers are the better choice if you’re looking for smooth blends, rich saturation, and fast layering. They’re ideal for polished illustrations, vibrant character designs, fast colouring, and artworks where you want minimal streaks.
If you’re aiming for a polished, high-saturation finish and you’re working on single sided paper, alcohol markers are often the faster and easier option. If you don’t care about the artwork on the other side, bleed-through doesn’t really matter – just place a blank sheet of paper behind your work to stop the ink from bleeding onto the next page or your desk.
Water-based markers are also a strong option, depending on the effect you want. They can create vibrant, bold colour or smooth blends when combined with water, offering a versatility that alcohol markers can’t easily replicate. Water-based markers are a strong choice for illustrations, sketching, mixed-media, and professional work that leans into layered, watercolour-like effects. With the right paper and technique, they can create polished results that rival alcohol markers in a way I didn’t think was possible. When used on the right paper and with good technique, they can deliver impressive results that go far beyond basic colouring. They just take a bit of practice.

Many artists end up using both types of markers, depending on the project they are working on. Alcohol markers offer excellent blending, vibrancy, and fast layering, making them ideal for covering large areas with colour, creating polished illustrations, and designing characters. While water-based markers bring their own strengths to the table. Their ability to react with water, create soft blends, and layer flexibly makes them valuable for adding texture, detail, and watercolour effects.
If you’re doing mixed media, you might also choose a marker based on the other media you’re using. For example, if your piece includes another wet medium, you might avoid water-based markers so they don’t bleed and run when they touch the water. Or you might embrace them for the same reason!
By combining both alcohol and water-based markers, you can take advantage of the best of each.
Which Marker is the Best for Colouring Books and Casual Art?
For colouring books or casual art, which marker is best often depends on the paper. If you’re working on single-sided pages where the back is blank, or the artwork on the other side doesn’t matter, you’ll probably love alcohol markers. But if your colouring book has double-sided pages, water-based markers are a much better choice to avoid bleeding through and ruining the page on the back.
You can also try applying gesso to the page first to stop bleed-through, however this will also change how the markers perform. For example, alcohol markers will sit wet for much longer and won’t blend as smoothly. It’s worth experimenting on a spare page to see for yourself!
Which Markers are Best for Professional Artwork?
For professional pieces, both alcohol and water-based markers are capable of producing outstanding results. Alcohol markers are often chosen for their smooth blending and vibrant colours, while water-based markers offer flexibility through softer blends and water effects. Each type brings different strengths depending on the style of artwork you want to create.
But it’s also important to know their limitations.
Alcohol markers are never lightfast, meaning the colours they produce will fade over time if exposed to sunlight.(You can read more about this in my full Lightfastness Blog.)
Most water-based markers aren’t lightfast either, but there are some brands available that use pigments instead of dyes or have worked on creating sets of markers that are lightfast, like the Winsor & Newton watercolour markers or the Talens Pantone Pigment markers.
If you’re creating artwork intended for long-term display, the safest option is to scan your finished piece and print it out on archival-quality paper, or use a lightfast protective spray over your finished piece and keep it away from direct sunlight.
How Much Do Good Markers Cost?
When it comes to price, markers can vary dramatically depending on the type, brand, and quality. Understanding the cost differences between alcohol and water-based markers can help you choose the right option for your needs and budget.
Alcohol markers have traditionally been the more expensive choice. Professional brands like Copic, Winsor & Newton, and Olo often come with a higher price tag, but they also offer excellent performance, wide colour ranges, and refillable systems. And some brands like Ohuhu offer a premium experience, and huge colour range on a smaller budget
There are a lot of alcohol markers available at even lower prices, but these often come at the cost of lower quality tips, cheap inks, and disappointing performance. I tested a few of these and found they didn’t live up to the quality of the more expensive brands.
Generally, water-based markers are more affordable. However, the gap between alcohol and water-based markers has closed significantly in recent years. There are now many high-quality water-based markers available that compete strongly in blendability, colour vibrancy, and overall performance, including the Faber-Castell Goldfaber Aqua Dual Markers, Tombow Dual Brush Pens, Karin Realbrush PRO, and Winsor & Newton Promarker Watercolour.
You can spend just as much on water-based markers as alcohol markers, but you don’t have to.
Water-based markers are still consistently cheaper than their alcohol-based counterparts, and even the cheapest sets (Like Crayola Supertips) perform really well when you’re using the right paper.
Ultimately, both alcohol and water-based markers are available at a range of price points, and the best choice will depend on your goals, your style, and how much you want to invest in your materials.
If you’d like a detailed breakdown of how different brands compare, remember to check out my blog ‘The Ultimate Marker Comparison’, where I tested over 2,800 markers across 90+ brands to find the best options for artists at every level.
The Best Alcohol & Water-based Markers
I’ve tested a huge range of markers to find out exactly which ones were worth your time (and money). So if you’re looking for markers that blend well, perform consistently, and won’t leave you frustrated, here are some of my picks.
The Best Alcohol Markers
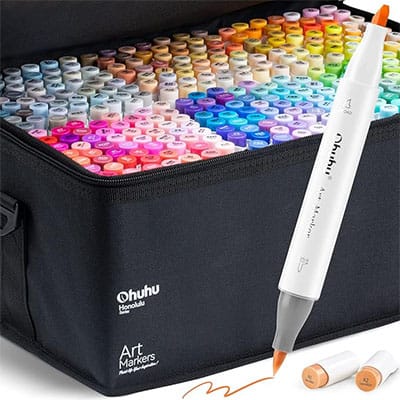
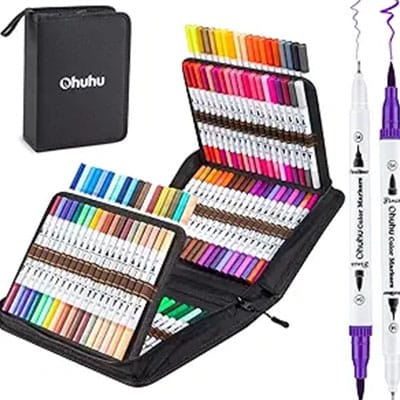
For alcohol markers, the Ohuhu Honolulu Series B is my top recommendation. They offer smooth blending, a huge colour range, and surprisingly high quality for such an affordable price. Their tips are slightly firmer and moister than brands like Copic and Olo, making them a great choice for bold colouring or comic book-style art.
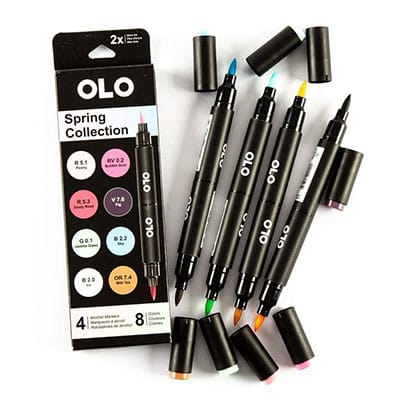
Olo markers also stand out as excellent markers, especially for their innovative half-marker refill system. You can combine two nibs or colours in a single marker, offering a lot of customisation. The downside is that you need to buy two halves if you want both a brush and chisel tip in the same colour.
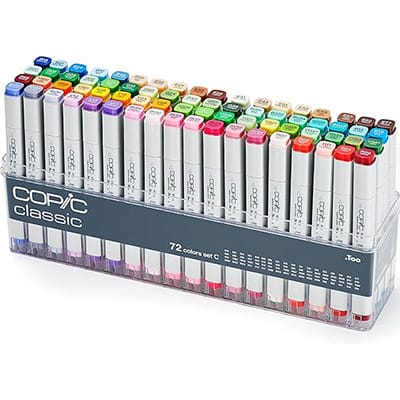
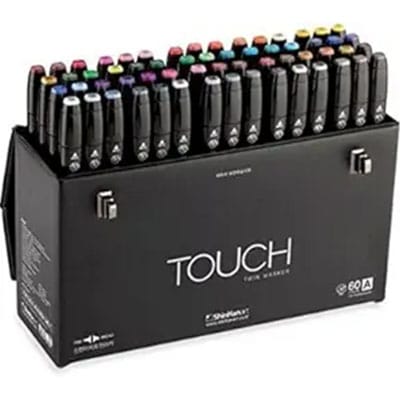
Copic Classic and Shinhan Touch Twin markers are excellent too, both are reliable, high-quality options. Copic markers, in particular, are great for their subtle tones and are often preferred for realistic artwork, making them popular with professional artists.
See the full range of alcohol markers tested here.
The Best Water-based Markers
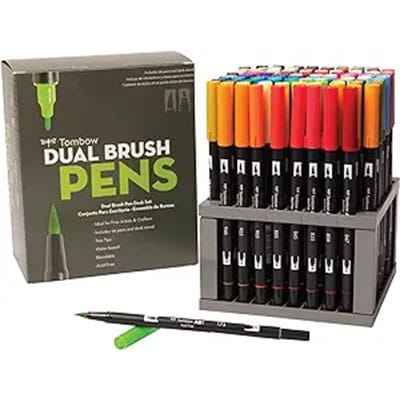
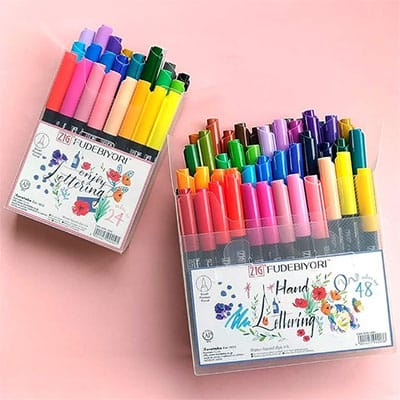
In the water-based marker category, the Tombow Dual Brush Pens were my top pick overall and my top recommendation for colouring books, thanks to their smooth application, minimal bleed-through, and wide colour range. With Zig Fudebiyori markers being my second recommendation. Having great colour performance and high-quality tips.
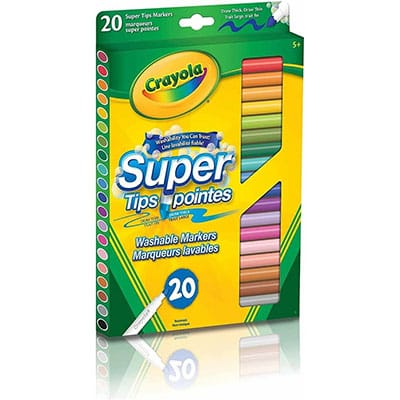
If you’re looking for a budget option, Crayola Supertips are the best value for money, although they don’t have numbers or colour names on the barrels, which can make colour matching tricky. If colour names printed on the barrels are important to you, the Ohuhu Maui markers are a great alternative for value.
Karin Brush Marker Pro and Talens Pantone markers are also both exceptional. They are high quality, with vibrant colours and strong performance in almost every test. The Talens Pantone markers are also among the only lightfast water-based markers available. However, both of these tend to bleed through colouring pages, so they’re not the best choice for double-sided colouring books. If you’re not concerned about bleed-through, they are fantastic picks.
Other notable mentions include the Koi Coloring Pen and Staedtler Double-Ended Fibre-Tip, both of which performed well across various tests and are worth considering.
More Marker Tips (And Beginner Mistakes)
Markers can be incredibly rewarding to use, but they also come with a few common beginner pitfalls. To help you get the most out of them, here are some tips to keep in mind as you get started.
Try Both and Find Your Style
When it comes to markers, there’s no one-size-fits-all answer. The best way to find what works for you is to try both alcohol and water-based markers and see which one fits your style, pace, and preferences. Some artists fall in love with the smooth, fast blends of alcohol markers. Others prefer the flexibility and texture of water-based markers.
Learn the Techniques for Each Marker
Use each type where it shines. Alcohol markers are great for bold, vibrant colours, clean gradients, and quick application. Water-based markers thrive when you introduce water, build layers, or simply want that streaky look.
Choose the Right Paper
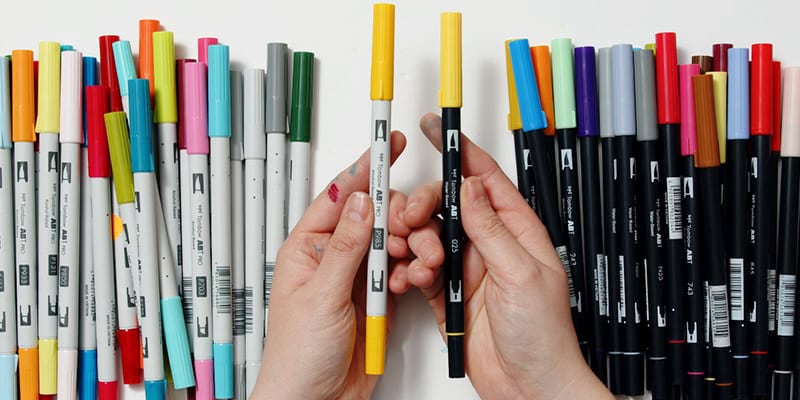
Whichever marker you choose, the paper you use can make or break your results. Alcohol markers work best on smooth, coated marker paper that lets the ink sit just long enough to blend. My favourite marker paper is X-Press It Cardstock, which works great for marker art and can fit in most printers.
Water-based markers need something more absorbent. Watercolour paper or mixed media paper is ideal if you want to add water without damaging the surface.
How to Revive Dried Markers?
Don’t throw out your old markers just yet! For alcohol markers that have dried out, some brands sell refills, so you can usually refill them, but make sure you check that your particular brand of marker offers refills before you commit to purchasing them if thats something that’s important to you. If the ink is still inside but the flow has stopped, try storing the marker horizontally or tip-down for a few hours, which can sometimes help the ink move back toward the nib. You can also gently dip the tip in a small amount of isopropyl alcohol for a few seconds to rehydrate it – just enough to loosen dried ink and get things moving again. These tricks won’t work every time, but they’re often worth trying before replacing the marker completely.
Water-based markers don’t usually offer refillable options, but they can sometimes be revived by dipping the tip in water for a few seconds or storing them tip-down to rehydrate the nib. It won’t work every time, but it’s worth a shot before you replace them.
Final Tip: Don’t Limit Yourself
At the end of the day, it’s important to not box yourself in. Try new combinations, explore different surfaces, layer pencil over marker or blend marker with watercolour. Markers are more versatile than they look, and the more you experiment, the more confident you’ll become.


Both alcohol and water-based markers have their strengths, and neither one is strictly better than the other. Alcohol markers bring smooth blends and vibrant colour, while water-based markers offer flexibility and the option to mix with water or layer in creative ways.
No matter what kind of art you want to create, there’s a place for both types of markers in your toolkit. That said, if you already know you only want to use one type of marker, that’s totally fine too – the key is understanding what each type can do, so you can make the most of whichever one you choose.
If you’re still unsure which is best for you, the best thing to do is try them for yourself. Experiment, make a mess, and have fun – you’ll learn more and more with every page.
Which kind of marker is your favourite? Do you prefer one over the other? Or do you change supplies for each project? Let me know in the comments, I love reading your opinions!
Read Next:
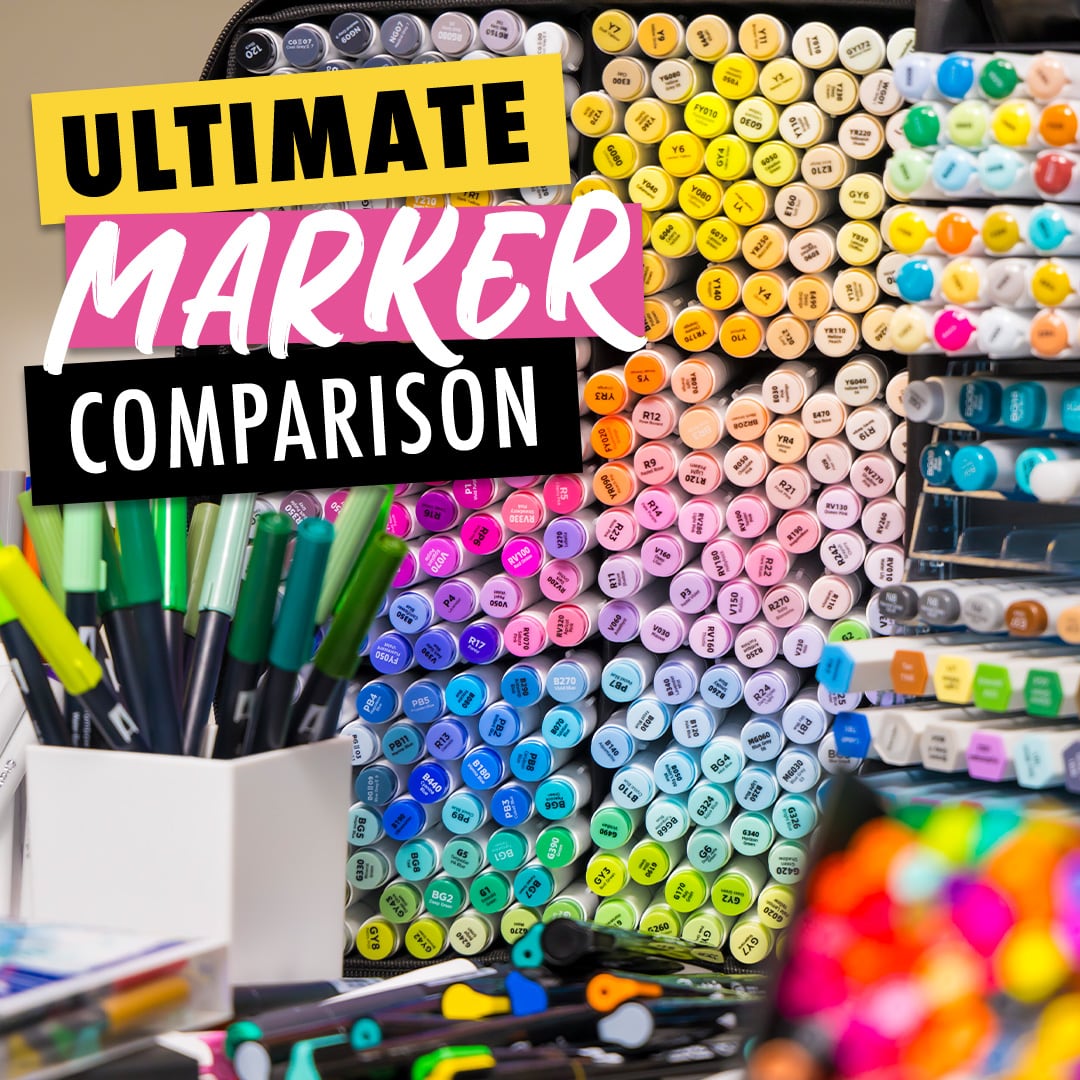
The Ultimate Marker Comparison
I Tested Every Marker I Could Find … and the Results Are IN!
I tested a whopping 2,872 markers from 90+ brands against 15 different criteria, from blending and layering abilities, to streakiness and even smell.
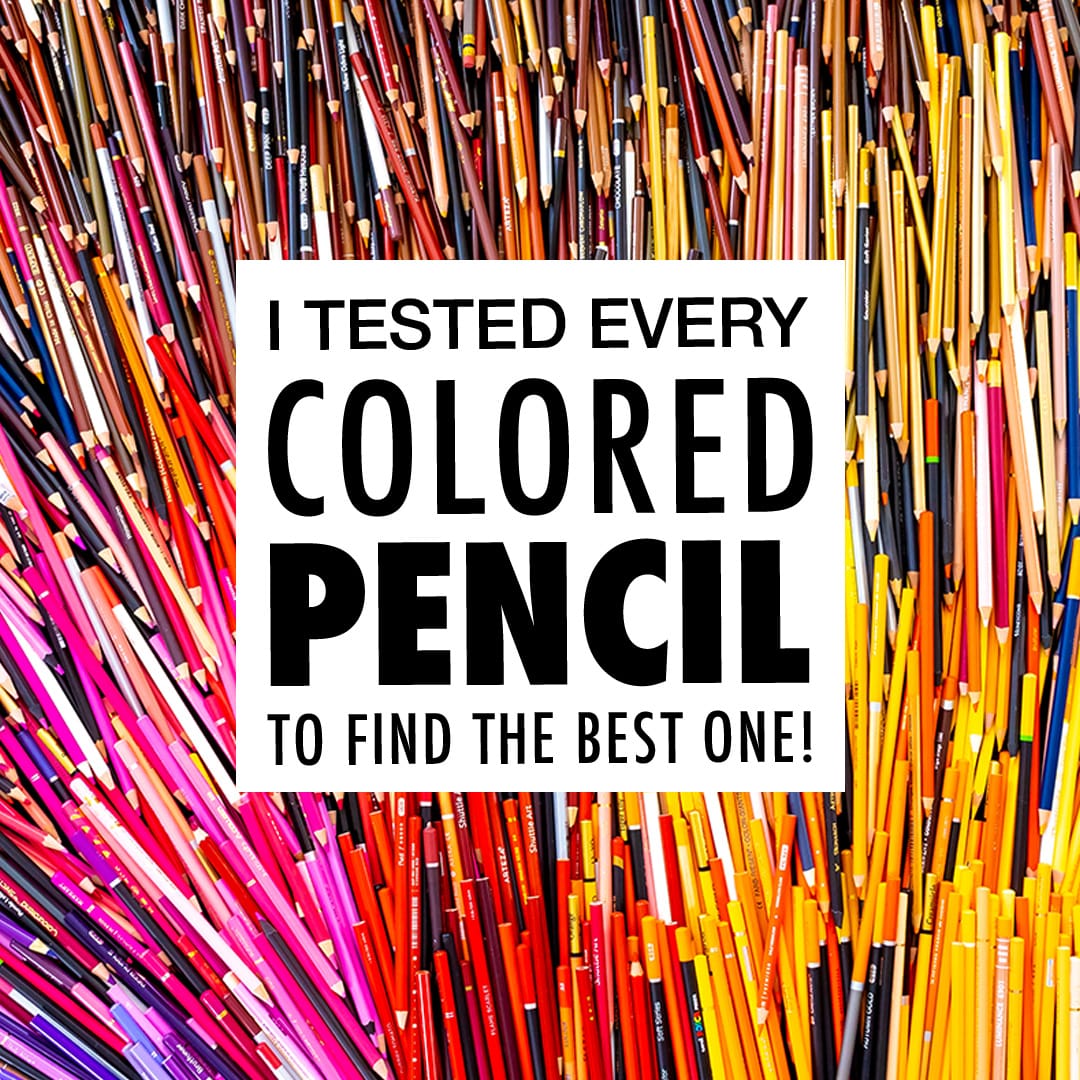
I Tested Every Colored Pencil to Find the BEST ONE…
Of course, taking 90+ pencils through 11+ different tests (along with extra research on other factors) adds up to a LOT of information for one blog post. So I’ve broken this article up into a (hopefully) easy-to-navigate mini website for you, where you can go on your own mini journey to find the best colored pencils for any situation.
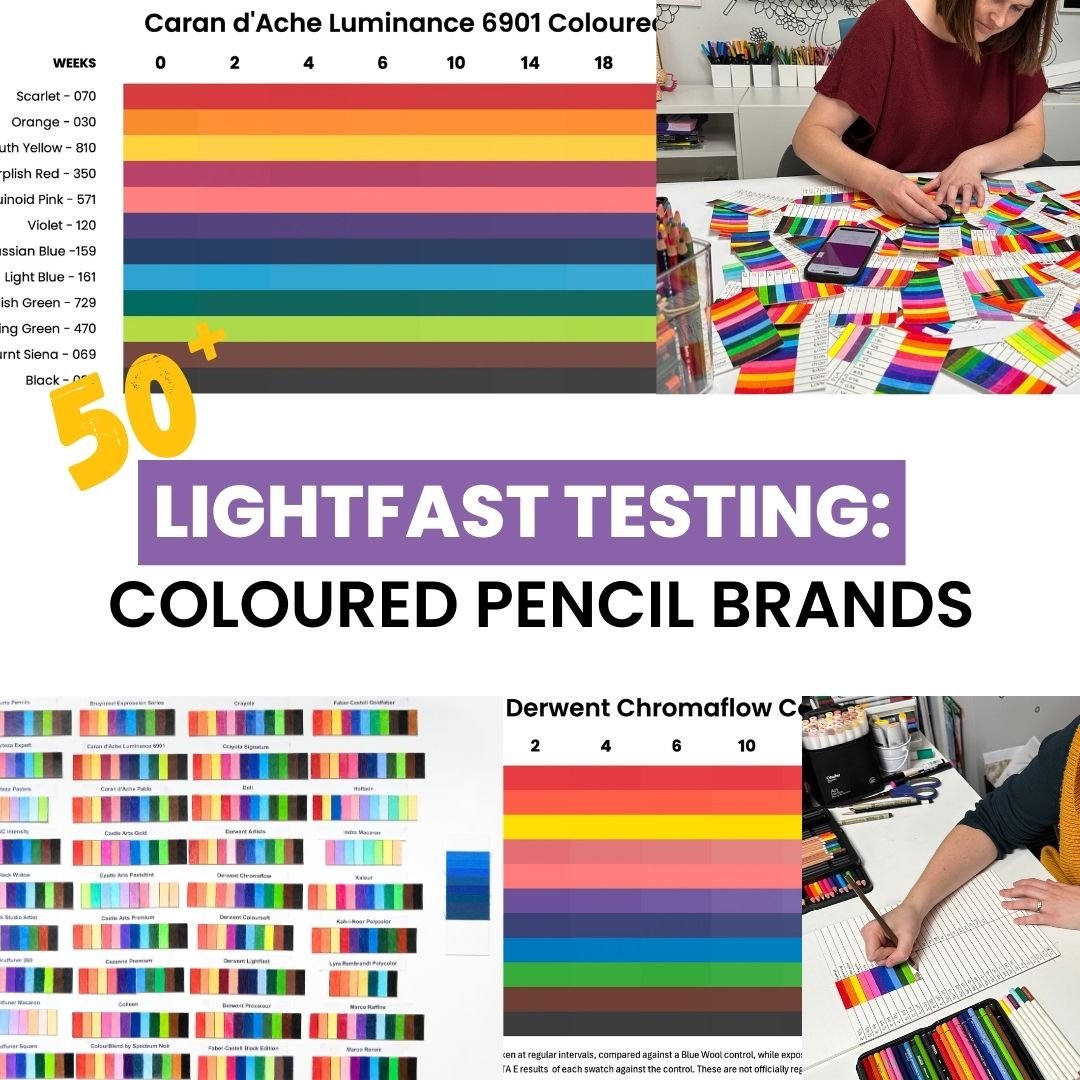
Lightfast Testing: 50+ Coloured Pencil Brands
Over the past 6 months, I’ve exposed swatches of coloured pencils and markers to sunlight and tracked their changes. I also compared my results to industry-standard lightfastness tests to see how different brands truly perform.
outstanding article. Altho I have both Alcohol and WC markers, I did not appreciate the difference. I am looking forward to playing with both to tap into the different performance. Thank you!