
When I first tried alcohol markers, I was instantly hooked!
Unlike the water-based markers I’d grown up with (which tore the paper or were always streaky), the alcohol-based markers turned my colouring pages into something that looked like they were coloured by a pro… with big, bold colours that had no streaks or lines.
And with the recent trend of “bold and easy” or “Cute and cosy” colouring books, it seems like everyone is discovering the beauty of alcohol markers – with Ohuhu constantly running out of stock of their most popular Honolulu alcohol markers and a huge rush of new brands competing with Copic.
Alcohol markers are great for big smooth blocks of colour, but their real superpower is blending.
Blending alcohol markers might not feel intuitive at first… but with a few easy tips and techniques, you’ll be surprised at what your markers can do.
So, let’s jump in!
Alcohol Marker Blending Techniques
There are a few different techniques for blending alcohol markers, and different methods will work better with different brands, colours and projects.
In this blog, I’ll walk you through the 4 most important techniques you should learn:
After this, I’ll share some tips to help you avoid common mistakes beginners make when blending alcohol markers.
1. Light to Dark Blending
This is one of the easiest ways to blend alcohol markers. Choose a light and dark variation of the same colour. I’m using Y18 Lightning Yellow and Y38 Honey from Copic in this tutorial.
1. Start by colouring your blend area with your lightest shade
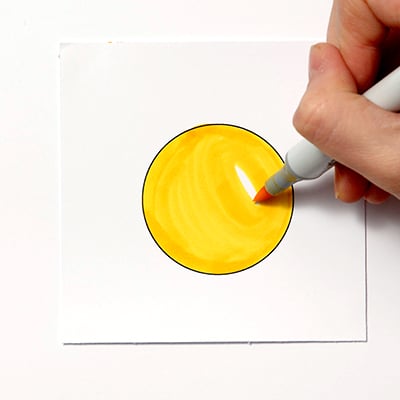
2. While it’s still wet, add your darker colour into the areas you want to darken, like shadows or edges
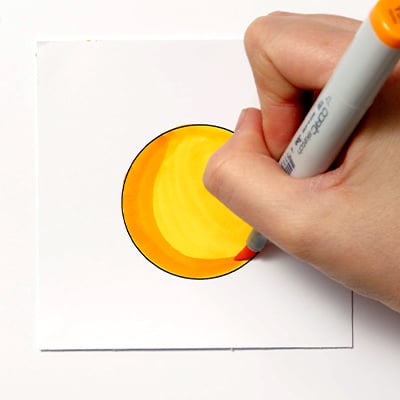
3. Then, go back and blend over the area where the two colours meet with your light marker
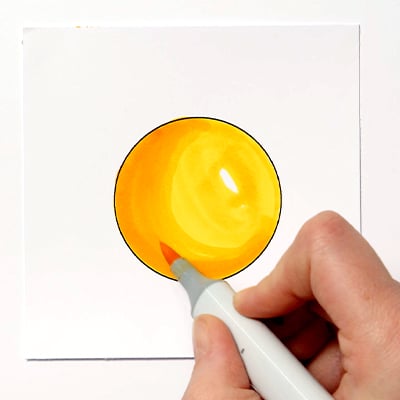
4. You can go back and forth between the two, layering slowly until the blend looks right. You can even bring in a third mid-tone to help smooth the transition. If all goes well, it should look like this
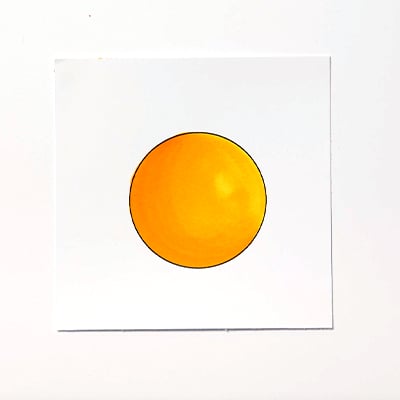
This method works best for shading with darker variations of the same colour, NOT for blending opposite colours. You can repeat the process and add more colours, remembering to go back to your mid or lighter colours to help with blending.
2. Dark to Light Blending
You can also blend your colours from dark to light.
1. Start with your darkest colour, but don’t fill the full area you want dark yet. It’s best to start small and build up, because you can always add more later.
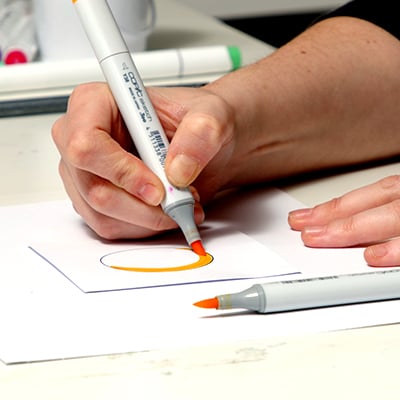
2. While the ink is still wet, use your lighter colour and blend over the edge of your dark colour, pulling it into the lighter space as you go. Start with small circular motions to lift the ink, then use longer strokes to smooth out the transition:
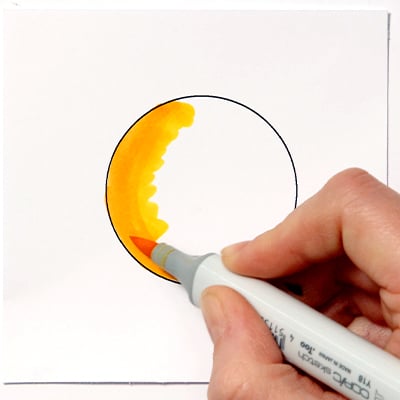
From here, you can continue to work with the lighter colour and add more dark (repeating the steps) if you need.
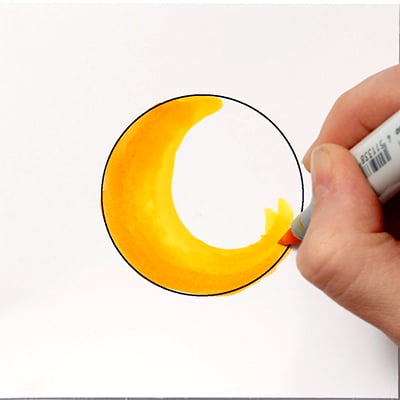
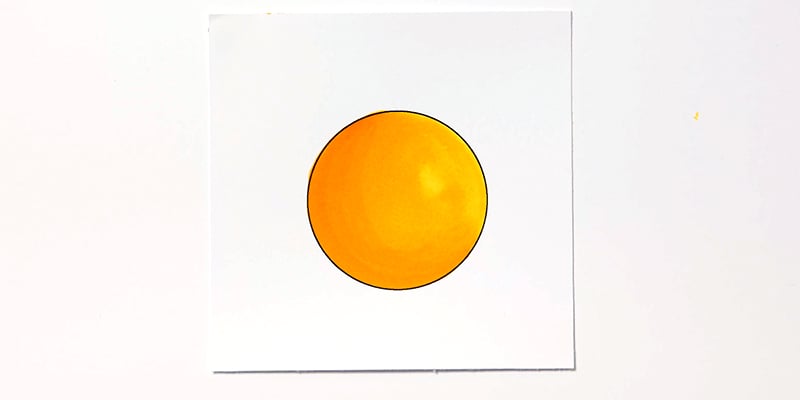
It’s not as easy as blending light to dark, but it uses less ink and is worth learning. Here’s my result:
3. Feather Blending
This was the first blending technique I learned, but I usually find myself reverting back to one of the other methods above, especially with juicy markers like Ohuhu. Here’s how to do it:
1. Start by flicking upward with your first colour, lifting gently to taper each stroke.
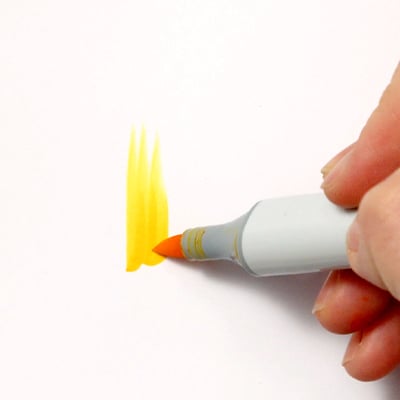
2. Then switch to your second colour and flick downward from the opposite side, letting the strokes lightly overlap in the middle to create the transition where the colours meet.
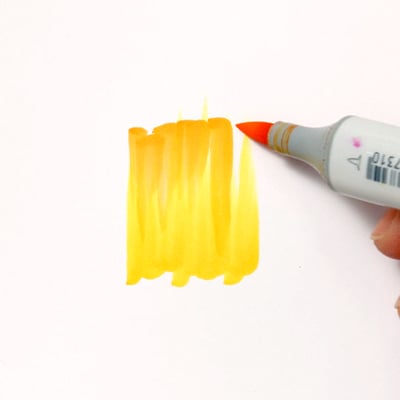
3. Repeat these steps until you get a nice blend. This one definitely takes practice, but it’s a great technique to learn.
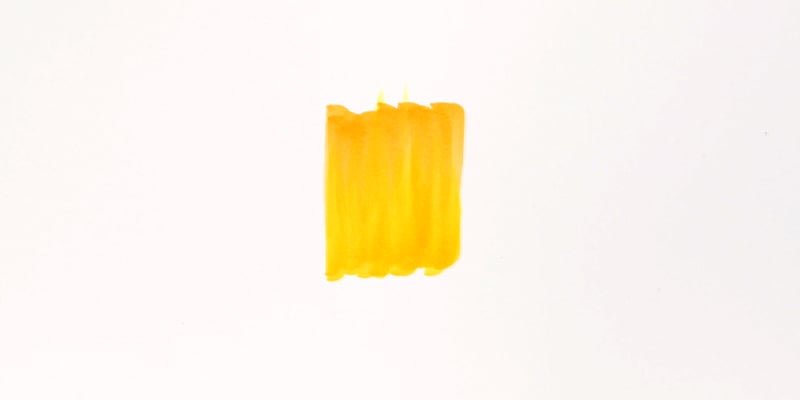
Here’s my result:
4. Tip-to-tip Blending
Did you ever see those Chameleon Markers that everyone was talking about a few years ago? They offered a special “feature” of being able to blend 2 marker colours together by letting the colour soak directly from one tip to another.
But what they didn’t tell you (and maybe why they’re not around anymore) is that you can do this with ANY alcohol markers!
Here’s how to blend tip-to-tip:
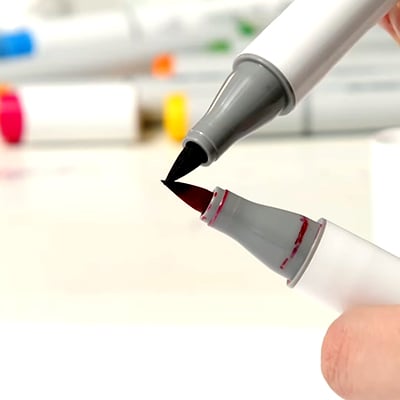
1. Hold the tips of two markers together (like pictured) to transfer some colour from one marker to the other. The marker on top should be the colour you want to start with, and the bottom one should be the colour you want to transition to. Let gravity pull the ink from one marker to the other for a few seconds.
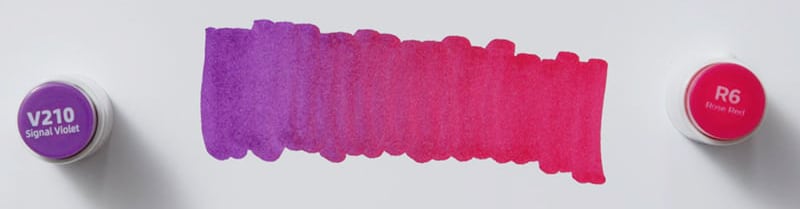
2. Use the bottom marker to colour. The borrowed colour will appear first, then fade to the original colour as you continue drawing.
You can use this same idea with a colourless blender in a few ways:
- Lighten a colour by touching the blender directly to the tip of your coloured marker.
- Reverse it: Add colour to your blender with a marker to create a fade to white.
- Or scribble some colour onto a palette and pick it up with the blender like a paintbrush.
These techniques won’t damage your markers. Even if the tips stain, a few strokes on scrap paper will clean them up. It’s another superpower of alcohol markers!
Finding Your Blending Style
Finding your style depends on your markers, your colours, and what you’re trying to blend. Try each technique, trust your instincts, and don’t be afraid to “waste” your supplies practising or testing out blends.
Once you’ve learned the basics, try experimenting and developing your own style.
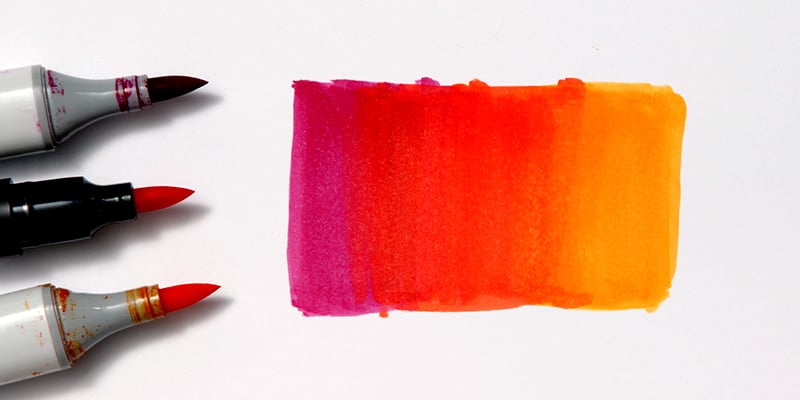
My go-to style is a mix of these different blending techniques.
I place my colours side-by-side and overlap them where I want the blend to happen, sometimes adding more colour or using feathering and circular motions to pull one colour into the other.
Common Mistakes (And How to Avoid Them)
As with every new art style, you’ll probably have a few “happy accidents” on the way to your best work. But don’t stress! You can always cover up your mistakes with coloured pencils or acrylic paint pens.
Still, some mistakes are avoidable, and your skills might not be the issue. If you want to save yourself some frustration, here are 5 common beginner mistakes you don’t need to repeat:
Mistake 1: Not Letting Your Markers “Do Their Thing”.
The common advice online is to work fast to create your blends before the alcohol ink dries. But that’s not the full story.
I made this mistake myself. I’d rush to scrub and force my colours together, trying to race the drying time, which stressed me out, AND led to patchy results.
But here’s the secret, alcohol markers WANT to blend. Slowing down gives your ink a moment to settle, giving you smoother, more natural transitions. As long as the existing colour is still wet, the new colour will naturally blend with it.
Even if your blend dries before you’re happy with it, it will reactivate when you add more alcohol marker, similar to how watercolours work.
Take your time, slow down, and let your markers do the work for you.
Mistake 2: Using the Colourless Blender to Blend
The “Colourless Blender” should really be renamed. Because you don’t need it to blend!
Alcohol markers will blend together on their own, using any of the methods I’ve shown you above. The colourless blender is simply a colourless marker – it will dilute or reactivate your alcohol ink, often lightening the colours and allowing you to blend out to nothing.
Frankly, it should just be called a colourless marker. It would be much less confusing!
Don’t get me wrong, the colourless blender has its uses. It can help fade colours to white, tidy up edges, reactivate dried spaces, and add lighter textures or highlights.
But no, you don’t need one to blend, and blending is often easier without it.
Mistake 3: Choosing the Wrong Colours
It’s much harder to blend colours from opposite sides of the colour wheel, like yellow and purple. It’s like shifting from 1st to 5th gear – you can do it, but it won’t be smooth.
With colours, the same thing happens. But instead of ruining your transmission, it’ll ruin your transition (between colours!).
You can technically blend opposite colours, but you’ll often get muddy blends instead of vibrant gradients.
To help opposite colours blend, try adding transitional colours in between. For blending yellow to purple, you can use orange, red, and warm pink to bridge the gap. And for best results, you may need even more colours in between for such a dramatic change!
Mistake 4: Assuming Paper Doesn’t Matter
You can use alcohol markers on almost anything, including printer paper. But if you want smoother blends, you’re choice in paper matters a lot. The wrong kind of paper will soak up too much ink or leave patchy areas, making it harder to create smooth transitions.
I recommend using marker paper instead. It’s smooth and slightly glossy, which helps your ink stay on the surface longer, giving it time to blend. My favourite marker paper is Xpress-it blending card. It’s better than most marker papers, and it works in most printers.
If you want to see how alcohol markers perform on different types of paper, check out my guide on How to Choose the Best Paper for Coloring Pages.
Mistake 5: Assuming All Markers Are Equal
You can get great results without spending a fortune on markers like Copic. But there’s a big jump in quality between the cheapest options and even mid-range markers.
Ultra-budget markers from sites like Temu can feel exciting, but don’t be surprised if there are a few downsides. Their rougher tips and inconsistent ink flow can cause blotchy patches, uneven transitions, and make it harder for the ink to move or layer smoothly. Even without trying to blend colours together, you may find unwanted textures in your colouring, or extra bleeding and feathering outside the lines.
Personally, I really like Ohuhu and Olo markers for blending. They’re smooth, reliable, and excellent for blending.
If you want to see how they stack up against other brands, see my full comparison blog on the best markers for blending.
More Alcohol Marker Resources
- Want to test your blending skills right away? Grab one of these free colouring pages and get started.
- Or watch me explore the secret power of alcohol markers with award-winning marker artist Katrina Young in this video: Everything You Know About Markers is Wrong.
- Not sure about the difference between alcohol and water-based markers? This beginner’s guide breaks it all down.
- Want to know which markers are the best overall? I tested 2,872 in my video, The BIGGEST Marker Test on YouTube, or you can read The Ultimate Marker Comparison.
- And if Bold and Easy colouring is more your thing, this guide has everything you need to get started, even free colouring pages.
Leave A Comment